DIY: Valentine’s Bunting for Under $1

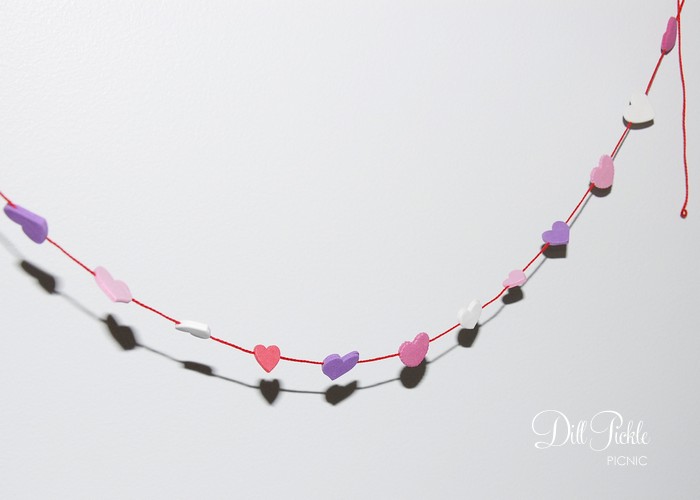
Yesterday I used the larger stickers from my dollar spot container to make heart shaped cupcake toppers.  When I was finished I had a handful of the smaller stickers left over and knew I needed to do something with them!  A quick glance through the craft stash box yielded some red embroidery floss and I realized that a mini heart bunting could be really cute.

DPP: Valentine Bunting for $1

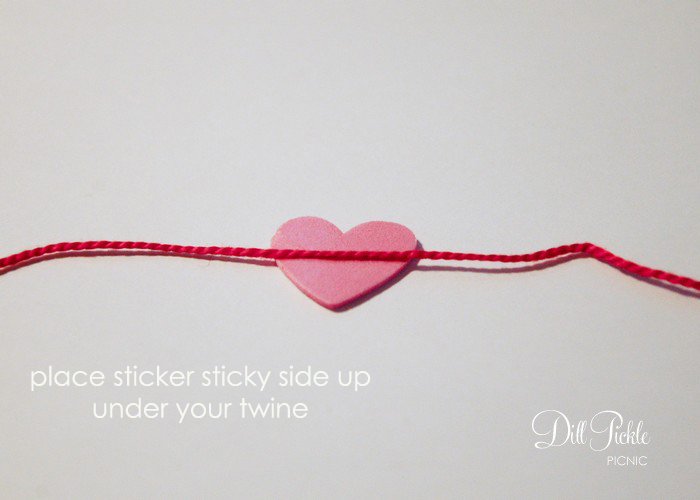
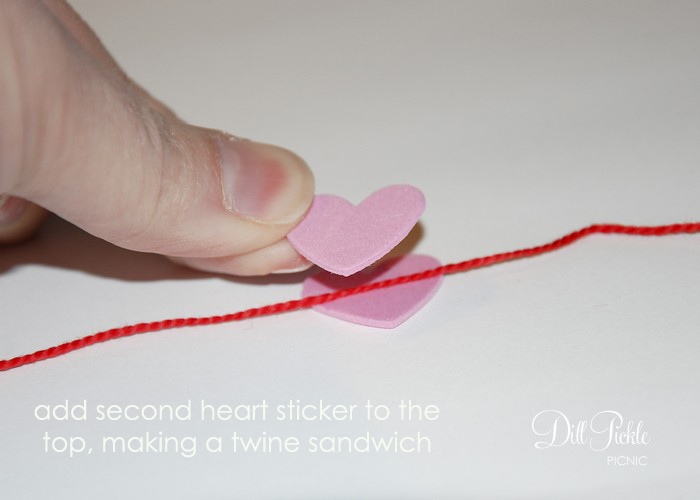
If you’d like to quickly make you own:


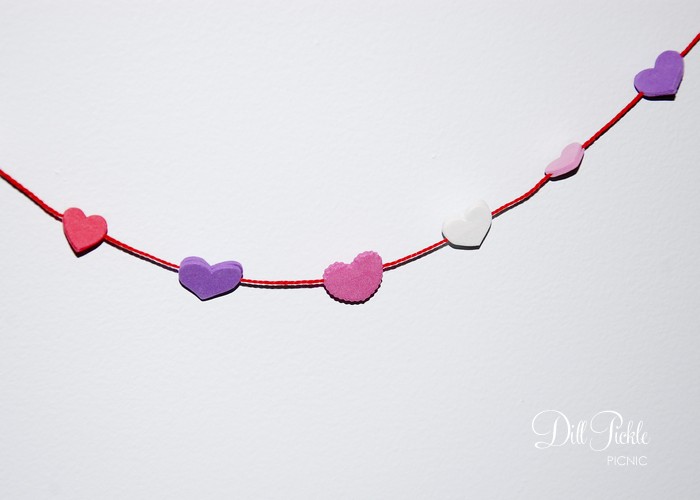
With my leftover stickers I was able to make over 6 feet of the bunting…which combined with the cupcake toppers is quite a bit of Valentine’s goodness for an expenditure of $1.07 (including tax)!   I’ve seen bags of rainbow foam heart stickers at my local dollar store this could be a fun birthday party decoration as well…one which your kiddos could help you assemble!


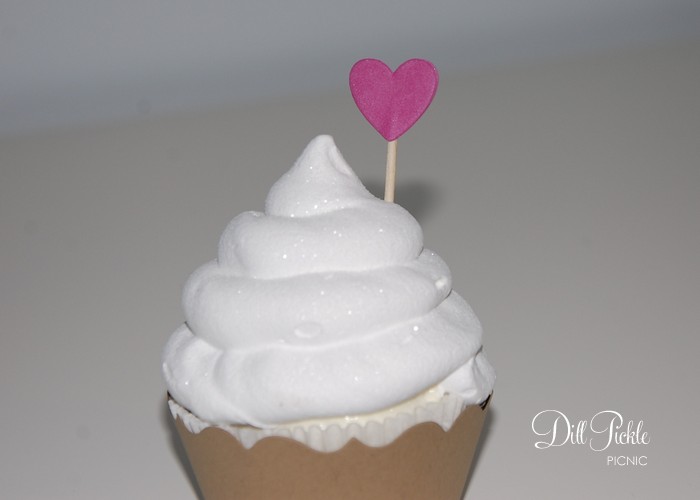
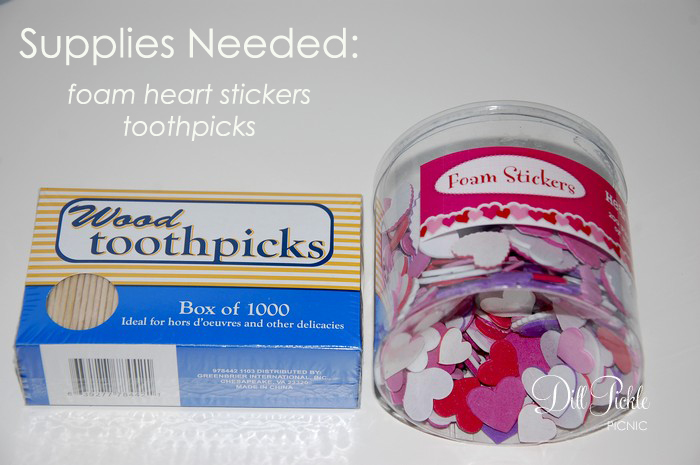
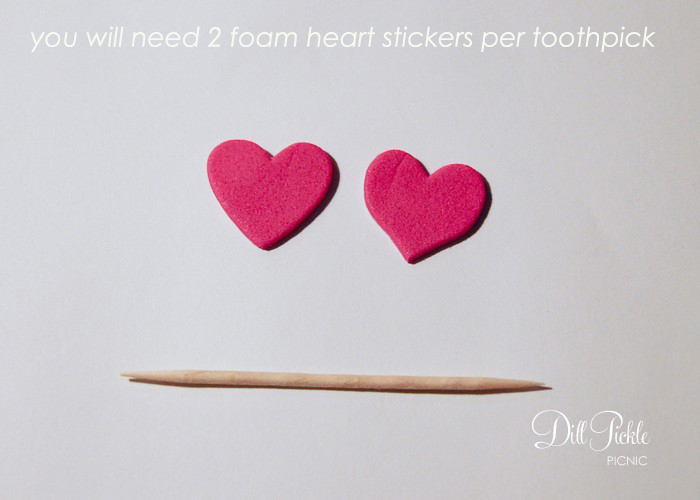
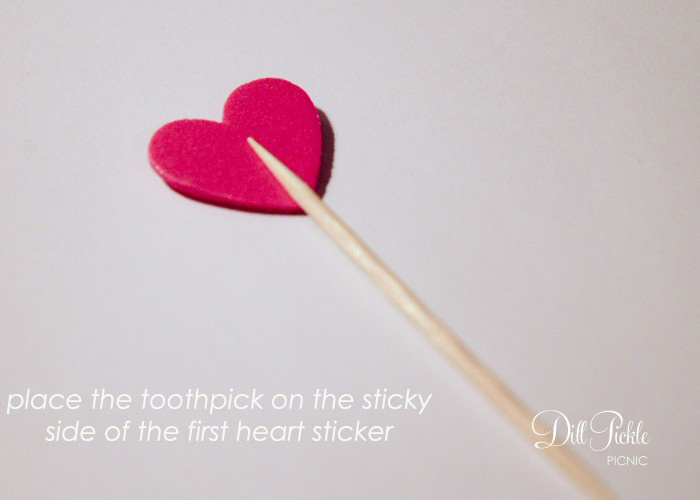
DIY: Valentines Cupcake Toppers for $1

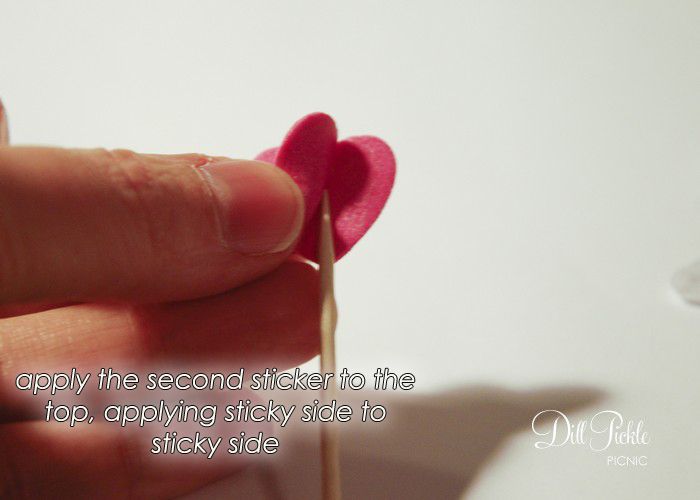
I’ve made these before…but when I ran across these cute heart stickers in the Target Dollar Spot I knew I had to repeat this Easter project.

In case you missed the Easter egg ones, the process is super cheap & easy.


And repeat until you end up with these cute little guys!

I picked up the container of stickers in the Target dollar section but I’ve also seen large bags of these in rainbow colors at my local dollar store in the craft section.  The fun thing about the Target container was that after making cupcake toppers with the larger stickers, I still had a large amount of the smaller ones left over.  This means I have another project lined up tomorrow with the leftovers and rumor has it I’ll give them both away next week 🙂

Anyone else out there throwing together last minute Valentines ideas?  I’d love to see them so share those links!

Semi-DIY: Valentines in a Snap for under $1

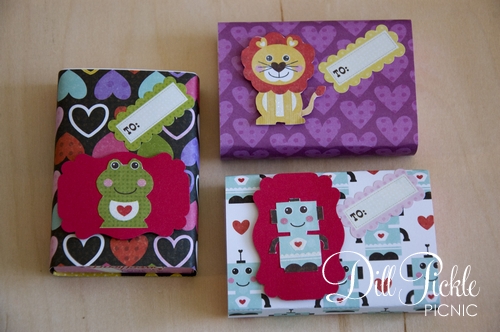
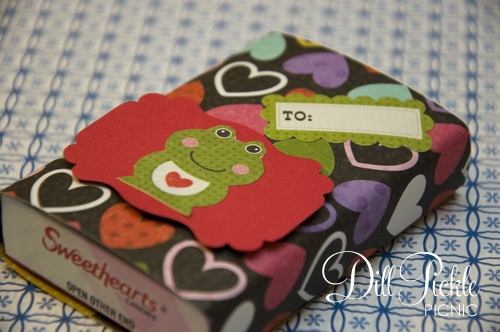
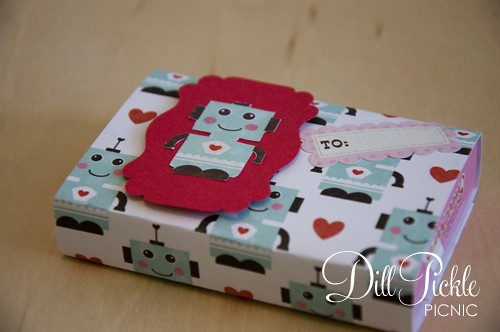
It’s been way too long since I posted a fun crafty treat and I’ve really missed it (and you guys)! Today’s Semi-DIY project is a quick and cheap way to dress up a simple box of candy.  It would be great for adults and the kiddos alike.  See…cute right?
DPP-2011ValSwap18

Supplies Needed:

  • Boxes of Conversation Hearts Candy – I picked mine up at the local Dollar Tree
  • Double Sided Tape
  • Scrapbook paper
  • Stickers or other decorative items

Instructions:

  1. Cut your scrapbook paper to the height and circumference of your candy boxes.  For the boxes I used the dimensions of the paper should be 3.5 inches wide by 7.5 inches long.
  2. Add a piece of double-sided tape to one end of the paper, and attach it to the back of your box.
    DPP-2011ValSwap25
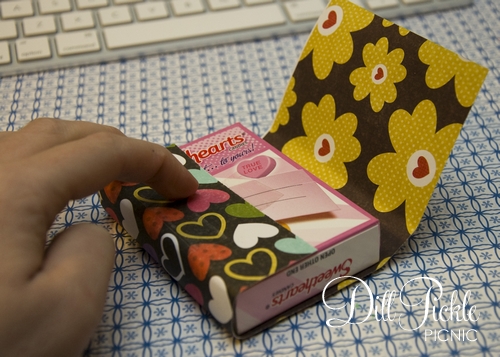
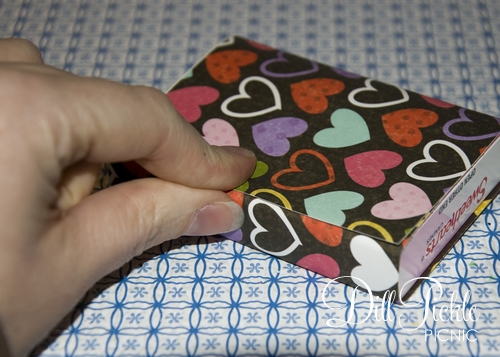
  3. Next, you will wrap the paper around the box and attach to the box with an additional piece of double-sided tape.  Do this underneath the overlaid section of the paper.
    DPP-2011ValSwap28
  4. Decorate with stickers and other assorted goodies.DPP-2011ValSwap30
  5. Give to someone special!

Costs:

One of the great things about this project is that in additon to be simple, it’s also quite thrifty.  If you have a stash of scrapbook paper & stickers like I do then it’s virtually free since you just need to buy the candy.  My boxes of candy were purchased from the Dollar Tree in a package of 4 for $1 and you could also pick up fun Valentines stickers there as well.

$1.07 for 4, so 26 cents each!  Can’t beat that!

DPP-2011ValSwap21

DIY: Flour Sack Boo-tiful Pillow Cover

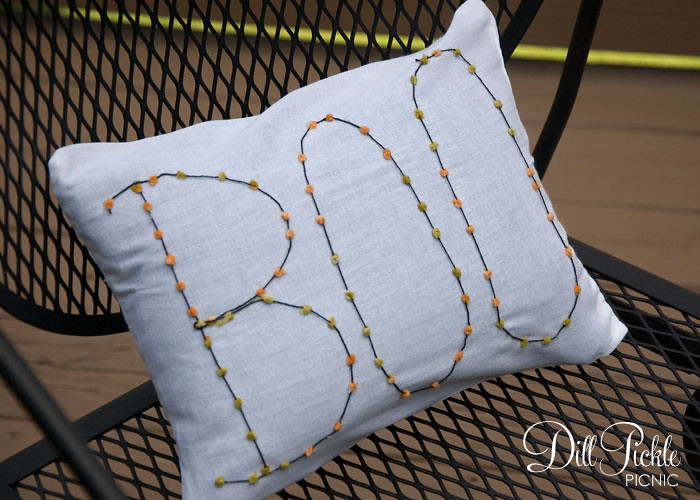
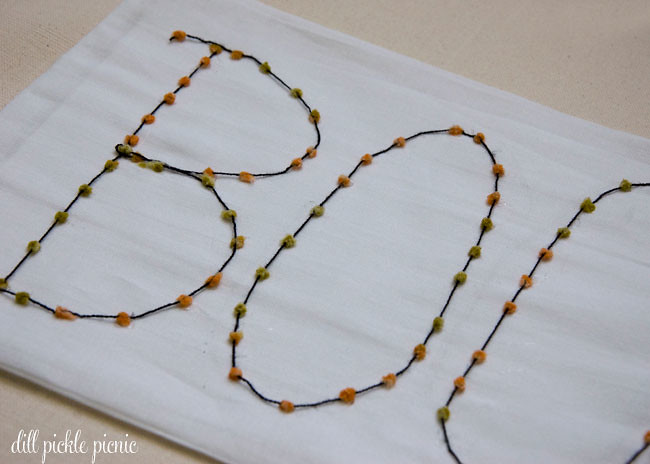
I know Halloween is still a few months away, but I couldn’t resist posting this fun (and cheap) project now.  It was easy & cheap…plus it’s tied to the infamous  “envelope of doom“,  so that makes it even spookier 😉  My Boo’tiful Flour Sack Pillow Cover:

Supplies Needed:

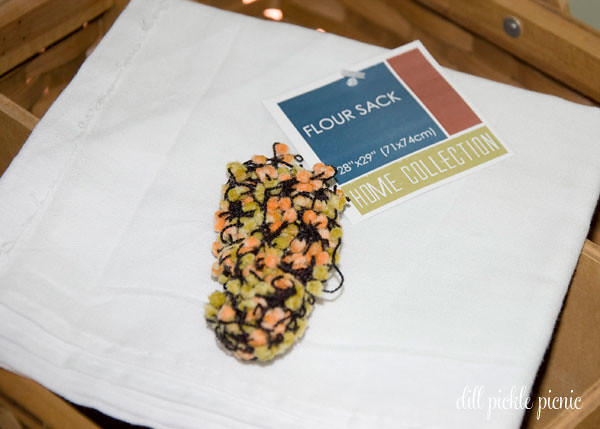
  • Fabric for pillow cover, I used a Flour Sack Cloth from my local Dollar Tree.  You will one piece of fabric that is 14 x 14.5 inches.
  • Small Pillow or stuffing
  • Yarn or Other Trim to make letters
  • Sewing Machine with matching thread
  • iron & ironing board
  • glue (I used hot glue)
  • Ruler

Instructions:

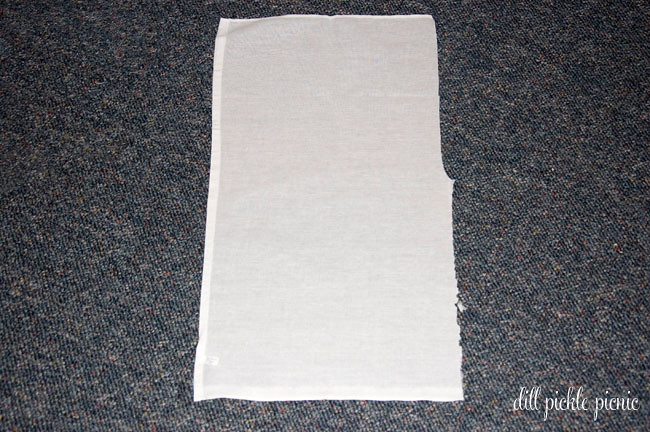
  1. Gather all your materials and press the fabric to remove all creases.
  2. If using the thin flour sack fabric you will need to cut the fabric in half length wise.  If you remember I used the other half of this same piece of flour sack to make this fun fish pin board.
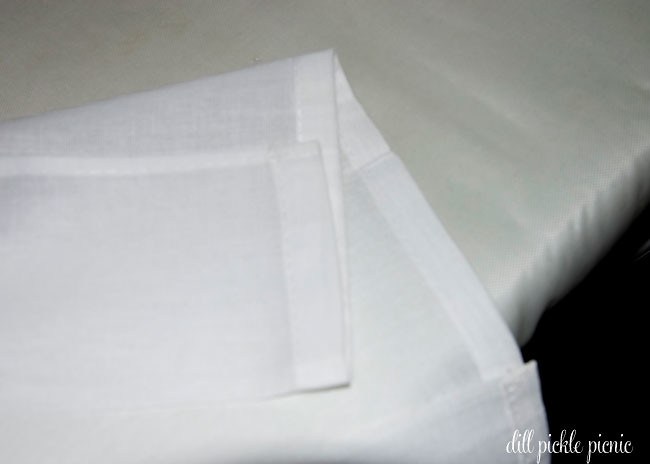
  3. Using your ruler pull the top edge of the fabric to the back 3.25 inches and stitch down along the bottom edge.
  4. With the sewn edge facing down, pull the bottom edge of the fabric up and over to the top 6.5 inches and press.
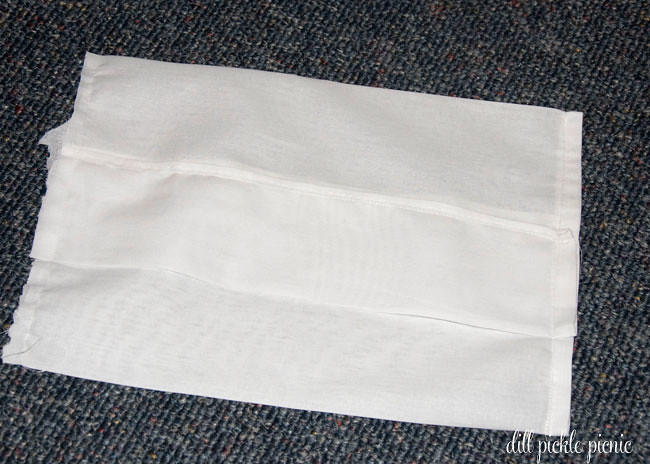
  5. Using your ruler pull the top portion down 7 inches.  It will overlap the pressed portion from step #4
  6. Take the folded fabric package to your sewing machine and sew both the left and right sides closed (leaving a 1/4 inch seam)
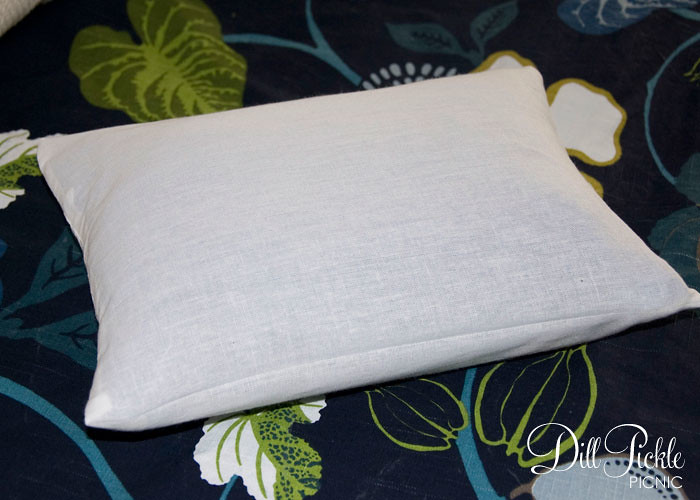
  7. Turn the pillow cover inside out and you are ready to use.
  8. If you don’t have a small pillow already you could either use a pre-purchased accent pillow form, or fill it up with stuffing 🙂

Then to make it boo’tiful:

  1. Place a piece of cardboard inside the pillow cover to keep any stray glue from gluing it closed.
  2. I wasn’t sure of my freehand skills so using a washable pencil I drew a quick outline of my letters.
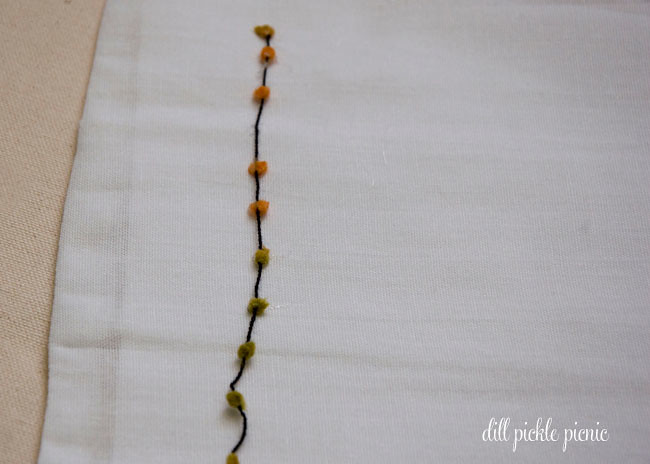
  3. I took my spooky yarn from the “envelope of doom” and glued it around the letter outlines.
  4. To make it a bit more sturdy for future washings I added several stitches around the furry dots to hold everything in place.
  5. Let dry/cool
  6. Remove cardboard, stuff, and enjoy!

Total Cost:  $1.00 and up

DIY: Fishy Thumbtacks

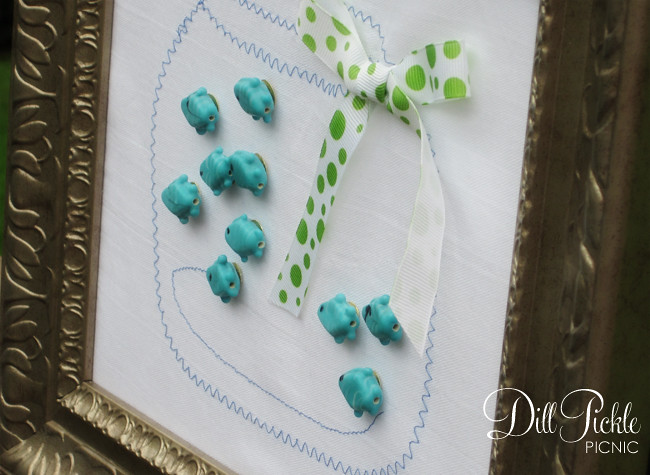
You’ve already seen the fishbowl message board I made as a gift to a friend.  Now, let’s bring on the fish…the fish thumbtacks that is. I mentioned the Envelope of Doom in a previous post, this is second of the 3 (or more) projects I created using several components from the “envelope of doom“. Don’t have an envelope full of supplies…don’t worry. You could create this project using items from your local dollar store & craft store as well! This is one of the quickest projects I’ve taken on in ages.

.

.Supplies & Materials Needed:

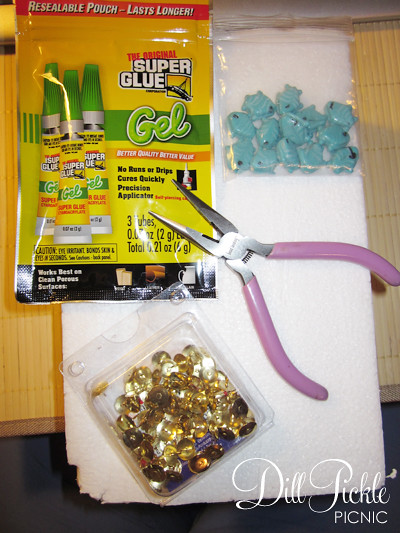
  • Fish beads
    Fresh from the envelope of doom, these happen to be glass
  • Thumbtacks
    The old school, plain kind with flat tops
  • Glue
    Any glue that will attach your bead material to metal will work here.  I used super glue which held “ok”.  One commenter suggested E6000 as a better option.
  • Foam block
    Optional but extremely helpful
  • Pliers
    Also optional for most people, but I’m not allowed to use super glue without the supervision of an adult and these help me not glue myself to things.  One day I’ll tell you about the time I glued both hands to separate tools and needed my then boyfriend to rescue me.  So many things will make more sense after that I’m sure! 😉

.

Instructions:
This is potentially the easiest tutorial I’ve ever written, and I think the photos tell the whole story.


  1. Count out the number of thumbtacks you need, and spread them out onto your Styrofoam block.  By placing the sharp end into the foam it will hold them in place while you glue down the fish.
  2. Squeeze a medium-sized amount of super glue onto the first tack.  I’m using the gel type of super glue from my local dollar store, this is because it is thicker and easier for me to work with.  It also means fewer drips which makes it MUCH safer for me to use.
  3. Place a fish bead onto the drop of glue and press down.  Let dry completely.
  4. I use the pliers to help center the beads really quickly before the glue sets.  It is also helpful when removing them just in case they aren’t completely dry.
  5. Repeat for each tack

I had all the supplies in my stash to make these fun tacks, so my grand total was FREE!  Gotta love that

Total Cost: $1.00 and up

And after they dry, you end up with these cute little guys:

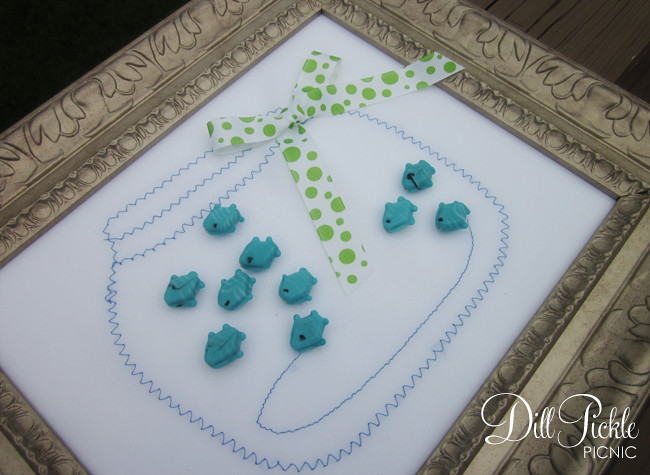
I think they really make the note board look more like wall art… even though now I wish I had painted the frame a fun green to match the ribbon.

I think this process could be fun to make all sorts of cute thumbtacks, so I see more of these in my future.  How about you?  Do you use cute things to attach things to your memo boards and if so where did you find your favorites?

DIY: Sewn Fishbowl Note Board

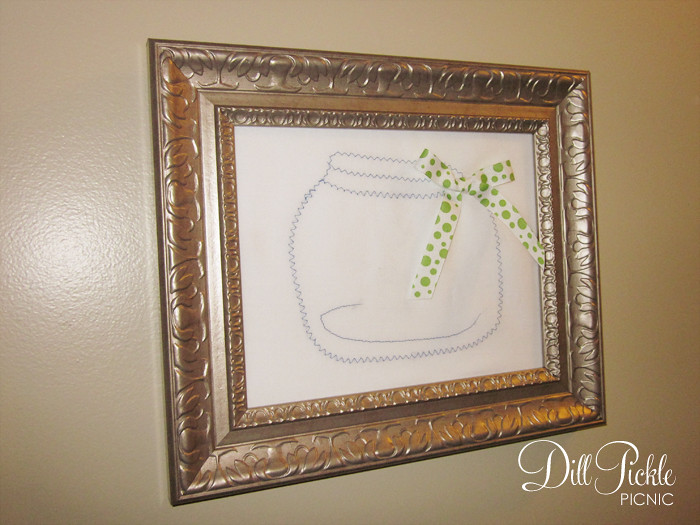
This is a project I have wanted to attempt for quite a while.  I’ve read several tutorials utilizing freezer paper for applique methods wondered if it was as easy as it seems.  All in all I’m happy with how it turned out, but I did have several problems along the way.

Materials Needed:

  • Freezer Paper (not pictured)
    large enough for pattern and an inch margin on all sides
  • Fabric to applique
    I choose to use a Flour Sack from my local dollar store
  • Thread in corresponding color
  • Photo Frame with the glass removed
    I used an 8×10 frame we had in the basement
  • cork or Styrofoam – should be large enough for frame opening
    I used Styrofoam since it is readily available in the trash heap at my office.

Tools Needed:

  • Marker to trace pattern (or print directly on freezer paper)
  • Scissors
  • Iron & Ironing Board
  • Sewing Machine
  • Xacto knife or cutting tool

Instructions:

  1. Cut your material down to the correct size.  Measure the opening to your photo frame and add 1.5 inches to both the horizontal & vertical measurements.  You will use this later when attaching to the frame.
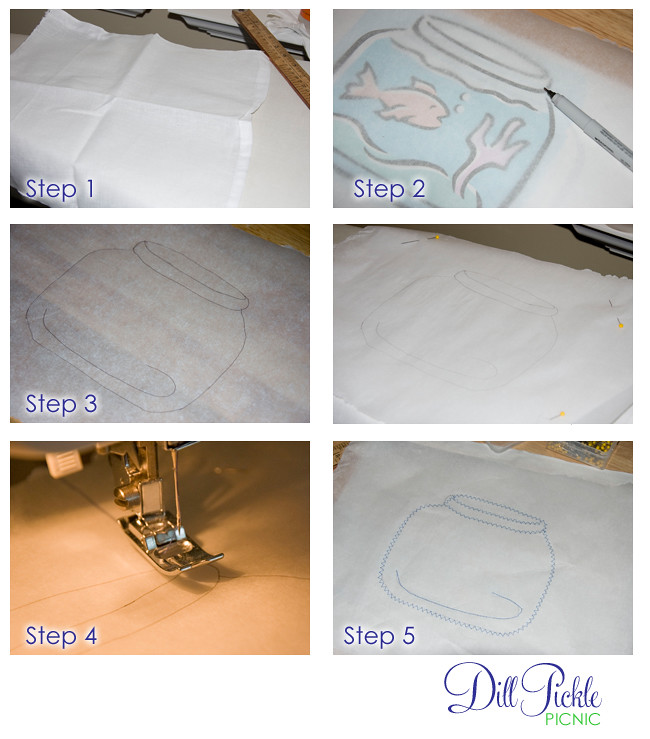
  2. Transfer your pattern to the freezer paper.  This can be accomplished in one of two ways.  I chose to simply print out my template and use a marker to trace it onto the freezer paper.  However, you could also run the freezer paper through an ink jet printer on the paper side.
  3. Remove your pattern and center your pattern in the middle of your piece of fabric, paper side up.  Using the iron with no steam, press your freezer paper to the fabric.  I was a bit unsure how it would hodl so I also pinned the corners for added “holding power”.
  4. Now using your sewing machine, simply sew over your template lines using your favorite stitch setting.  For my message board I chose to use a fun zigzag stitch.   You can see I got off my pattern a bit, but don’t worry…you can fix this later.
  5. Remove the fabric from your machine and carefully tear the freezer paper away.  This is where I had issues…major issues.   I ended up having to use the craft knife to carefully cut the paper away.  I don’t recommend this since it’s also easy to cut your stitching this way.

  1. Now is the perfect time to embellish your fishbowl a bit.  Remember by mistake, I decided to use some leftover wedding project ribbon to add a colorful bow to this fishbowl.  I just tied the bow, trimmed and singed the edges of the ribbon, and then stitched it to the fabric.  Press the fabric when you are finished to create a smooth surface for your message board.
  2. Now it’s time to cut your cork or Styrofoam.  The easiest method I found was to place your material on a cutting mat.   Take the glass you removed from the frame and place onto your foam.  Line up the outside edges so you have fewer cuts to make.
  3. Using an Xacto knife (and being careful not to cut yourself on the glass edge) cut around the edge of the glass pane.  Make sure your cuts are over your cutting mat.
  4. Time to put it all together.  Carefully center your fishbowl fabric over the cut piece of foam/cork.  You could easily use spray adhesive on the back of the fabric to help hold it in place while you complete the assembly.
  5. Take your foam/cork sandwich and insert into the opening of your frame, and fold edges to the center of the foam/cork.  I used clear packing tape to hold the edges down.
  6. Replace the back of the frame.  If it doesn’t sit completely flush, you could also use clear packing tape to hold the back securly to the frame.  This is necessary to keep everything all nice and wrinkle free.
  7. Hang and Enjoy

Everything used came from my stash, except the Flour Sack towel from the dollar store.

Total Cost:  $1.00 and up

Cute huh?  Oh…wait….where are the fish?  Don’t worry!  I have a post about fish coming up later!

So, overall I wasn’t impressed with my first experience using freezer paper.  Have any of you out there given it a try with better luck?  If so, please help me out…what did I miss?

Bring on the Doom!

The Crazy Crafty Wicked Cool Envelope of Doom that it!

Long ago (ok a few months ago), and in a land far away (hey, California is pretty far away from Georgia) the lovely Michelle L. won a Stash Busting give-a-way and created a blog.  There she created treasures from her winnings and posted them for all to see.  One day Michelle hatched a devious plan and decided to share with the world her “stash”. Using her leftover winnings and her own personal “stash”, the “Crazy Crafty Wicked Cool Envelope of Doom” give-a-way was born.  In her words, “I’m calling them ‘envelopes of doom’ because the items are going to be pretty eclectic. Okay, insanely diverse. And a few, possibly mind-bogglingly awful. It’s up to YOU to re-imagine and transform them into wicked coolness.”  The winners were to, “promise to make at least three interesting things from the contents, and post them online for us all to see.  Also, since this is kind of a “craft-it-forward” deal, I think your assignment should be to make things for other people – in other words, come up with three gift ideas, and tell us how you gave your creations away.”

Now, that sounds like a challenge I’m up for…and as luck would have it.  I was one of the winners!

After a bit of a technical glitch that put my envelope a bit late arriving, I opened my mailbox and was off to an immediate start, chanting “must catch up, must catch up”.  I ripped it open and spread out the contents quickly take stock of the monumental task ahead of me.  Honestly, I’m not sure what to think of some of this stuff.  There is some odd yarn-like stuff, a panel of hologram valentines, and an expired Starbucks card.
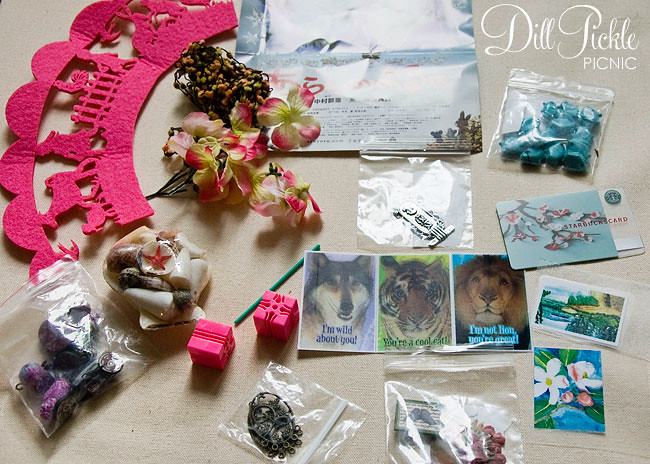
I put all that aside for a moment and focused on these odd-looking pink squares.   Interestingly enough they matched up exactly with the green pixie stick deal which makes me think they might be some sort of construction toys…. Wanna see?
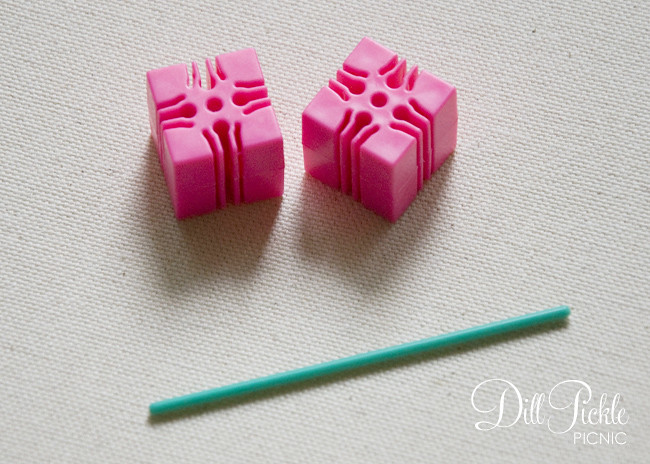
Oh, TOYS!  That’s it… I have a friend who collects Barbie & her assorted stuff…so I quickly assembled the 3 pieces together.  Do you see where I’m going with this?
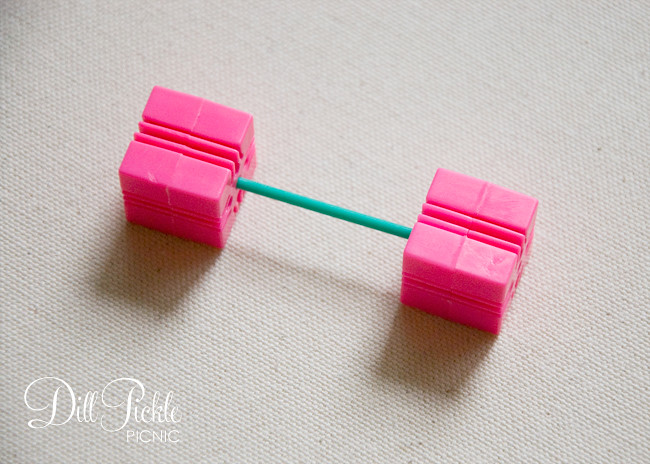
Yes, my first project was to create an action figure doll size set of weights.  I even gave it a try myself…
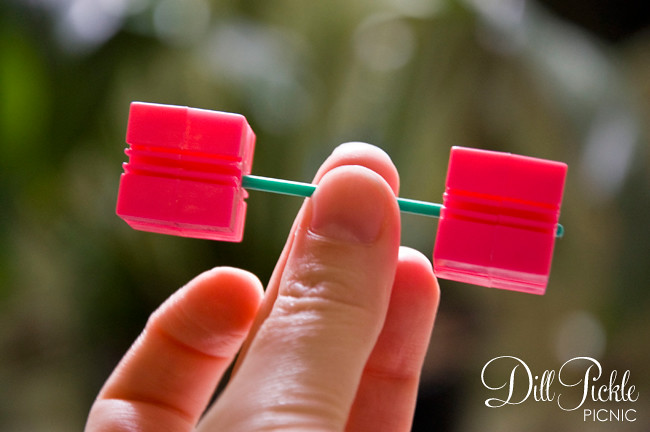

Now that’s my kind of workout!

Just kidding Michelle…I’ll be posting at least 2 of my projects from doom in the upcoming week.  Couldn’t resist kicking off this challenge with a bit of crafty humor!

If you want to see the other goodies these lovely crafters are coming up with, check out Michelle’s blog:  Mich L. in L.A.
DIY: Cute as Button Shirt

So, let the April Stash Bust posts resume (Yes, I realize it’s now May).  Mid-April I had the perfect weekend to get a few stash busting projects finished up since the hubby was at his dad’s to attend the first Indy Car Race in Alabama.  Racing just isn’t my thing so I opted to stay home and tackle our weed filled flower beds instead.  So, Saturday after spending the majority of the day working in the yard and finding out my credit card number had been stolen, I retired to my little craft room to see what I could whip up.

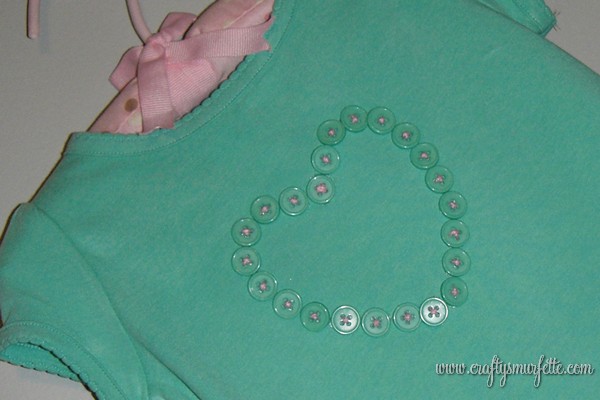
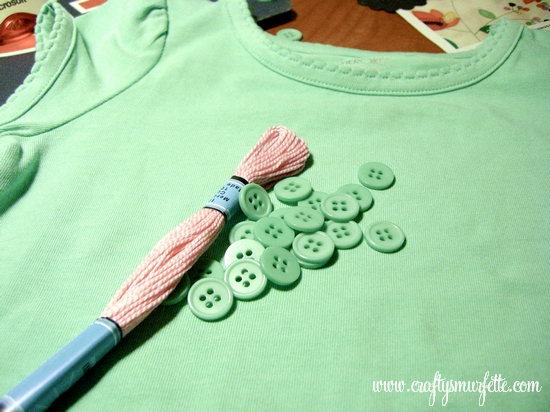
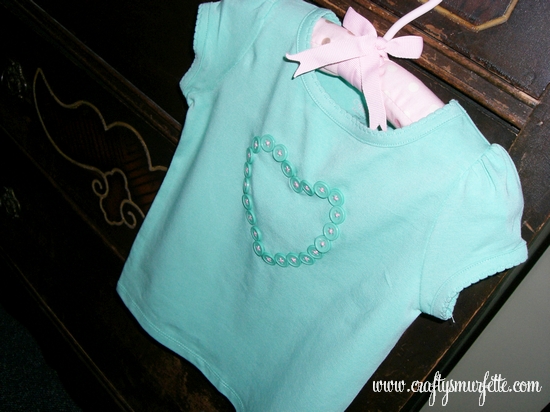
I had originally purchased this aqua t-shirt with the intentions of making my niece a bunny shirt for Easter.  Since that didn’t happen, I decided I needed to do something quick with the shirt so I could include it in a package I was planning to mail my sister that day.  So I started digging around in a couple of the plastic bins of craft supplies I have stashed in a closet and came up with some leftover buttons from a wedding project and a massive stack of embroidery floss.  Put all that together…and you get this Cute as a Button Heart Shirt.

It was super fast to make and turned out much better than I’d imagined.  I like that it looks like a more expensive boutique shirt, yet cost me right around $5.99 to make.

To make your own version you’ll need the following:

  • T-Shirt
  • Buttons (I used (25) 1 cm buttons for this project)
  • embroidery floss
  • needle
  • pencil to draw outline
  • heart shaped template (optional)
  • embroidery hoop (optional)
  • hot glue/fabric glue (optional)

Instructions:

  1. Press the shirt flat
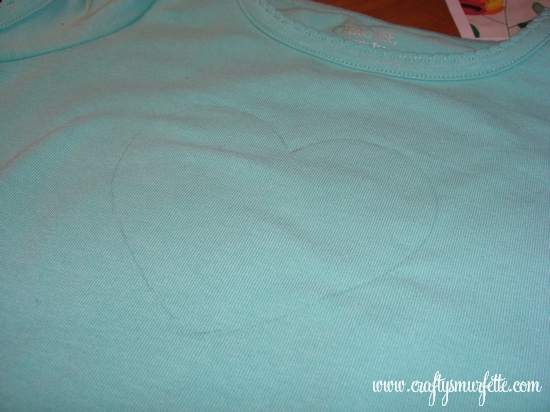
  2. Create Heart template and copy outline to shirt.  I used a regular pencil but a tracing pencil that washes away would have worked better if I’d had one.
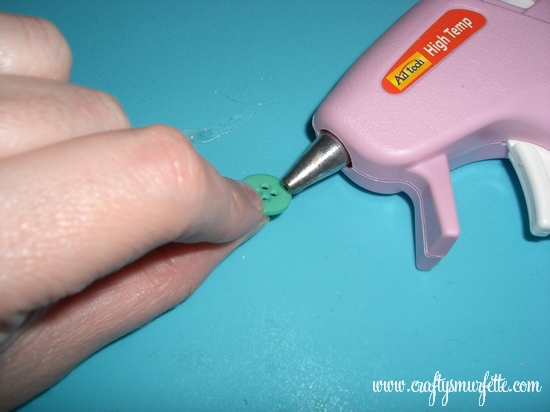
  3. If you want to add a little bit of extra attachment of the buttons to the shirt, take a moment to glue the edges of the buttons to the shirt.  Take care not to glue the centers so you can stitch them down in the next step.
  4. Thread your needle with embroidery thread and tie off with a sturdy knot.
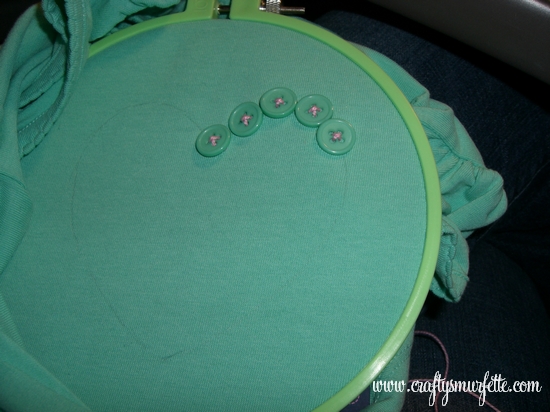
  5. Start in the center of the heart and stitch your buttons to the shirt with moving around the heart.  This is where an embroidery hoop might make the process much easier.
  6. And after about an hour….1 cute as a button heart shirt :

Oh…so about those cute pink shorts.  I have to admit I bought those Saturday on a trip to Target during April.  I know…I wasn’t supposed to be adding to the stash before I finish busting through it but if it was less than $1 does it count?  My local store had all their Easter goodies marked 75% off, but a nice lady watching me pick up a bag of Dove eggs told me it was actually ringing up 90% off.  Which included all their children’s Easter themed clothing.  So the shorts cost me a whopping $0.43 (including tax) and then I sewed a matching button in the middle of each of those cute little bows on the sides just to tie it all together.

Project Costs:
– TShirt –  from stash – otherwise Target – $5.00
– Buttons – free from stash – otherwise $1.99 for package, using 1/4 of package
– Embroidery Floss – free from stash – otherwise $0.99
GRAND TOTAL:  $7.98 if you needed to buy everything at once.
My Grand Total:  FREE from STASH (ok…$0.43 for the Easter Clearance shorts)

_________________________________________________________________________

Safety Note:   Make sure all buttons are glued and then sewn on securely.  Due to buttons, do not leave your baby unattended while wearing this garment.
_________________________________________________________________________

ReUse: TP Roll Candy Bunting

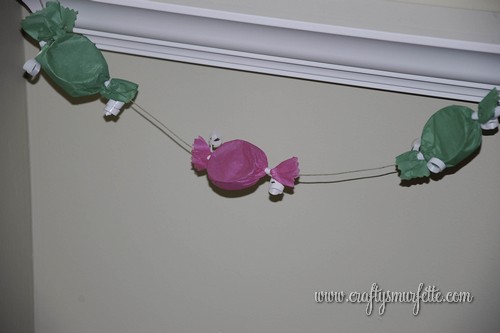
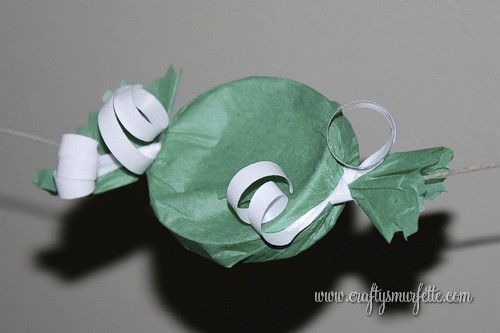
In honor of Earth Day & my April Stash Bust endeavors I decided to try my luck at reusing several TP(toilet paper) rolls because I’m not sure about your household but we seem to have an abundance of empty cardboard rolls.  I’m really loving bunting right now, so I set out to make some sweet candy bunting from my trash & stash…and this is what I ended up with:


What do you think?  I’m thinking it’s quite cute…and so easy to make that you could even have you kids help you with this project.  It could be fun for a child’s birthday party or even dressed up a bit more to hang behind a candy buffet.

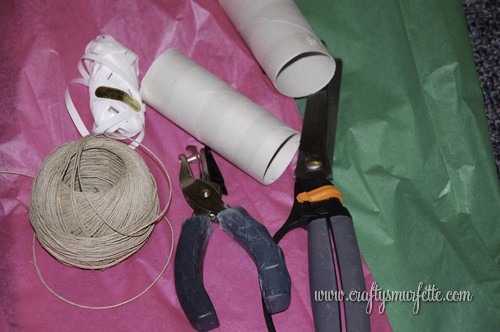
Supplies Needed:

  • Toilet or Paper Towel cardboard rolls (1 TP roll averages 9 pieces of candy, or 4 feet)
  • Tissue Paper (you could also use fabric)
  • Curling Ribbon
  • Twine (Ribbon or Yarn would also work)
  • Hole Punch
  • Rickrack Scissors
  • Craft Knife or Scissors
  • Double-Sided Tape (optional)

Instructions:

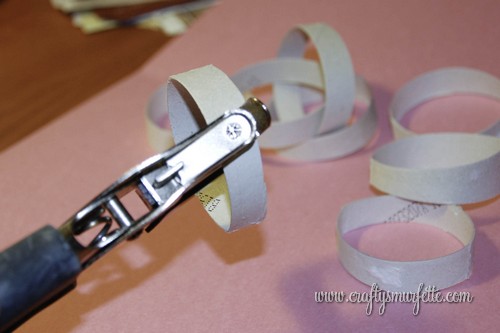
  1. Using your craft knife or scissors carefully cut your cardboard rolls into 1/2 inch pieces.  (If you are doing this project with small children this is a step an adult should complete ahead of time.)
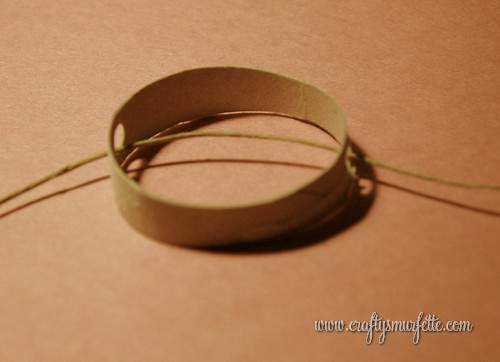
  2. Using a standard hand-held hole punch punch two holes across the tube from each other.  Repeat this process for each of your 1/2 inch pieces.
  3. Cut bunting twine to your desired finished length.
  4. Cut your tissue paper (or fabric) into 5 inch square pieces using pinking sheers. (If doing this project with children this is another step that could be completed by an adult ahead of time.)
  5. Carefully thread one piece of cardboard onto the twine. (hint: To make this easier I actually taped one end of the twine to my table.  This helped keep one end stationary while I was threading from the opposite end.)
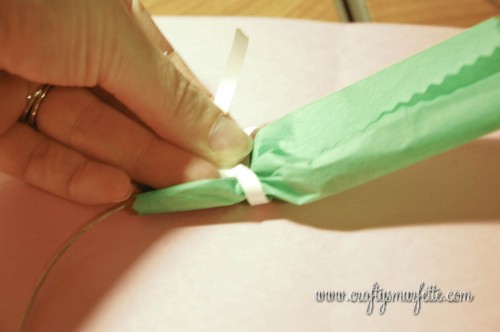
  6. Take a piece of tissue paper and place it under your threaded circle and fold it over to overlap in the front.  (hint:  You might find using a small piece of double-sided tape helpful to hold everything in place, but it isn’t necessary.)
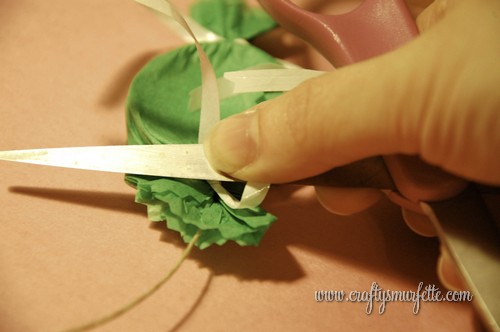
  7. Using 4 inch pieces of curling ribbon, tie off each side of your “candy” with a hard knot.
  8. Using scissors curl the ribbons to make a decorative tie.  (If you are doing this project with small children this is a step an adult should complete once the stringing process is completed.)
  9. Repeat the length of your twine.
  10. You can move the pieces slightly along the finished product to help evenly space them.
  11. Hang and Enjoy!


See…quick, easy, and a fun way to turn a common household trash item into something fun & decorative!

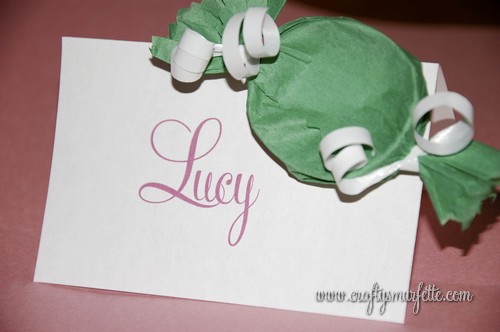
And if you have extra “pieces of candy” left over you could always glue them to place cards or signage for a sweet look.

Price Breakdown: Free from my trash & craft stash!
However, if you wanted to create these with no supplies on hand you could do so entirely from your local dollar store!

What crafty fun will you reuse trash & stash items for this week?


ReUse: Security Envelope Bunting

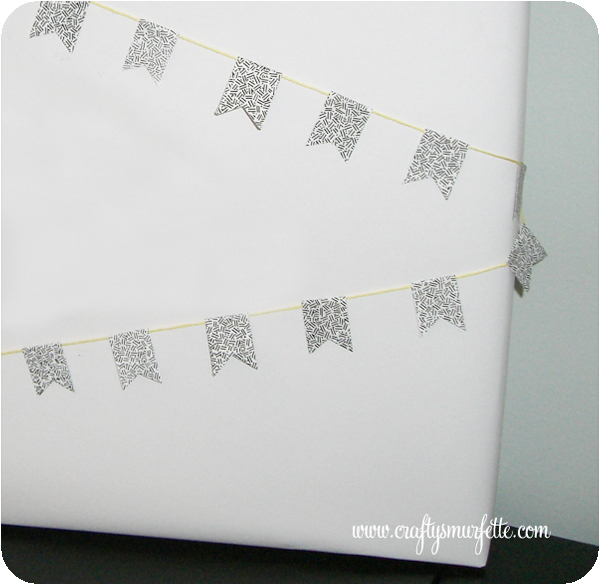
I’ve been saving envelopes with cool security patterns since I saw a cute cake bunting from the ever wonderful Martha made from her papers that mimic the same patterns.  So, what better time than during April’s Stash Bust to finally put those envelopes to use. Now after making a couple I think this would be an easily portable craft project to work on while I’m traveling for work and stuck in hotel rooms!

The possibilities of how to use these are endless!  You can use them to decorate a cake, create a pretty package wrapping, I’ve seen them attached to fronts of greeting cards, craft show displays… and of course you could use any type of paper to make the flags. 
How will you use your bunting?

OK, let’s get started!  This is a super simple project, but I’ll admit it is a bit more time consuming than I thought.  To help speed up the process I’ll include several hints in the instructions below.

Supplies Needed:

  • Security envelopes (for this project I used 2 envelopes from my power bill)
  • Toilet Paper Roll
  • Baker’s Twine or Embroidery Thread (5 ft)
  • Double Sided Tape, Xyron, or Glue Stick

Tools Needed:

  • Ruler
  • Scissors
  • Bone Folder or Envelope Opener (optional)
  • Paper Cutter (optional)

Instructions (written directions follow pictorial):

  1. Carefully take apart your envelopes exposing the inner security lining.  To do this I use my bone folder and carefully slide it between the seams to open them up.  You could also use an envelope opener or just pull them apart as well.
  2. Use your paper-cutter (or scissors) to square up the pieces, and remove the edges and window panes  (hint:  I’m putting those window panes off the side for another idea I have swimming around in my noggin).
  3. Now, using either your cutter (hint: it’s quicker and easier to get consistent sized pieces using a paper-cutter with built-in ruler) cut your envelope into 3/4 inch strips.
  4. Stack those strips up together and use your cutter to cut those into 2 inch pieces.
  5. Measure & cut a 5 foot piece of either embroidery thread or bakers twine  (hint: if you use embroidery thread use a piece of tape or glue to seal off both ends to keep it from separating as you add your flags).
  6. You will start assembling your bunting by placing the first flag 6 inches from one end of your twine and stop 6 inches from the other end to allow you room to tie up your bunting.
  7. Apply your choice of adhesive to your first flag and carefully fold it over the twine sealing the edges together.  For this example I used double-sided tape that ran half the length of the flag.  You could also use a glue stick but it will be a bit messier.  (hint:  if you have a Xyron machine you can run all your pieces through at once and then just peel them off and fold over the twine.  It made the process MUCH quicker).
  8. Continue this process by adding a new flag every 1.25 inches.  You can always tape a ruler to your desk to make it easier to decide where to place the next flag, but after the first few I went with the just eyeball it method.
  9. Once you have all your flags in place it’s time to snip the decorative edge.  For this process I just pulled up a podcast I wanted to listen to and used scissors to make a “V” snip on each edge.  (hint:  if you want consistent edges you could also use scrapbook scissors or even a triangle shaped paper punch)
  10. Hang it up and enjoy!

Wait…but how do I keep it from getting all tangled up until I’m ready to use it.
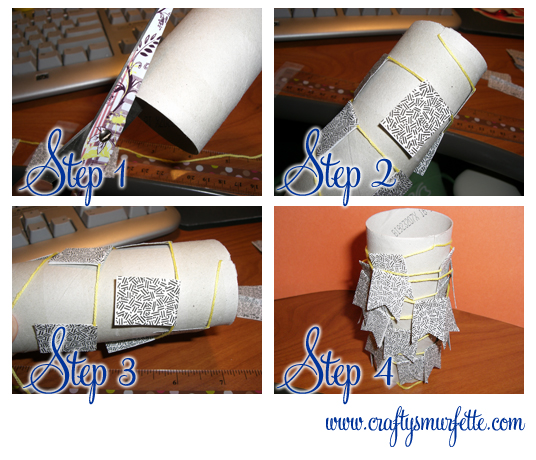
It’s simple:  a toilet paper roll

  1. Just take a toilet paper roll and cut a small slit in the top edge.
  2. Take one end of the bunting and slide it into the slit.
  3. Carefully roll your bunting around the tube and once at the other end tuck it inside the slit as well.
  4. There you go…all rolled up and ready to use!

So, let’s recap:  4 feet of cute bunting completely from my stash & trash!

Cost Breakdown:
– Paper for Flags – Free from recycling the envelopes from pesky utility bills
– Twine or Thread – Free from my stash (or $.99 new from JoAnn’s, will make 2)
– Glue/Tape – Free from stash (or $2.99 from Target, will make 25)
– Toilet Paper Rolls – Free from recycling
GRAND TOTAL: FREE from Stash or $0.60 per bunting

PS.  I’ve decided to list a few of my “crafty projects” in the etsy store over the next few weeks, it’s kinda sad how long it’s sat empty!