DIY: Race Car Cupcake Toppers

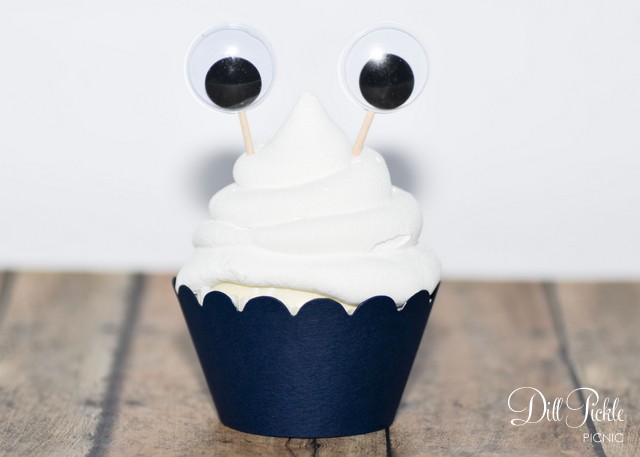
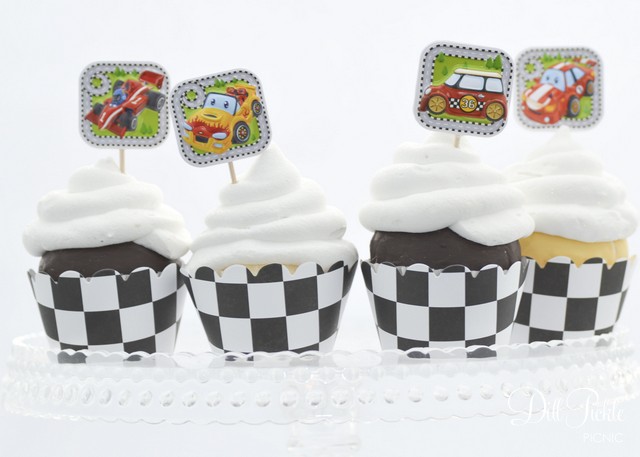
I don’t know about you, but there is at least one person in my house who is a fan of all types of motor car racing.  From F1 (which I actually enjoy watching) to NASCAR he is interested in it all.  I blame his dad and grandfather for this fascination with all things racing but I suspect it is quite the norm with boys of all ages.  I recently had a custom request to put together something for a little guy’s 3rd birthday party.  Mom wanted a race theme but nothing “character” related and I lucked out and found these adorable car stickers on the cheap.  I think they turned out quite fun, and wanted to share in case you might want to make a few of your own!
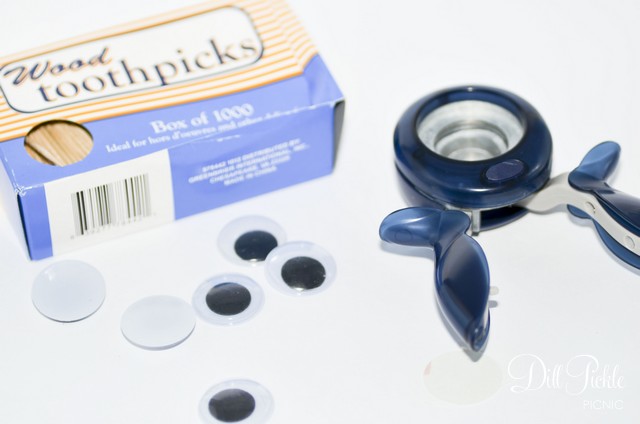
Race Car Cupcake Toppers by Dill Pickle Picnic

DPPPhoto-096Supplies Needed:

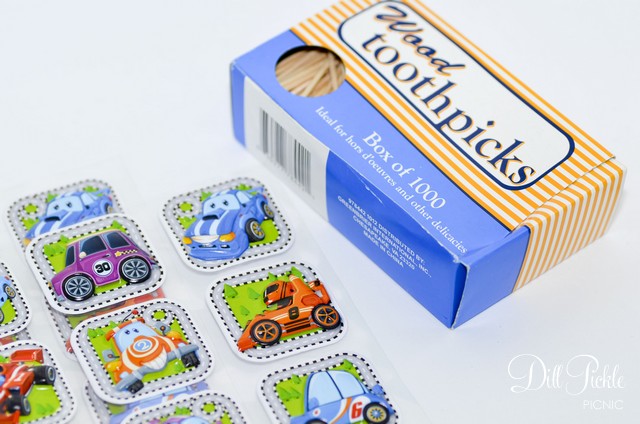
  • Race Car Stickers – 2 stickers per topper (these cute 3D ones came from Dollar Tree)
  • Toothpicks
  • Optional: glue (low temp hot glue or craft glue)

Instructions:

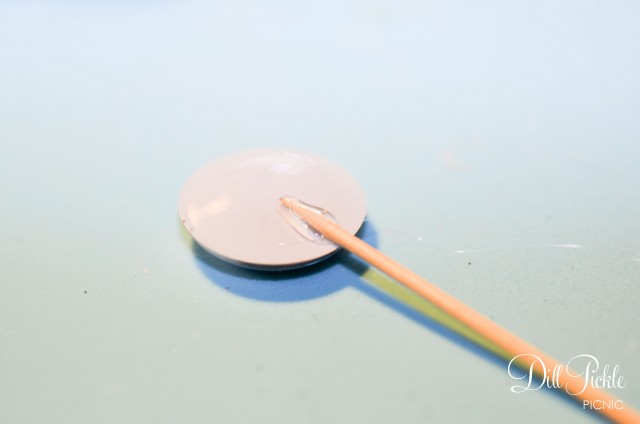
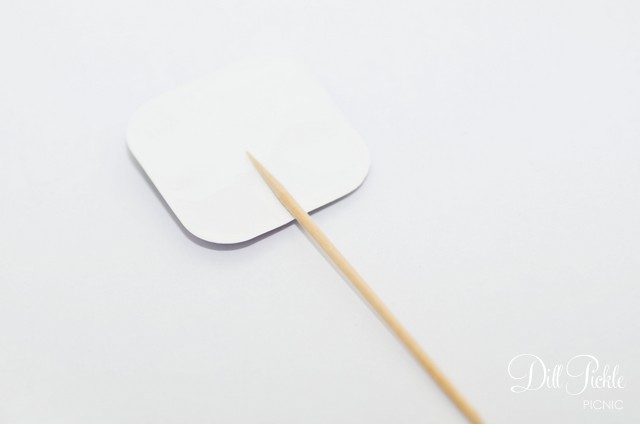
  1. Place first sticker laying face down on a flat surface
  2. Place toothpick near the bottom of the sticker, making sure to leave .25 inch or so of the toothpick on the sticker’s surface.
    DPPPhoto-098
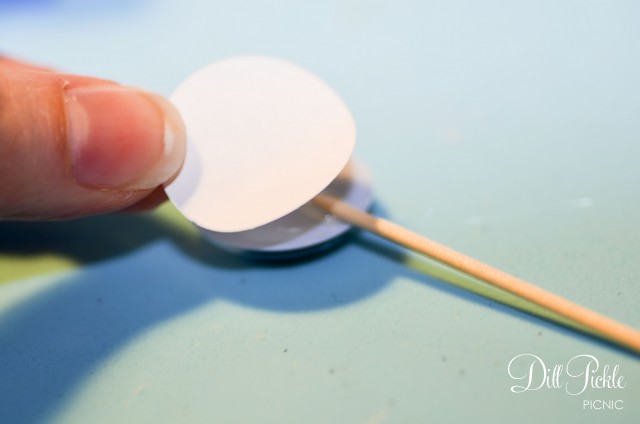
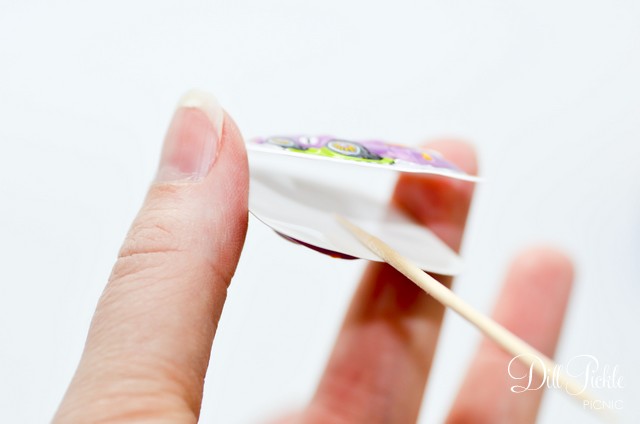
  3. Optional Step in case your stickers are a bit heavier:  Apply glue to the back of the sticker
  4. Carefully place the second sticker over the back of the first pressing firmly to “lock” the toothpick in place.
    DPPPhoto-099
  5. Let dry completely and enjoy!

Race Car Cupcake Toppers by Dill Pickle Picnic

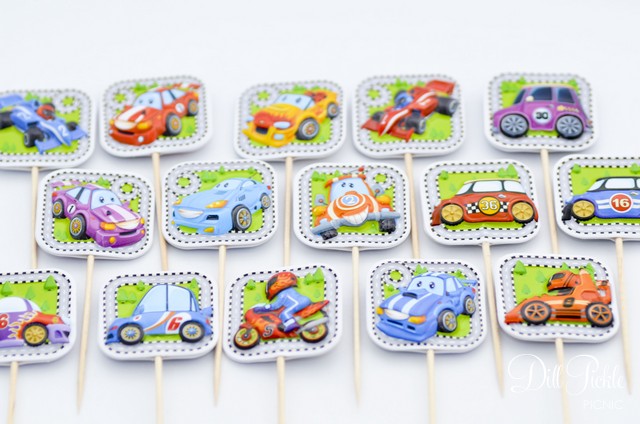
If you don’t want to make your own…I got a bit carried away so I have one additional set listed in my Etsy shop.

DIY: Monster Cupcake Eyes for $1

So, I really should have posted this before Halloween but these little guys are adorable for Monster birthday parties as well.  They are another one of those quick & easy crafts that pack so much cute for such a small investment.  How awesome would they look if you covered the top of the cupcake with the squiggly grass-like icing or solid “monster-colored” sprinkles?

Monster Cupcake Eyes from Dill Pickle Picnic

DPPPhoto-100Supplies Needed:

  • Googly Eyes (mine came from Dollar Tree)
  • Glue (or adhesive backed paper)
  • Optional: White cardstock or construction paper
  • Optional: Round Punch in same size as eyes

Instructions for Monster Eye Cupcake Toppers:

  1. Glue toothpick to the back of each eye.  I would recommend regular craft glue, or low temp hot glue.  Using a higher temperature hot glue tends to cause the thin plastic backing of the eye to bubble.
    DPPPhoto-102
  2. Optional Steps: I wasn’t really happy seeing the glued toothpick on the back of the eye.  To fix this I simply pulled out my 3/4 inch circle punch which is the same size as the googly eyes and punched circles out of some left over white label paper (you know the parts that are left on the side margins after you use the actual labels?).  Then I stuck those to the backs covering the glue/toothpick which also did a nice job of holding the toothpicks in place instead of glue.  You could also use white cardstock and just glue them in place as well.
    DPPPhoto-103
  3. Let dry completely & enjoy!

DPPPhoto-108

The best thing about these is they could be used to create so many different type of critter cupcakes!  What creatures will you be creating with your googly eye cupcake toppers?

DIY: Fall Sunflower Cupcake Wraps for $1

There is something about the cooler temperatures of fall that make me think of sunflowers and jewel tone colors.  Maybe it’s all the colors that nature surrounds us with this time of year.  So when I found these fun little yellow sunflower doilies at my local Dollar Tree, I dropped them in my cart not really knowing what I would do with them.  A few weeks later I needed to take muffins & mini muffins to a gathering and decided it was the perfect time to give those little doilies a new home.

Sunflower Muffin Wraps from Dill Pickle Picnic
This is the part where I admit this all happened last fall…but as I was running through the Dollar Tree in search of clear treat bags last week I once again saw these packages of cute little sunflower doilies and made a note to finally put this post together.  These are the types of craft projects I really enjoy….quick, easy, and quite a bit of fun for the buck.

It’s easy to make your own sunflower muffin or cupcake wraps:DPP-Fall-2013-01

Supplies Needed:  

  • Package of Sunflower (or any rounded shape doilies)
  • Scissors
  • Ruler
  • Clear Tape

To Make Mini Size Muffin Wraps:

  1. Fold your doily in half
  2. Measure down from the outside 1.25 inches in several places and make a slight mark.
  3. Cut along the marked lines with your scissors.  On the sunflower doilies it was easy since the 1.25 inch mark ended up being in line with one of the rows of cutouts, so I could just cut along that row of details without needing to measure all the way across.
    DPP-Fall-2013-03
  4. Cut the doilies along the folded lines on both ends.
    DPP-Fall-2013-05

To Make Standard or Jumbo Size Cupcake Wraps:

  1. Lay your doilies out flat.
  2. Measure down from the outside 1.75 inches for standard or 2.5 inches for jumbo from the outer edge and make a slight mark. Do this around the entire circle.
  3. Using your scissors make a straight cut from the outside to the marked location for one of your marks.
    DPP-Fall-2013-06
  4. Cut along the marked lines with your scissors.  On the sunflower doilies it was easy since the 1.75 inch mark ended up being in line with one of the rows of cutouts, so I could just cut along that row of details without needing to measure all the way across.
    DPP-Fall-2013-07
  5. Wrap around the base of your cupcake/muffin and cut to size using a small piece of clear tape to adhere them together in the back.
  6. Serve & Enjoy!

With these smaller sunflower size doilies I was able to make 2 mini wraps per doily or 1 standard or jumbo wrap. Which means for $1.07 I could make 64 mini wraps or 32 standard or jumbo wraps.  I call that a fabulous fall deal 🙂

DPP-Fall-2013-08

What does fall make you think of?  Do you look for quick ways dress up your fall treats?  If so, please share….I’d love to hear how you quickly add a little fall to your goodies!