DIY: Race Car Cupcake Toppers

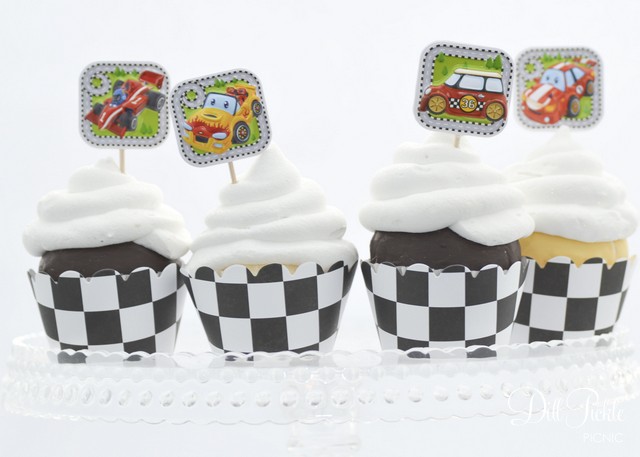
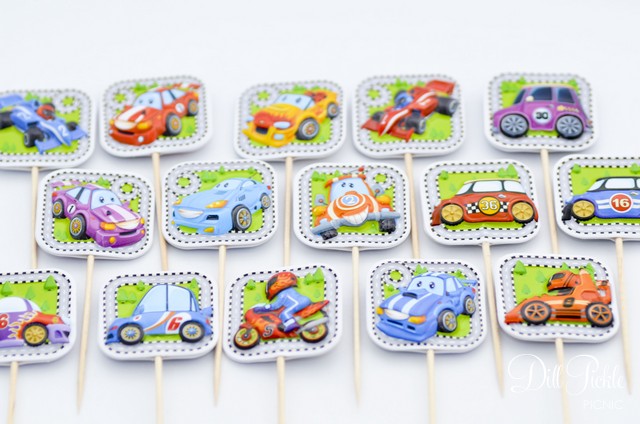
I don’t know about you, but there is at least one person in my house who is a fan of all types of motor car racing.  From F1 (which I actually enjoy watching) to NASCAR he is interested in it all.  I blame his dad and grandfather for this fascination with all things racing but I suspect it is quite the norm with boys of all ages.  I recently had a custom request to put together something for a little guy’s 3rd birthday party.  Mom wanted a race theme but nothing “character” related and I lucked out and found these adorable car stickers on the cheap.  I think they turned out quite fun, and wanted to share in case you might want to make a few of your own!

Race Car Cupcake Toppers by Dill Pickle Picnic

DPPPhoto-096Supplies Needed:

  • Race Car Stickers – 2 stickers per topper (these cute 3D ones came from Dollar Tree)
  • Toothpicks
  • Optional: glue (low temp hot glue or craft glue)

Instructions:

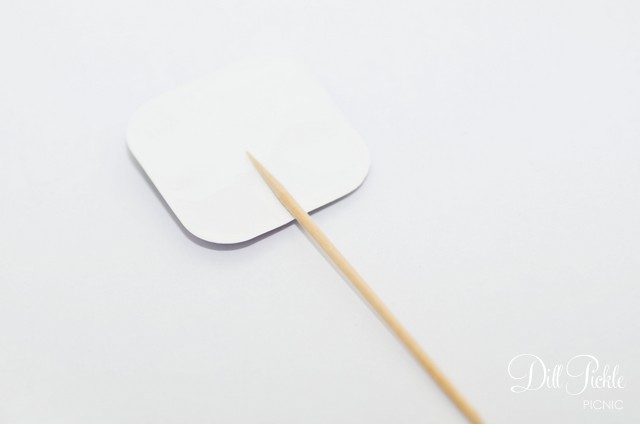
  1. Place first sticker laying face down on a flat surface
  2. Place toothpick near the bottom of the sticker, making sure to leave .25 inch or so of the toothpick on the sticker’s surface.
    DPPPhoto-098
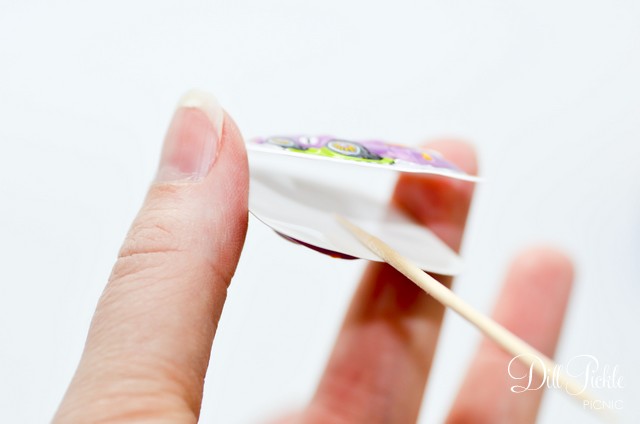
  3. Optional Step in case your stickers are a bit heavier:  Apply glue to the back of the sticker
  4. Carefully place the second sticker over the back of the first pressing firmly to “lock” the toothpick in place.
    DPPPhoto-099
  5. Let dry completely and enjoy!

Race Car Cupcake Toppers by Dill Pickle Picnic

If you don’t want to make your own…I got a bit carried away so I have one additional set listed in my Etsy shop.

DIY: Monster Cupcake Eyes for $1

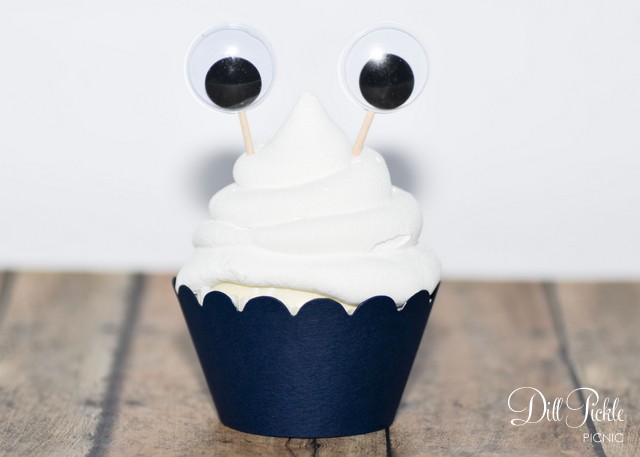
So, I really should have posted this before Halloween but these little guys are adorable for Monster birthday parties as well.  They are another one of those quick & easy crafts that pack so much cute for such a small investment.  How awesome would they look if you covered the top of the cupcake with the squiggly grass-like icing or solid “monster-colored” sprinkles?

Monster Cupcake Eyes from Dill Pickle Picnic

DPPPhoto-100Supplies Needed:

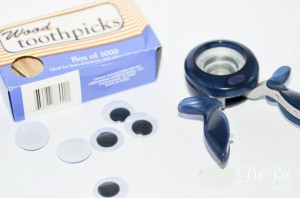
  • Googly Eyes (mine came from Dollar Tree)
  • Glue (or adhesive backed paper)
  • Optional: White cardstock or construction paper
  • Optional: Round Punch in same size as eyes

Instructions for Monster Eye Cupcake Toppers:

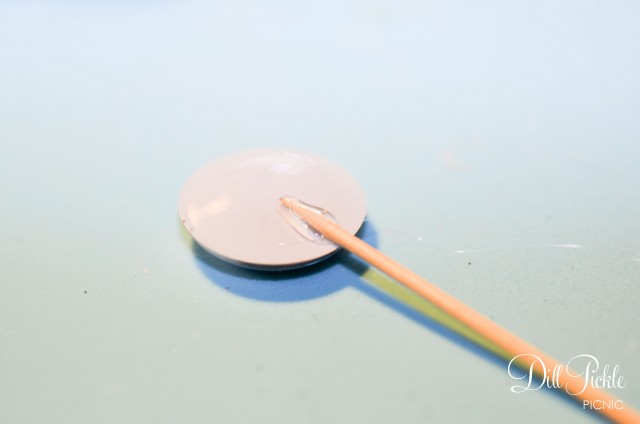
  1. Glue toothpick to the back of each eye.  I would recommend regular craft glue, or low temp hot glue.  Using a higher temperature hot glue tends to cause the thin plastic backing of the eye to bubble.
    DPPPhoto-102
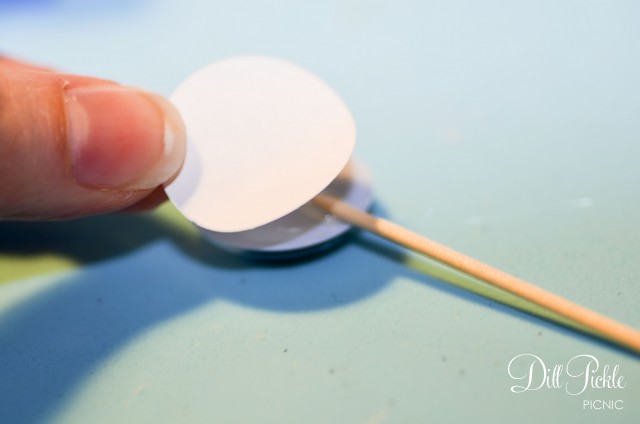
  2. Optional Steps: I wasn’t really happy seeing the glued toothpick on the back of the eye.  To fix this I simply pulled out my 3/4 inch circle punch which is the same size as the googly eyes and punched circles out of some left over white label paper (you know the parts that are left on the side margins after you use the actual labels?).  Then I stuck those to the backs covering the glue/toothpick which also did a nice job of holding the toothpicks in place instead of glue.  You could also use white cardstock and just glue them in place as well.
    DPPPhoto-103
  3. Let dry completely & enjoy!

DPPPhoto-108

The best thing about these is they could be used to create so many different type of critter cupcakes!  What creatures will you be creating with your googly eye cupcake toppers?

DIY: Fall Sunflower Cupcake Wraps for $1

There is something about the cooler temperatures of fall that make me think of sunflowers and jewel tone colors.  Maybe it’s all the colors that nature surrounds us with this time of year.  So when I found these fun little yellow sunflower doilies at my local Dollar Tree, I dropped them in my cart not really knowing what I would do with them.  A few weeks later I needed to take muffins & mini muffins to a gathering and decided it was the perfect time to give those little doilies a new home.

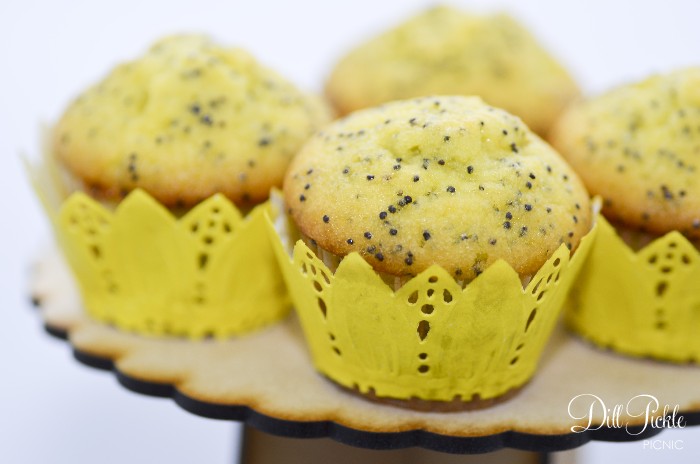
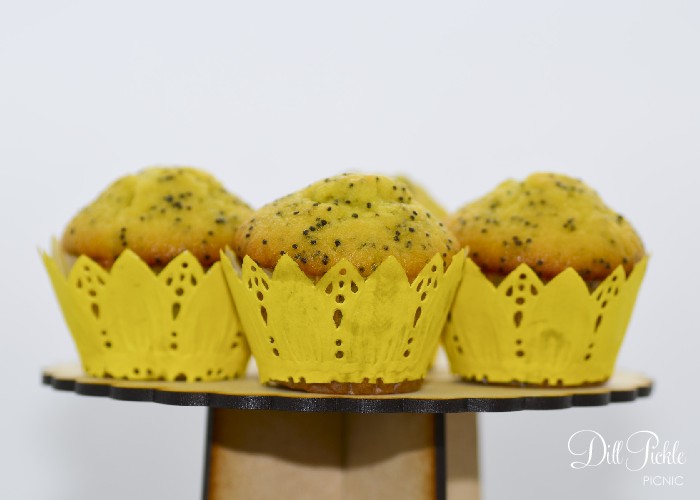
Sunflower Muffin Wraps from Dill Pickle Picnic
This is the part where I admit this all happened last fall…but as I was running through the Dollar Tree in search of clear treat bags last week I once again saw these packages of cute little sunflower doilies and made a note to finally put this post together.  These are the types of craft projects I really enjoy….quick, easy, and quite a bit of fun for the buck.

It’s easy to make your own sunflower muffin or cupcake wraps:DPP-Fall-2013-01

Supplies Needed:  

  • Package of Sunflower (or any rounded shape doilies)
  • Scissors
  • Ruler
  • Clear Tape

To Make Mini Size Muffin Wraps:

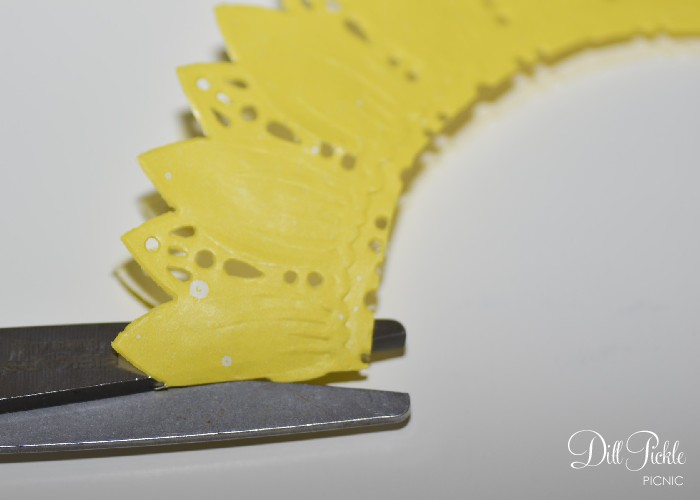
  1. Fold your doily in half
  2. Measure down from the outside 1.25 inches in several places and make a slight mark.
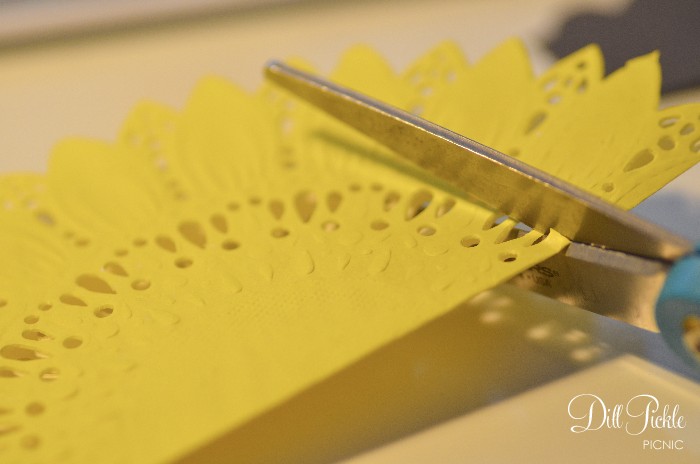
  3. Cut along the marked lines with your scissors.  On the sunflower doilies it was easy since the 1.25 inch mark ended up being in line with one of the rows of cutouts, so I could just cut along that row of details without needing to measure all the way across.
    DPP-Fall-2013-03
  4. Cut the doilies along the folded lines on both ends.
    DPP-Fall-2013-05

To Make Standard or Jumbo Size Cupcake Wraps:

  1. Lay your doilies out flat.
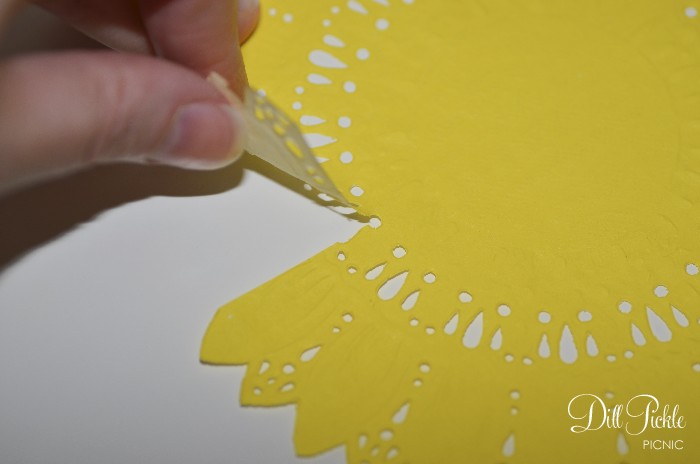
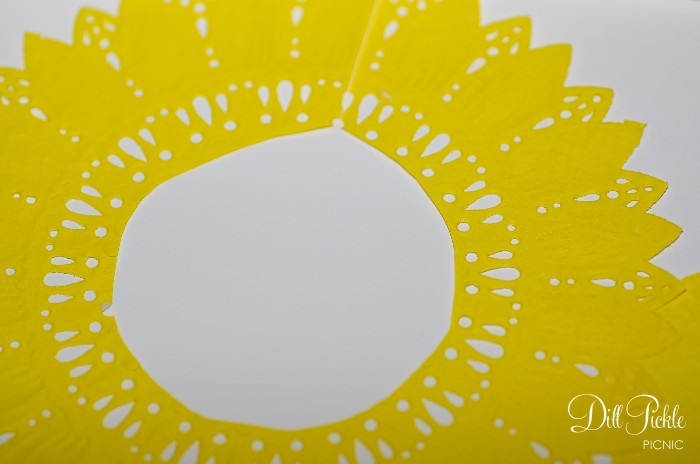
  2. Measure down from the outside 1.75 inches for standard or 2.5 inches for jumbo from the outer edge and make a slight mark. Do this around the entire circle.
  3. Using your scissors make a straight cut from the outside to the marked location for one of your marks.
    DPP-Fall-2013-06
  4. Cut along the marked lines with your scissors.  On the sunflower doilies it was easy since the 1.75 inch mark ended up being in line with one of the rows of cutouts, so I could just cut along that row of details without needing to measure all the way across.
    DPP-Fall-2013-07
  5. Wrap around the base of your cupcake/muffin and cut to size using a small piece of clear tape to adhere them together in the back.
  6. Serve & Enjoy!

With these smaller sunflower size doilies I was able to make 2 mini wraps per doily or 1 standard or jumbo wrap. Which means for $1.07 I could make 64 mini wraps or 32 standard or jumbo wraps.  I call that a fabulous fall deal 🙂

DPP-Fall-2013-08

What does fall make you think of?  Do you look for quick ways dress up your fall treats?  If so, please share….I’d love to hear how you quickly add a little fall to your goodies!

DIY: Valentine’s Bunting for Under $1

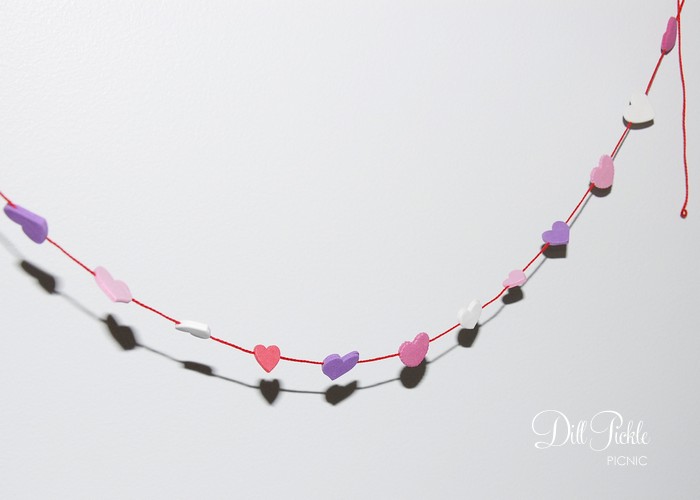
Yesterday I used the larger stickers from my dollar spot container to make heart shaped cupcake toppers.  When I was finished I had a handful of the smaller stickers left over and knew I needed to do something with them!  A quick glance through the craft stash box yielded some red embroidery floss and I realized that a mini heart bunting could be really cute.

DPP: Valentine Bunting for $1

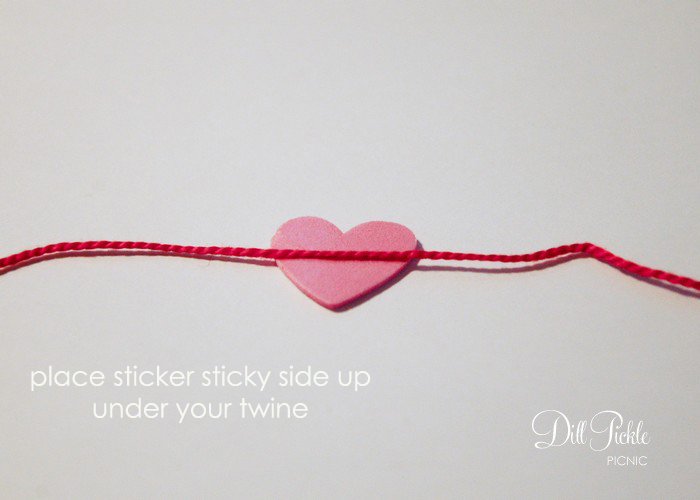
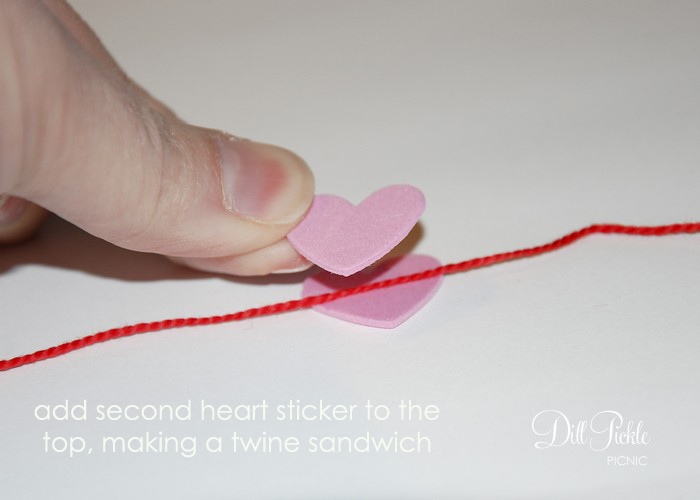
If you’d like to quickly make you own:


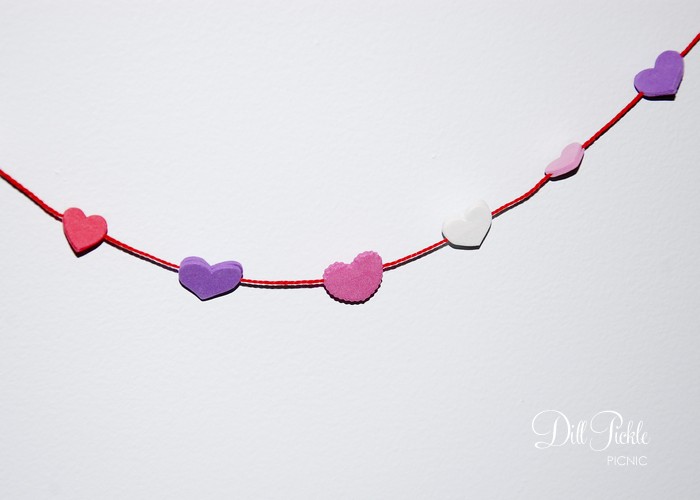
With my leftover stickers I was able to make over 6 feet of the bunting…which combined with the cupcake toppers is quite a bit of Valentine’s goodness for an expenditure of $1.07 (including tax)!   I’ve seen bags of rainbow foam heart stickers at my local dollar store this could be a fun birthday party decoration as well…one which your kiddos could help you assemble!


DIY: Valentines Day Round-Up

I hope each of you is having a wonderful Valentines Day!  Things have been very busy in our household this year, so I really haven’t crafted as much as normal.  However, that means I took a look back through the archives at the crafts from years past…and thought you might enjoy reviving some of these oldies but goodies as well!  Just click the link below the image to visit that tutorial.

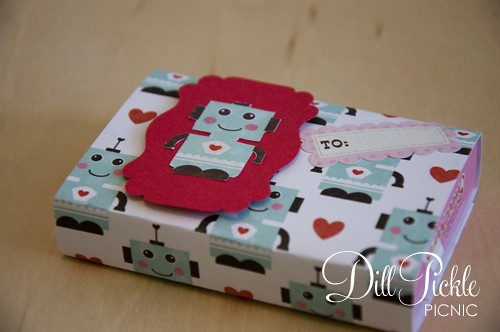
DIY Large Matchbox Style Valentines (with template)

DPP-2011ValSwap10

Click to View Tutorial

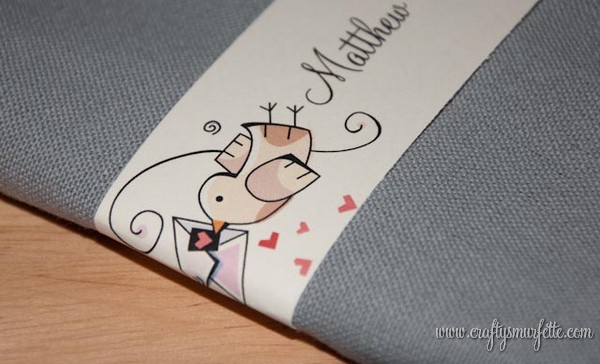
DIY Valentine Napkin Wraps (with template)

Click to View Tutorial

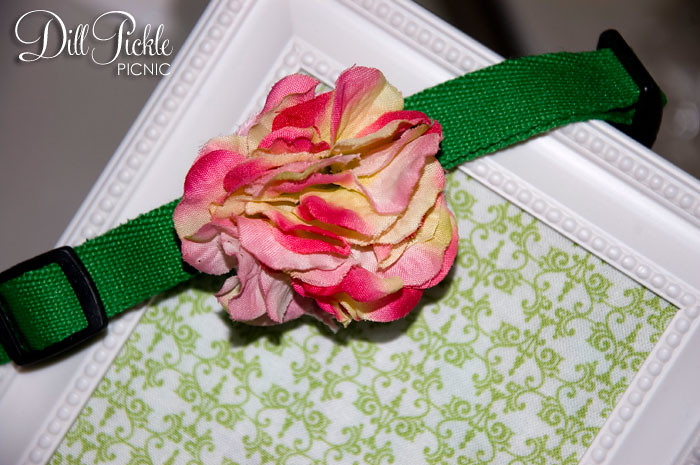
Flower Power Decorated Dog Collar

Click to View Tutorial

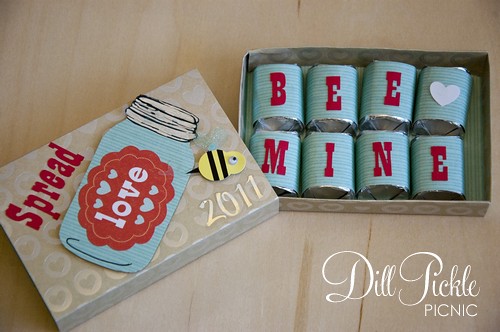
Turn Dollar Store Candy into Cute Valentines

Click to View Tutorial

Semi-DIY: Valentines in a Snap for under $1

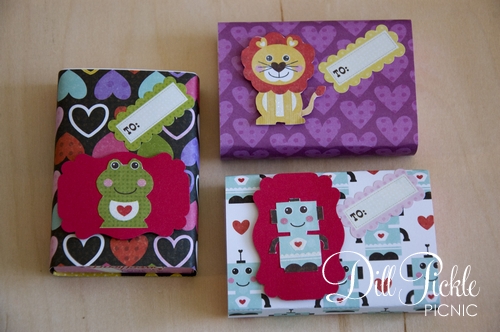
It’s been way too long since I posted a fun crafty treat and I’ve really missed it (and you guys)! Today’s Semi-DIY project is a quick and cheap way to dress up a simple box of candy.  It would be great for adults and the kiddos alike.  See…cute right?
DPP-2011ValSwap18

Supplies Needed:

  • Boxes of Conversation Hearts Candy – I picked mine up at the local Dollar Tree
  • Double Sided Tape
  • Scrapbook paper
  • Stickers or other decorative items

Instructions:

  1. Cut your scrapbook paper to the height and circumference of your candy boxes.  For the boxes I used the dimensions of the paper should be 3.5 inches wide by 7.5 inches long.
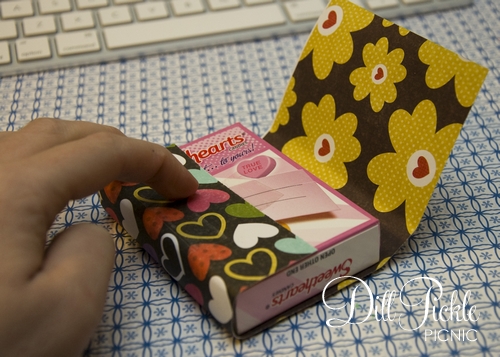
  2. Add a piece of double-sided tape to one end of the paper, and attach it to the back of your box.
    DPP-2011ValSwap25
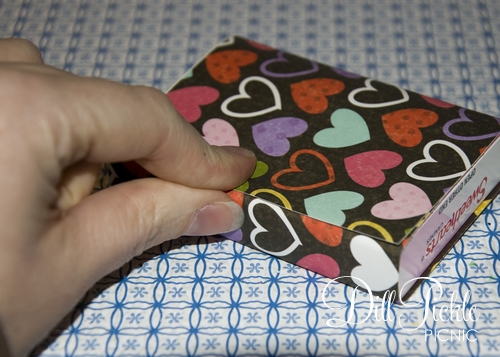
  3. Next, you will wrap the paper around the box and attach to the box with an additional piece of double-sided tape.  Do this underneath the overlaid section of the paper.
    DPP-2011ValSwap28
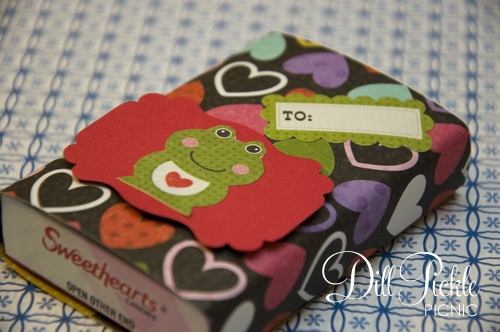
  4. Decorate with stickers and other assorted goodies.DPP-2011ValSwap30
  5. Give to someone special!

Costs:

One of the great things about this project is that in additon to be simple, it’s also quite thrifty.  If you have a stash of scrapbook paper & stickers like I do then it’s virtually free since you just need to buy the candy.  My boxes of candy were purchased from the Dollar Tree in a package of 4 for $1 and you could also pick up fun Valentines stickers there as well.

$1.07 for 4, so 26 cents each!  Can’t beat that!

DPP-2011ValSwap21

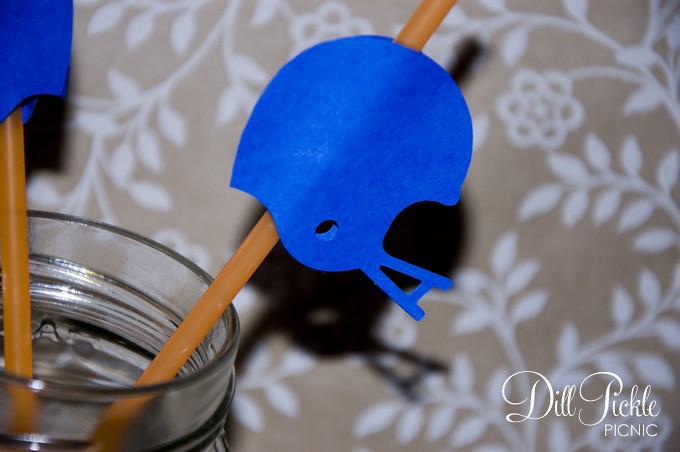
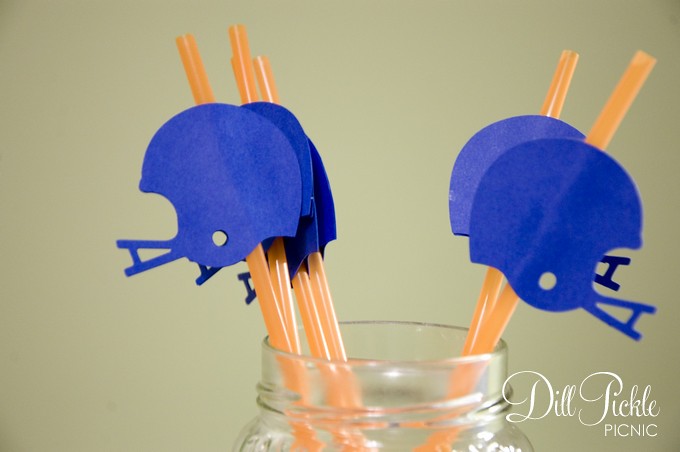
DIY: Are you ready for some football…straws?

Today I would like to dedicate some craftiness to one of my all-time favorite fall activities…football!  While I tend to gravitate towards college football, this craft could just as easily apply for the pros.  Regardless of what your favorite tailgate beverage might be, I can assure you it will look much more festive when sipped casually through one of these cuties. 😉

DPPhelmetstraw3
Ready to make some of your very own?

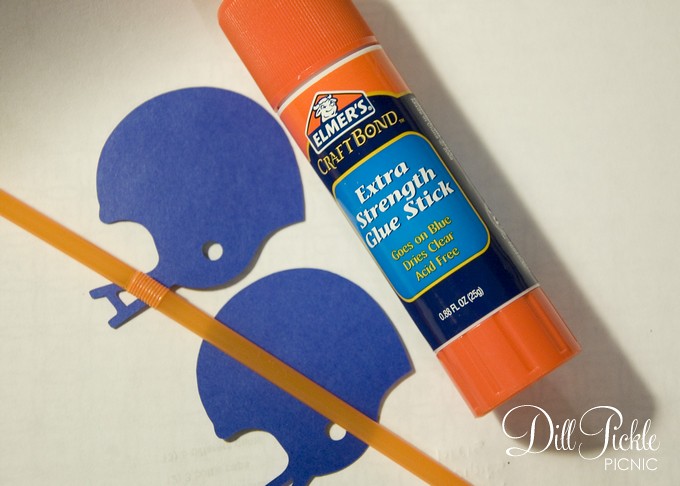
Supplies Needed:

  • Cardstock in your favorite team’s colors
  • Straws, also in your favorite team’s colors
  • Glue or Glue Stick
  • Helmet Punch (or die cuts from your favorite machine, you will need two helmets for each straw)

DPPhelmetstraw9

Instructions:

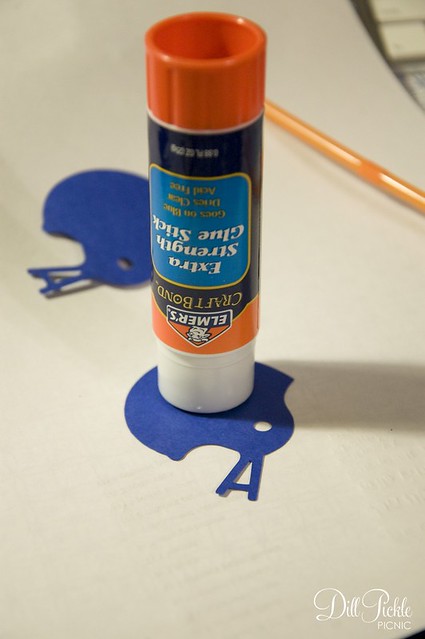
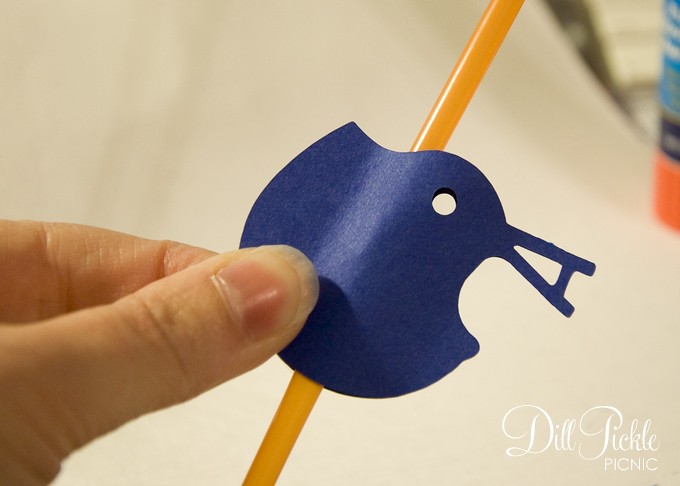
  1. Punch out your helmets.  For this version of this process I used my Silhouette to quickly cut out my helmets using some cardstock I had left over from another project.   You will need two helmets for each straw you want to make.
  2. Using your glue cover the back of one helmet. I use a glue stick when I want to whip these up really quickly, but choose to use paper glue for the ones I sell in my store).
  3. DPPhelmetstraw10

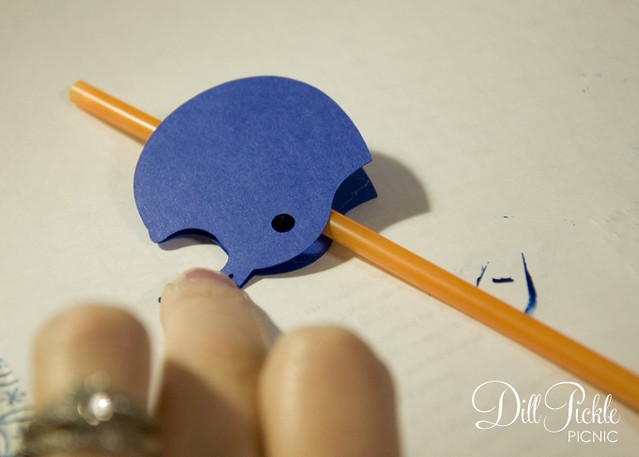
  4. Carefully layer the second helmet onto the first, taking care to line up the edges all the way around. Make sure you press to seal the pieces together around the straw.DPPhelmetstraw11
  5. DPPhelmetstraw12

  6. Repeat for the remainder of your straws

Wouldn’t these look fun for a sport themed birthday party as well?

DPPhelmetstraw13

Total Cost: $1 and up

See quick, easy…and cute! Will you decorate for your tailgate area this year? Can you guess who my team of choice is based on these colors?

War Eagle!

Like these but have no time to make your own?
Check out my shop and message me about creating a set custom for you!

DIY: Pumpkin Ale Labels

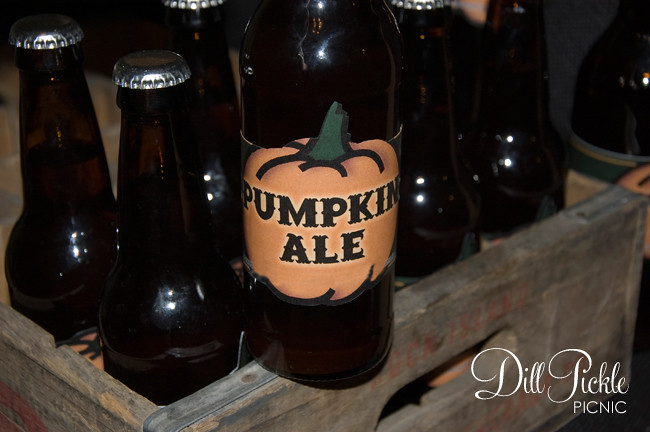
One last project going on in our household this week is the labeling of my hubby’s home-brewed pumpkin ale.  However these fun labels could look fun over your favorite pumpkin brew or any other fun Halloween beverage.  This could even be fun for other fall festivities or Thanksgiving.

Pumpkin Ale Labels
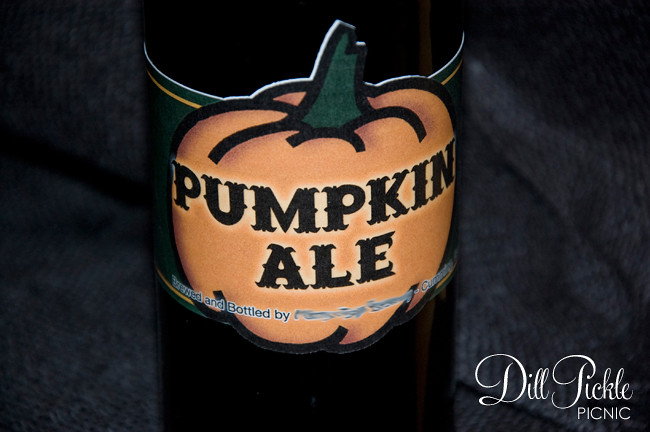
I printed these out on standard paper and then ran them through my Xyron machine, so these labels won’t stand-up to being iced down.  Then I setup a cut file on my Silhouette (which I’m still learning how to use) and cut them out.  The labels were quickly thrown together, but overall I’m happy with how they turned out.

Don’t have all the fun toys above?  That’s ok too!  You can easily make your own by downloading the printable PDF from below and printing it out onto full sheets of labels and then trimming around them!

Click to Download Printable PDF

Pumpkin Ale Labels

Now that the pumpkin ale labels are finally all attached and ready for a Halloween party this weekend…it’s time to start thinking about fun ideas for the Holiday Ale coming up next!

I hope each of you has a safe & spooky weekend, Happy Halloween Y’all!!

Semi-DIY: Creating Coasters – Part 2

So yesterday you saw our first re-purposed item coaster attempt, today I”ll show you the latest additions and how they came about.

Back in June, the boy and I celebrated one glorious year of marriage with a fun little trip to Asheville, NC.  We took a couple days off from work, and the hubs planned out the where/when/how and kept it as a surprise destination until the morning we left.  He chose Asheville because 1)I had never been 2) it offered plenty of outdoor activities (which we both enjoy) 3) it offered nice lodging & dining options and 4) being at a high elevation that Atlanta it would be a nice relief from the oppressive heat that has plagued the Atlanta area this summer.

All I can say about reason #4 is HA!   Mother Nature definitely didn’t get that memo, and instead it was a sweltering mess of high temperatures mixed with humidity from the depths of places known for fiery torture.  Any of your familiar with Weddingbee might remember that Mrs. Snow was getting married in Asheville in June…yes, it was the same weekend and she blogged about the crazy weather swing as well.  So, we rearranged several of the things the boy had in his plans so we didn’t melt away in the oppressive heat…and in the midst of wandering around we realized that weekend was also the River District Artists Studio Stroll.

So we drove over and wandered around through several of the studio’s, not really looking for anything in particular.  Then right before turning around to make our way back to the car (and out of the heat) we walked into Michael Hofman’s Studio.  Michael makes beautiful pieces of porcelain pottery using antique lace to make impressions into his pieces.  Some of the lace he uses is centuries old, from things like christening gowns & wedding dresses.  It was quite interesting to meet him, and see part of his process in action.  He was even telling us about someone who brought in their grandmothers wedding dress to use to create their wedding china (incidentally the dress was not harmed in the process).  So we looked around thinking we might pick up a serving platter, but then the boy picked up these small square plates and said “hum? think they could be coasters?”
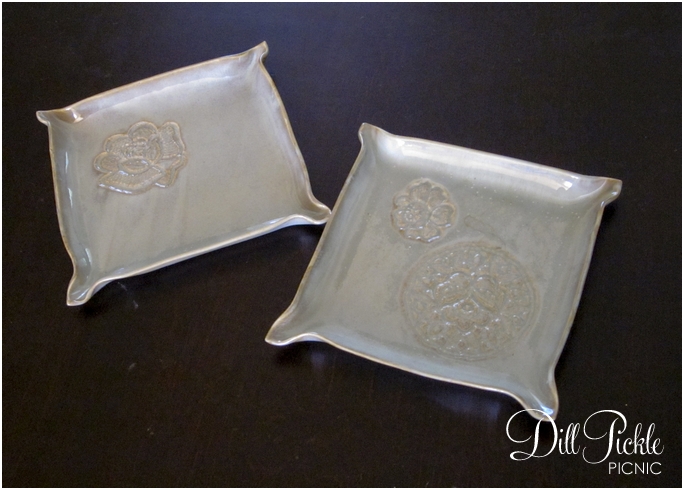
So, we picked up two of the square tapas plates.  Once home, we again brought out some felt pads from the local dollar store (the thinner of the selection this time) and added one to each corner of the plate.

Instant coasters, that once again provide a useful reminder of our anniversary trip!  Look at the lace details up close…aren’t they stunning?  Those lace details also provide a place for beverage sweat to pool, gotta love it when something is both beautiful and useful. 🙂
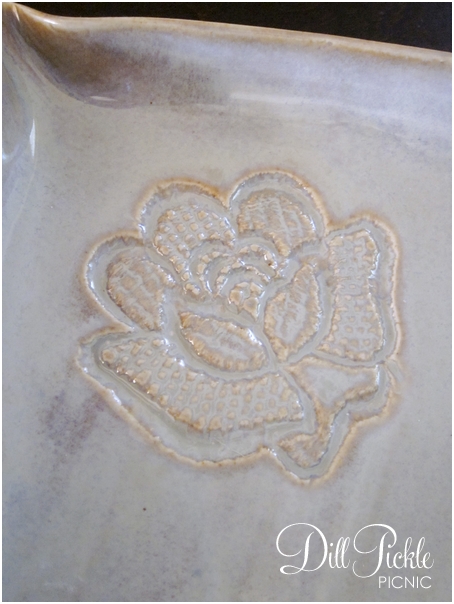
Can you tell we tend to purchase only mementos that have an actual use around our house?  We tend to buy art or handmade pieces to commemorate special trips or events…that and I buy magnets (which I still need to figure out what to do with since I’ve picked up magnets from my travels my entire life).  What do you pick up as mementos of special occasions or trips?
Semi-DIY: Creating Coasters – Part 1

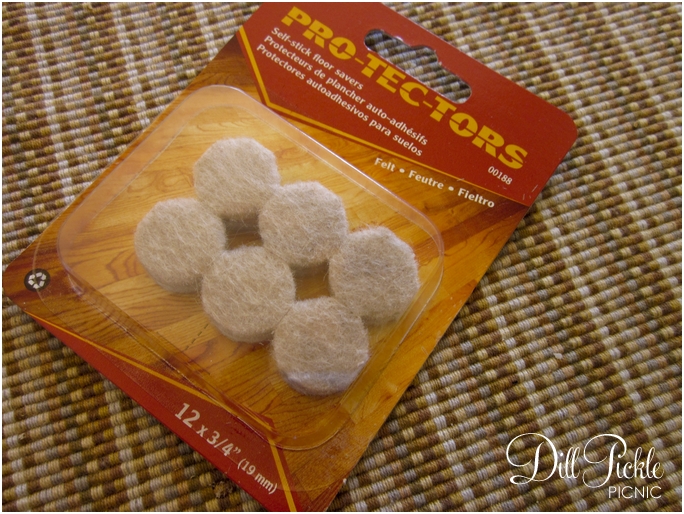
We don’t like coasters.   There…I’ve said it out loud.  That’s not to say that we prefer to place our sweating beverage glasses or bottles directly onto surfaces, I’m just saying  we haven’t found any that we BOTH found aesthetically pleasing.  Then something happened…we stopped shopping for them and instead focused on things we could make into them.  This is the story about how we used these little guys from the local dollar store to solve our coaster dilemmas.

dollar store felt floor protectors

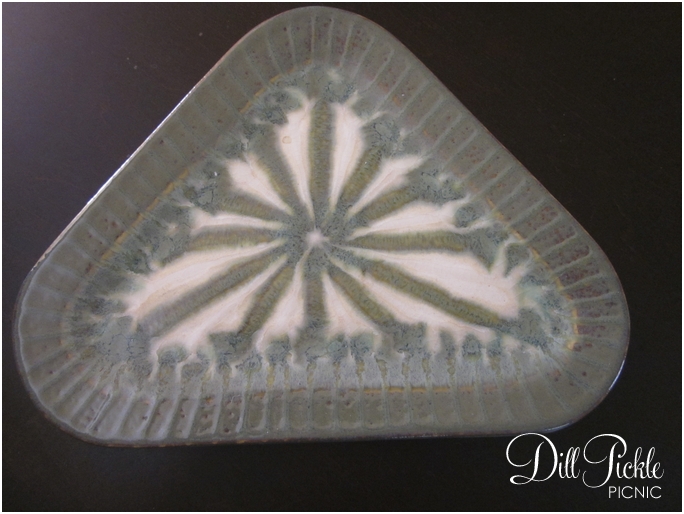
Last year while on a bit of a family vacation with the boy’s family we noticed this fun piece of flattened pottery on a deck side table in the house we were staying in.  It was the perfect size for a couple of glasses and still appealed to both our senses of design.  Interestingly enough we already owned a bowl in a similar pattern from the same pottery studio that the boy uses on his bedside table to store the contents of his pockets each night.  Do you see where I’m going with this?  Yep, we looked around the shops that weekend in search of a plate to use as a coaster on our living room end table. We ended up choosing the small triangular plate from The Good Earth Pottery, their stuff is great in not only is it appealing to the eye, it is also dishwasher and oven safe as well.

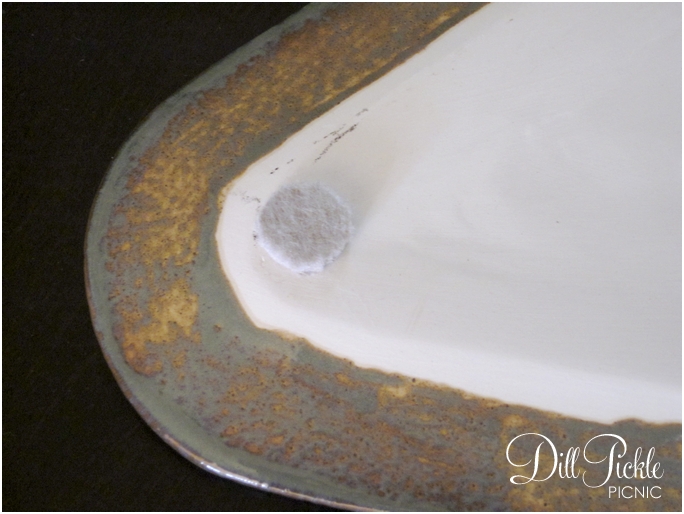
Then to keep our fun new find from scratching up our tables we just added one of the little felt pads to each corner.


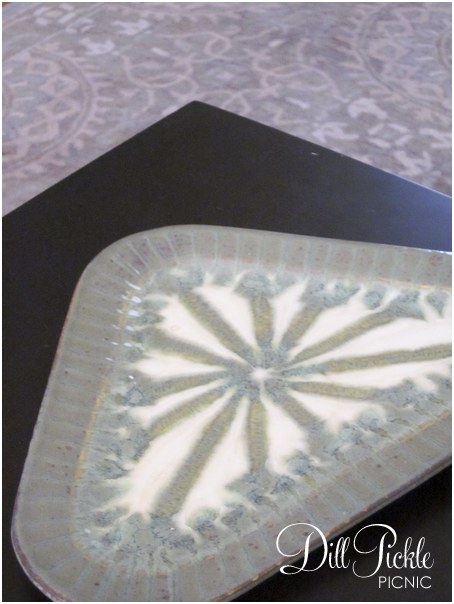
Instant extra large coaster!  What’s really nice is when I am lazy and fill up a Nalgene bottle with water…it fits on the coaster with no worries as well.  As do ice cream bowls, large coffee mugs…you get the picture. You can see in the next photo how the colors in the plate match our rug, but sadly what you can’t tell is how nice it looks on our end table.

Overall, I’m really pleased with how our initial attempts to use something not originally intended as a coaster worked out.  The benefit we never considered when we initially picked this piece was how any sweat from glasses placed on top would pool in the small groves of the pattern , this means the bottom of the glass stays drier than if the piece were a completely flat surface.  Plus, the coaster also serves as a very useful reminder of our trip to Highlands, NC. 

Come back tomorrow and I’ll show you round 2 of our coaster experiment! 🙂

How have you re-purposed items to create the “thing” that seemed to elude you otherwise?  Was it a success?