Using Envelope templates…of doom!

I love paper and I love office supplies.  There, I admitted it, so when I found a fun piece of paper in my envelope of doom I figured what better than to turn it into paper office supplies.  If you’ve followed my blog for a while you already know I love both lining envelopes and making my own envelopes, and some of my favorite tools are the templates you can purchase from Paper-Source.  I’ve more than gotten my money’s worth out of the ones I own, so when I was in the store a few weeks back taking a little class and saw the new baby sized envelope template I had to try it out.

This is the template kit I choose, the other option had pink paper selection but looking around here should explain how much I love blue and green so naturally I selected the “pool” color selection.

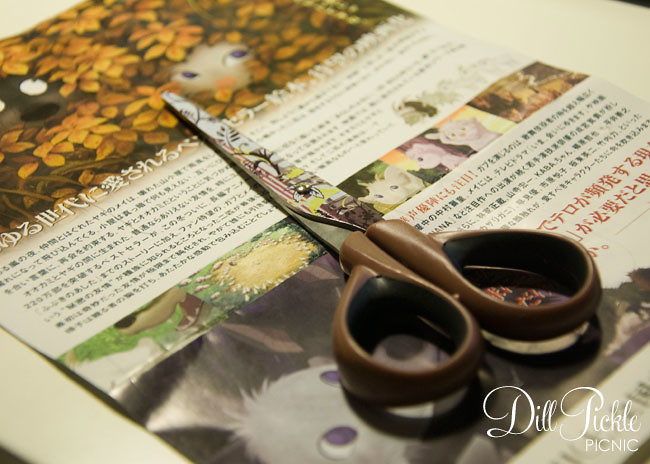
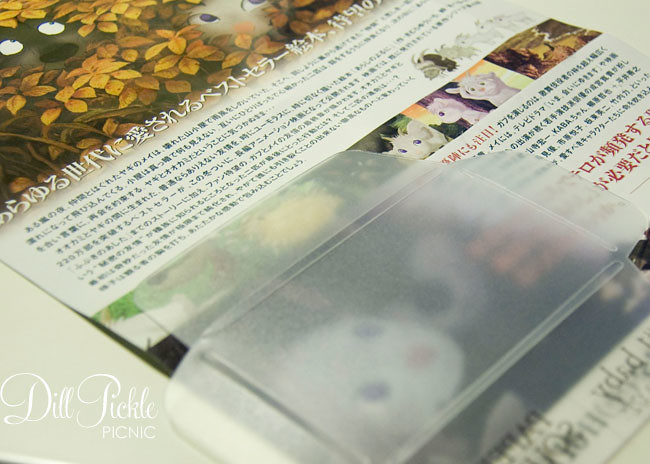
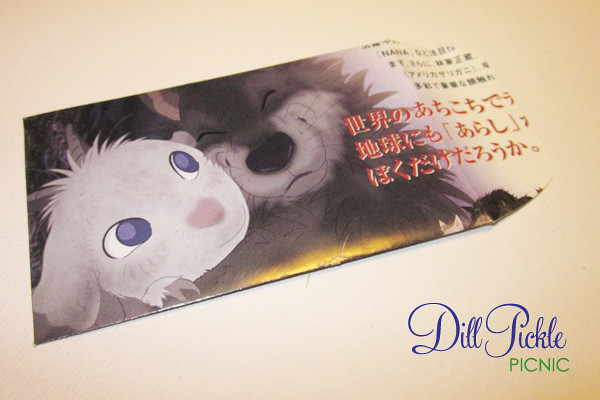
And this is the paper I found folded up in my envelope of doom!

Using their envelope templates is super-simple.

  1. Trace around the template on the reverse side of the paper.
  2. Cut out along the lines
  3. Score where the inner opening of the template are (I use a scoring board from Martha & love it)
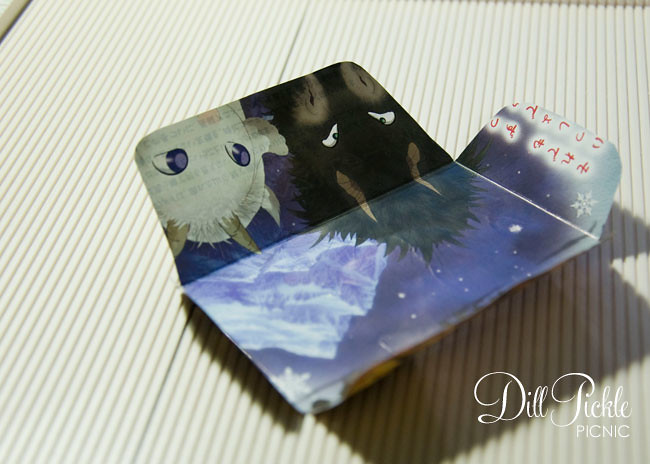
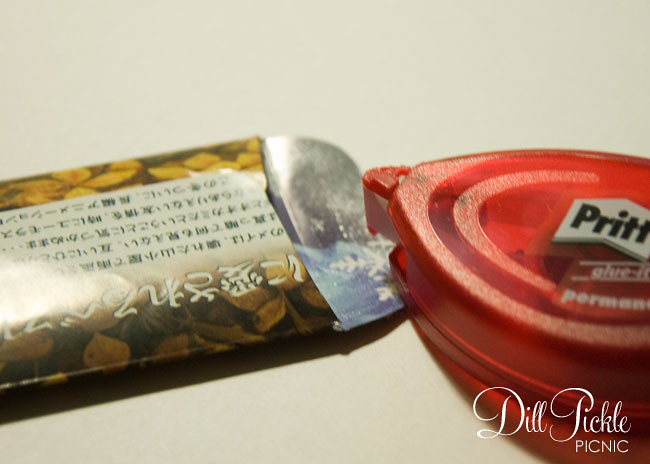
  4. Glue the edges
  5. Put those babies to use, these just happen to be the perfect size for a business card!
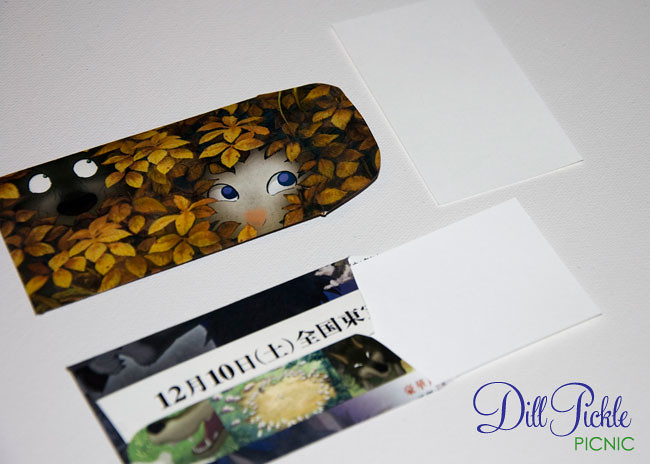
So basically I used contents from my “Envelope of Doom” to create “Baby Envelopes of Doom” 😉  In keeping with the rules of the game, the items were to be gifted to someone else…and these just so happened to be included in a swap package I was sending out!  I love it when things work out like that!
** I have been in no way compensated for my options or the products referenced above.  These are purely my unsolicited options of crafty products I use and adore! **
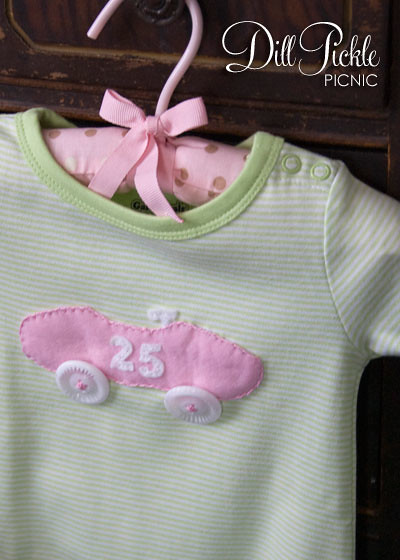
DIY: Sweet Race Car Onesie

I have this “thing” where I feel like I need to make a little something for each and every baby/bridal shower I attend.  It’s a compulsion of sorts and often I stress myself out coming up with the perfect little handmade treat to go with the gift purchased off the registry.  With 4 people around me having babies and a few weddings thrown in you can see where I might have my hands full.  However, the gift below was not only the easiest to construct and economical, it was also the easiest to come up with.

You see my friend’s husband drives a race car in one of the local circuits.  He already has big dreams of his sweet little girl being the next female racing star, so it just stood to reason that she would need the proper attire even at her young age to support her favorite race team!  Granted here in the south there is a huge supply of NASCAR baby racing gear so I could have bought something commercially, but I thought she needed something a little more “sugar & spice” to mix with “my daddy rocks”.

Materials Needed:

  • Cotton Onesie
  • Fabric for car & numbers (non-raveling since there will be exposed edges)
  • Matching embroidery thread
  • 2 Large Buttons
  • Heat Tape

Supplies Needed:

  • Needle
  • Scissors
  • Template
  • Pencil or Pen
  • Iron

Instructions (text below pictorial):

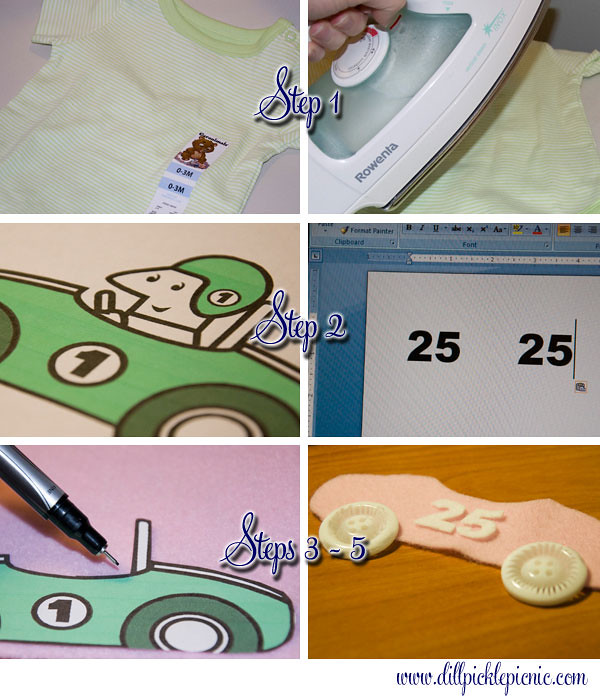
  1. Remove all stickers and tags from onesie and press flat with iron.
  2. Print out your race car and number templates.  (I used a stock image from MS Clip Art and re-sized it to fit a smaller onesie)
  3. Cut out your race car shape.
  4. Trace template outline onto backside of fabric (I used a regular pen, however a fabric marking pen/pencil would be a better option).
  5. Use scissors to cut out along traced guidelines
  6. Repeat steps 3, 4, and 5  to create race car numbers
  7. Using embroidery thread  sew the numbers to the car.  I used a straight embroidery stitch and stitched down the center of each number.  You could also do this step with your sewing machine if you prefer.
  8. To help hold the car in place while you stitch place one small piece of Heat Tape down the center of the car and press onto the onesie.
  9. Now that the car is stead place the steering wheel under the edge of the car fabric and using the same method as in Step 7 sew it to the onesie.
  10. Switching embroidery thread to match the body of the car, use a blanket or edge stitch and sew along the car’s edge, attaching it to the onesie.
  11. Attach your button wheels to the car also with embroidery thread, careful to tie off all knots/etc. under the buttons or car to keep “itchy stitches” away from baby.

Cost Breakdown:

  • Onesie – Garanimals brand from Wal-Mart – $3.81
  • Embroidery Floss – Had on Hand from multipack purchase 2+ years ago
  • Pink  Felt – $0.26
  • White Felt – Had on Hand
  • Buttons – 4 Pack from Dollar Tree/used 2 – $0.53
  • Heat Tape – Had on Hand
  • Grand Total:  $4.60

_________________________________________________________________________

Safety Note:   Make sure all buttons are sewn on securely.  Due to buttons, do not leave your baby unattended while wearing this garment.

_________________________________________________________________________

What about you…anyone else have my same “I must make them something compulsions”?  And if so, please share some of your favorite DIY baby gifts…

DIY: Easter Napkin Wraps – Religious Themed

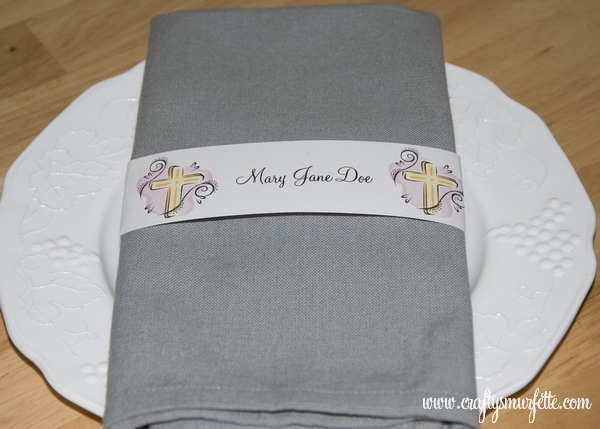
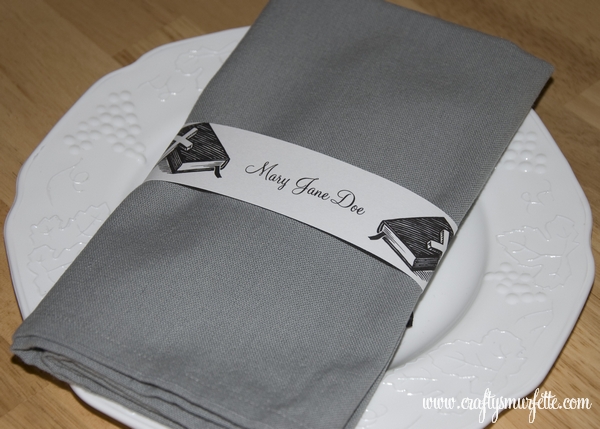
I have a friend putting together a ladies pre-Easter brunch at her church who asked me if I could put together a couple of reusable religious themed wraps.  So using MSClipArt (I’m being lazy since I’m so swamped at work) I whipped up several options that could be used not only at Easter but for other events later in the year.

Let’s start out with a pastel cross theme:


Download Template:  Pastel Cross Napkin Template

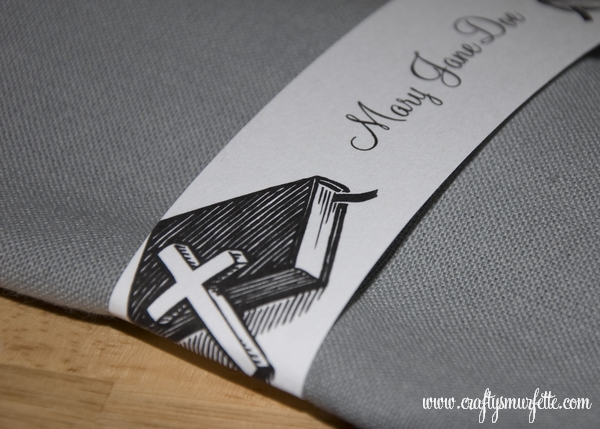
And then my friend requested a black & white option with a bible theme:

Download Religious theme template: Black & White Bible Napkin Template

All templates above use Monterey BT font which is free to download from SoFontes (see link on templates page).  New to Napkin Wraps?  No worries, visit this post for step-by-step instructions on how to use my napkin wrap templates!

DIY: Pink Lily Napkin Wraps

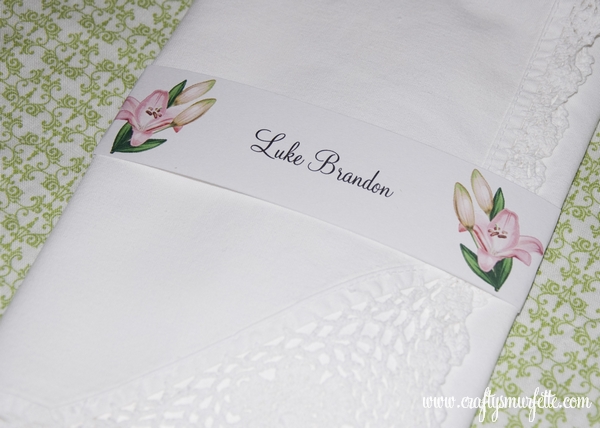
Yesterday a reader sent me an email asking for a template featuring an Easter Lily, and since I am always so excited to hear from someone who reads my little blog I couldn’t turn her down.  So, Becky…this one is for you and thanks so much for your kind words!


To Download Template:  Pink Lily Napkin Wrap Template

All templates above use Monterrey BT font which is free to download from SoFontes(see link on templates page).  New to Napkin Wraps?  No worries, visit this post for step-by-step instructions on how to use my napkin wrap templates!

It’s true what they say about comments being the crack for bloggers…so what say you?  Any suggestions for future templates that you’d love to see?

DIY: Easter Napkin Wraps – Part II

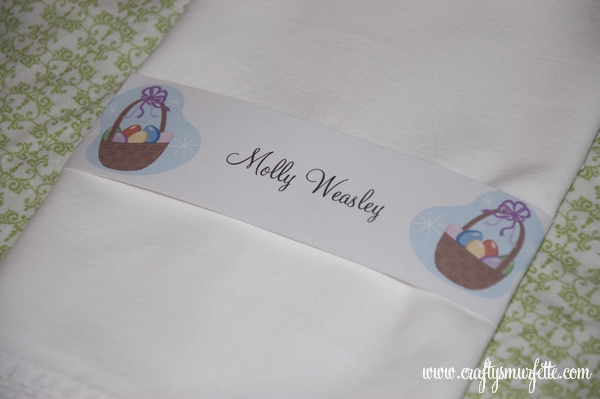
Today we have Easter baskets & banners, as well as a new idea for how to use the napkin wraps.  Lets start out with a cute Easter basket wrap:

To download: Easter Basket Napkin Template

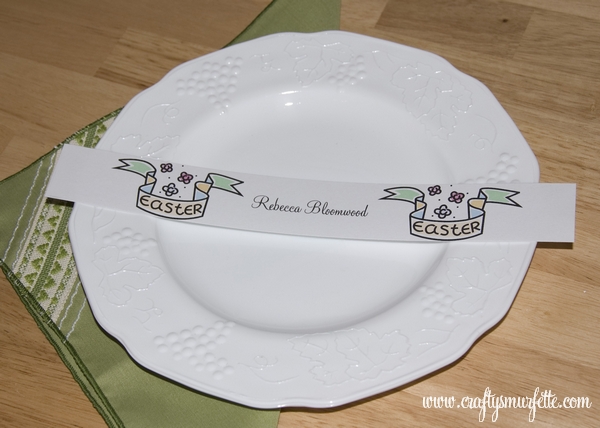
Next up, a cute Easter banner template that can be used as either a standard napkin wrap, OR just cut and lay it across your place-settings as a quick & simple name card.  These would also but cute if cut on the ends to duplicate the banner shape (I just thought of that as I was posting the photos).


Download: Easter Banner Napkin template

All templates use Monterey BT font which is free to download from a link on the templates page.  New to Napkin Wraps?  No worries, visit this post for step-by-step instructions on how to use my napkin wrap templates!

_________________________________________________________________________

In other news, we started the great craft room/office/spare bedroom relocation process.  It will be amazing to have a much brighter, larger space to use for my crafty fun and office but I dread the process since it involves painting and new flooring.  Any suggestions on how to organize all my craft supplies once I’m able to unpack them?

DIY: Easter Napkin Wraps – Part I

I realized this week that Easter is just around the corner.  It seems that this year is just speeding by and I’m left wondering where did the first quarter of 2010 go?  Sadly, the job that pays the bills has been demanding most of my nightly internet time and I missed St. Patrick’s Day completely…but I am determined to whip together a few last-minute Easter decorations this week.  Starting with napkin wraps!

This post is about more casual napkin wraps, with bunnies.  Up next will be a post with Easter baskets & banners.  Later this week I’ll post a few more religious themed wraps I put together for a friend to use at a church event.  It going to be a Napkin Wrap fest this week in the Smurfy household 🙂

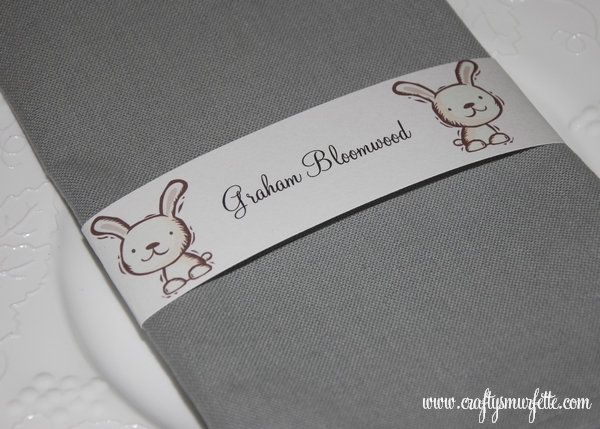
Let’s kick this off with the cutest little brown bunny.  He’s so cute I want to hug him 😉


Download template: Brown Bunny Napkin Wrap Template

And a more vintage looking bunny:

Download: Vintage Bunny Wrap Template

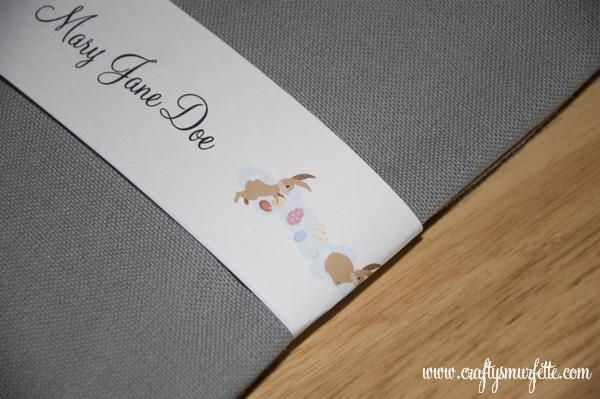
A finally, a parade of bunnies!

Download: Bunny Parade Wrap Template

All templates use the Monterey BT font which is free to download from Sofontes (see link on templates page).  New to Napkin Wraps?  No worries, visit this post for step-by-step instructions on how to use my napkin wrap templates!

DIY: Holiday Napkin Wraps – Part II

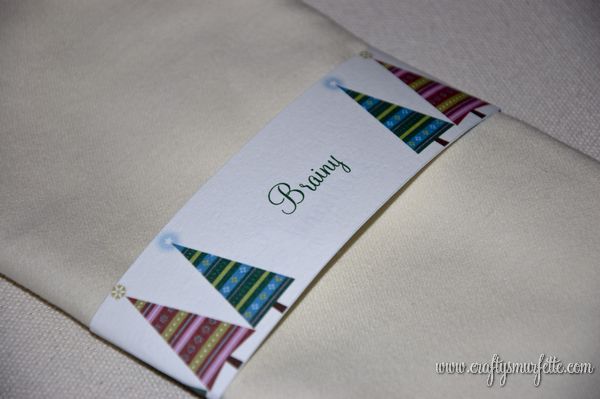
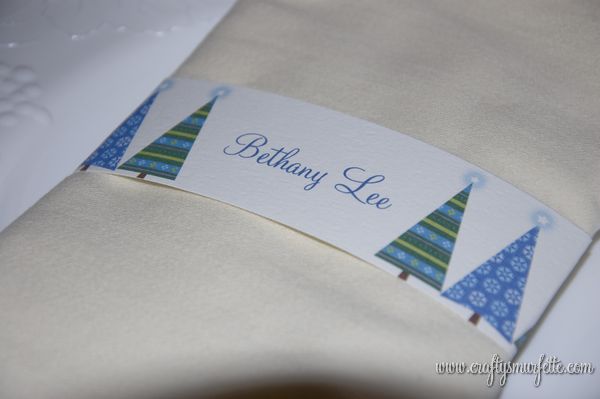
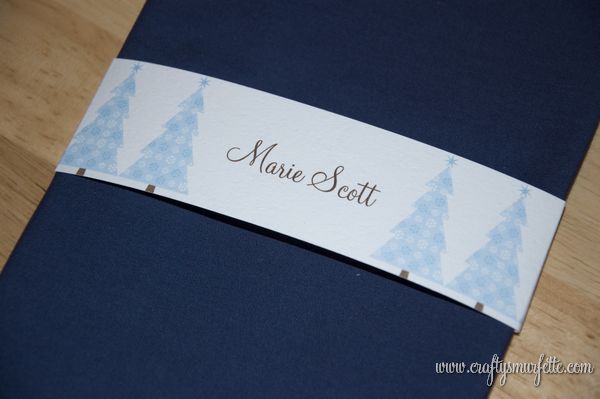
And now time for the “tree edition” of the napkin wraps.  Again, these work the same as my previous wraps, refer to this post for complete instructions.  Merry Christmas from our Smurfy house to yours!

The first is a Set of Multi-Colored Trees
Click to download: csmurf_treenapkins

Or how about my favorite with green & blue trees
click to download template:  csmurf_greenbluetreenapkins

and finally a winter wonderland with pale blue trees
click to download template:  csmurf_palebluetreesnapkins

Check back tomorrow for my final Christmas project for this year:  My version of these 🙂

DIY: Holiday Napkins Wraps – Part I

Ever had that moment when you know you’ve already created something and just can’t find it.  That was me with the Holiday Napkin wraps…I created and tested them weeks ago and then promptly lost the files.  Thankfully today I found them, and not a moment too soon! These work the same as my previous wraps, refer to this post for complete instructions.  Merry Christmas!!

The first is a sepia toned winter cottage.
Click to download: csmurf_rustichousenapkins

Or how about some pastel ornaments
click to download template:  csmurf_pastelornamentnapkins

Check back tomorrow for the “tree” edition of Holiday Napkin wraps & hope you and yours have a wonderful Christmas!

Die-Cut Christmas: Food Buffet Labels

I’ve dubbed this Christmas season in our home as the “Die-Cut Christmas” because I plan to make several projects using both my Cuttlebug for die-cuts and paper punches.  First there was the Christmas Card Addresses, then the place cards and I liked how they turned out so I moved onto today’s project:  Buffet Labels.

Editor’s Note: These will actually get quite a bit of use during the holidays with not one but Christmas potluck lunches, and I’m so excited to see them in all their glory!

Materials Needed:

  • White or Ivory Text Weight Paper
  • Small pieces of Heavy weight card stock or even recycled cardboard
  • Green Cardstock or Construction paper (it’s ok to reuse envelopes, etc.)
  • Red Paper (it’s ok to reuse envelopes, etc.)
  • Glue Stick or pen

Tools  Needed:

  • Top Note Die from Stampin Up
  • Die Cutting Machine (I use a Cuttlebug)
  • Sizzix Festive Christmas Set (purchased 50% off at Joann’s)
  • Standard Hole Punch
  • Scissors or Paper Cutter
  • Computer with Word Processing Software of your choice
  • Home Printer

Getting the pieces punched out:

  1. Cut your paper.  I cut my paper ahead of time so it is easier to center it on the die cut.  Since I am using regular 8.5 x 11 paper, I simply cut my paper into fourths.  For this project I used my paper-cutter because it has the outlines for this size paper on the board so I just line it up and cut.  Each piece of paper should end up 4.25 x 5.5 inches.
  2. Setup your document in your word processing software.  I use MS Word, so I just create a new document and then set the page size to be the 4.25 x 5.5 inches of my pre-cut paper.  Then I center the document and choose my font/size of choice.  For this project I used Monterey BT which you can download for free (see my templates page for a link). This is where you could get really fancy and use the mail merge feature of MS Word to fill in from a spreadsheet, it’s a great time saver but is a bit tricky to setup…or you could just cut and paste in each one like I did.
  3. Print out your individual buffet labels.
  4. Start die cutting.  Using the Top Note Die face up in your machine, carefully center the printed page in the center of the surface.  Run through the machine.  Repeat for each printed page.
  5. Continue die cutting.  Now take out your green paper and the holly die and start working on cutting out your leaves.  A large holly shaped paper punch would also work well for this if you have one!  You’ll need 2 holly leaves per buffet label.  Note that I didn’t use whole pieces of paper when I cut out my leaves…I had some scrap paper from the edges of some green top notes I cut out earlier so I just used the scrap paper to line up over my leaves.  This is a great usage for scraps or even perhaps those envelopes from the Christmas cards you’ve already received!
  6. Punch out your berries.  Now the Holly Die comes with a berry if you’d like a single red berry…but I liked the smaller berries so I went with a standard hole punch.  You’ll need 3 to 4 berries per buffet label.  Again this is a great place to reuse paper…you can see I used the cover of an old PaperSource catalog that was in my recycle bin.

Putting it all together:

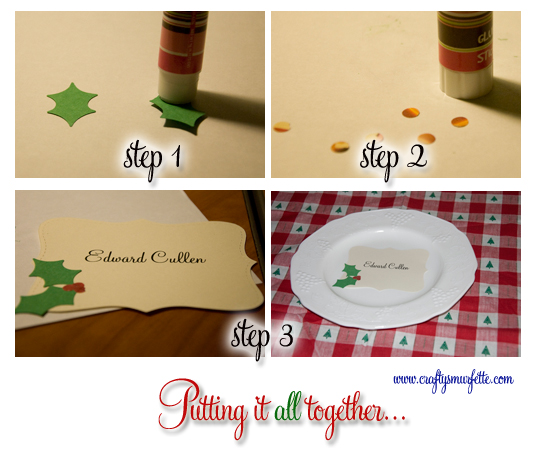
  1. Start with the Leaves.  Using a piece of plastic or paper, take the glue stick and cover the back of 2 of the holly leaves so the portions of the leaves that will attach to the buffet label are covered.
  2. Carefully lift them from the backing and place onto label (I found it easier to start with the lower leaf in the bottom left corner and then add the upper one afterwards).  To remove the leaf from the backing I was able to use my fingernail, however tweezers would also work well for this.
  3. Add the berries.  Using a glue stick repeat the step above for the berries, this is the most tedious step.  I think a glue pen or even school glue might have worked more quickly for this step.
  4. Cut a small piece of heavy cardstock or recycled cardboard (think cereal boxes) approx 1 inch by 3.5 inches per buffet label.
  5. Fold the first third of the cardboard strip forwards and align on the back of the label, holding in place with a glue stick or even tape.
  6. Stand it in front of your tasty dishes and let them tell the world that your cobbler is made of blackberries 😉

If you like these, you might also like the other entries in my Die-Cut Christmas Series:
Die-Cut Christmas Card Addresses
– Die-Cut Seating Cards
– Die-Cut Food Buffet Labels

Die-Cut Christmas – Seating Cards

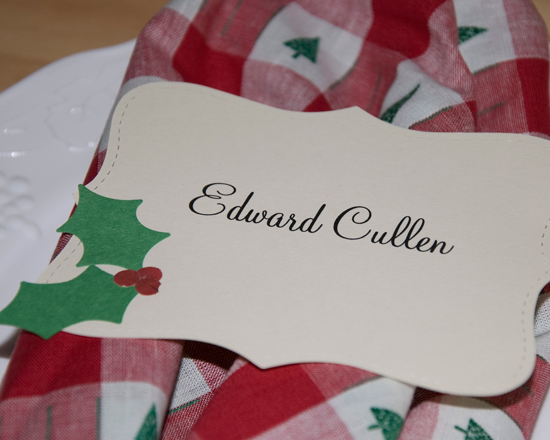
I’ve dubbed this Christmas season in our home as the “Die-Cut Christmas” because I plan to make several projects using both my Cuttlebug for die-cuts and paper punches.  First there was the Christmas Card Addresses, and I liked how they turned out so I moved onto today’s project:  Seating Cards

Editor’s Note:  Here is where I should be totally honest and fess up that my family will in no shape or form use this for our Christmas lunch or dinner…but I can dream right?

Materials Needed:

  • White or Ivory Text Weight Paper
  • Green Cardstock or Construction paper (it’s ok to reuse envelopes, etc.)
  • Red Paper (it’s ok to reuse envelopes, etc.)
  • Glue Stick or pen

Tools  Needed:

  • Top Note Die from Stampin Up
  • Die Cutting Machine (I use a Cuttlebug)
  • Sizzix Festive Christmas Set (purchased 50% off at Joann’s)
  • Standard Hole Punch
  • Scissors or Paper Cutter
  • Computer with Word Processing Software of your choice
  • Home Printer

Getting the pieces punched out:

  1. Cut your paper.  I cut my paper ahead of time so it is easier to center it on the die cut.  Since I am using regular 8.5 x 11 paper, I simply cut my paper into fourths.  For this project I used my paper-cutter because it has the outlines for this size paper on the board so I just line it up and cut.  Each piece of paper should end up 4.25 x 5.5 inches.
  2. Setup your document in your word processing software.  I use MS Word, so I just create a new document and then set the page size to be the 4.25 x 5.5 inches of my pre-cut paper.  Then I center the document and choose my font/size of choice.  For this project I used Monterey BT which you can download for free (see my templates page for a link). This is where you could get really fancy and use the mail merge feature of MS Word to fill in from a spreadsheet, it’s a great timesaver but is a bit tricky to setup…or you could just cut and paste in each one like I did.
  3. Print out your individual name plates.
  4. Start die cutting.  Using the Top Note Die face up in your machine, carefully center the printed page in the center of the surface.  Run through the machine.  Repeat for each printed page.
  5. Continue die cutting.  Now take out your green paper and the holly die and start working on cutting out your leaves.  A large holly shaped paper punch would also work well for this if you have one!  You’ll need 2 holly leaves per name plate.  Note that I didn’t use whole pieces of paper when I cut out my leaves…I had some scrap paper from the edges of some green top notes I cut out earlier so I just used the scrap paper to line up over my leaves.  This is a great usage for scraps or even perhaps those envelopes from the Christmas cards you’ve already received!
  6. Punch out your berries.  Now the Holly Die comes with a berry if you’d like a single red berry…but I liked the smaller berries so I went with a standard hole punch.  You’ll need 3 to 4 berries per name plate.  Again this is a great place to reuse paper…you can see I used the cover of an old PaperSource catalog that was in my recycle bin.

Putting it all together:

  1. Start with the Leaves.  Using a piece of plastic or paper, take the glue stick and cover the back of 2 of the holly leaves so the portions of the leaves that will attach to the name plate are covered.  Carefully lift them from the backing and place onto name plate (I found it easier to start with the lower leaf in the bottom left corner and then add the upper one afterwards).  To remove the leaf from the backing I was able to use my fingernail, however tweezers would also work well for this.
  2. Add the berries.  Using a glue stick repeat the step above for the berries, this is the most tedious step.  I think a glue pen or even school glue might have worked more quickly for this step.
  3. Admire your work and set that table!

If you like these, you might also like the other entries in my Die-Cut Christmas Series:
Die-Cut Christmas Card Addresses
– Die-Cut Seating Cards
– Die-Cut Food Buffet Labels