DIY Link: Yo-Yo Christmas Trees & Product Review

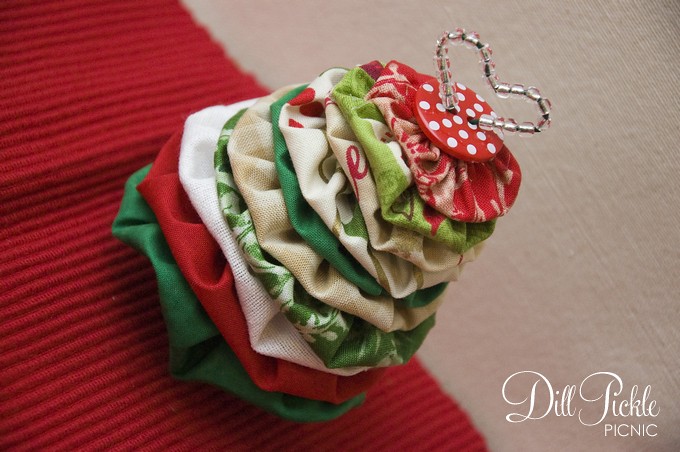
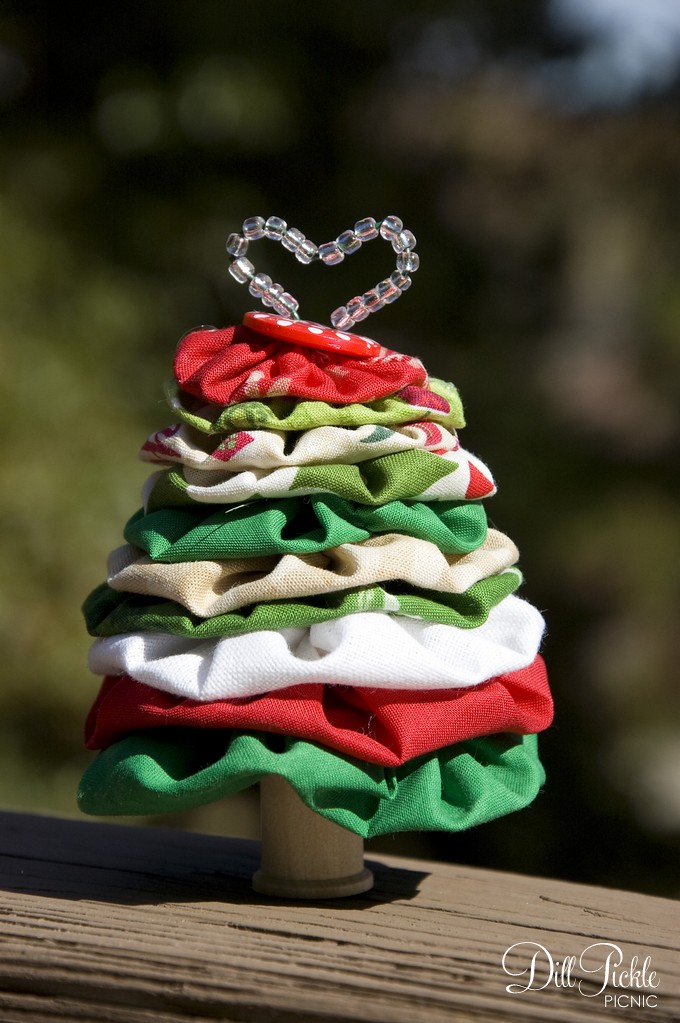
I’ve mentioned my love of Swap-Bot before, and today I’ll show off one of my latest projects that was shipped off several weeks ago to one of my swap partners.  The Yo-Yo Christmas Tree:

DPP-YoYoTree4

Isn’t it cute?  I love to make yo-yo’s, making them is quite soothing to me for some reason.   Typically I have a pile of them laying around with no clue how to use them and after seeing a yo-yo pumpkin this fall thought I should attempt to make a tree.  Then I saw this fun tutorial from Kiwi at Heart and she had made exactly what I was dreaming up in my head.  She does a great job explaining the process…I only did one thing differently.

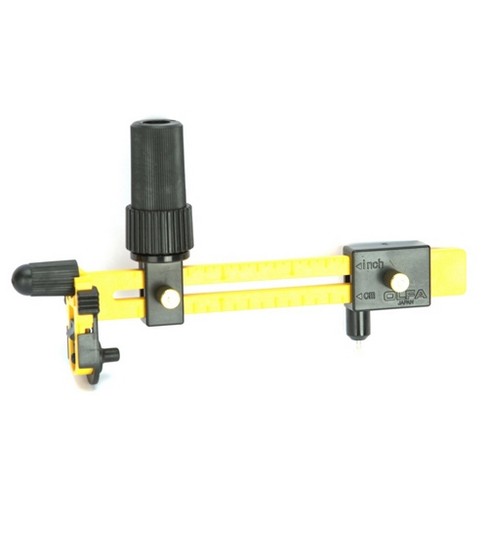
Where she uses templates to cut her circles, I decided to try out this fun little gadget I picked up 50% off at Joann’s a while back.

Olfa Circle CutterThe verdict?  I LOVE it!

PROS:
I was able to just adjust the setting to match her dimensions and cut the circles out with no templates.  It works much like using a string & pencil to draw a circle…only this bad boy has a sharp pin to hold it in place and a super shape rotary blade.  Such a time saver…especially when you love to make yo-yo’s as much as I do! I have a quilt I want to make this year that involves circles and I am thinking this little guy might be a life saver when I get to that point.  So if you cut out circles-o-plenty of like I do…it might be the best $15 you spend.

CONS:
It uses a really sharp rotary blade, so you absolutely must use a cutting mat underneath it.  It can also be a bit odd to hold and turn at first, but once you get the hang of it that isn’t really a problem.

Any other recommendations out there for yo-yo construction or quilting gadgets I might also find indispensable?  Please, share!!

DPP-YoYoTree1

Make sure you check out the yo-yo tree tutorial:  Yo-Yo Christmas Tree Tutorial from Kiwi at Heart

You might also check out Mummy Crafts to see her take on the same tutorial, which also includes a template for cutting the circles.

Fine Print:  I have not been compensated in any way by either Joann’s or Olfa for my review of this product.  It is simply my opinion based on usage of the product I purchased.
DIY: Cute as Button Shirt

So, let the April Stash Bust posts resume (Yes, I realize it’s now May).  Mid-April I had the perfect weekend to get a few stash busting projects finished up since the hubby was at his dad’s to attend the first Indy Car Race in Alabama.  Racing just isn’t my thing so I opted to stay home and tackle our weed filled flower beds instead.  So, Saturday after spending the majority of the day working in the yard and finding out my credit card number had been stolen, I retired to my little craft room to see what I could whip up.

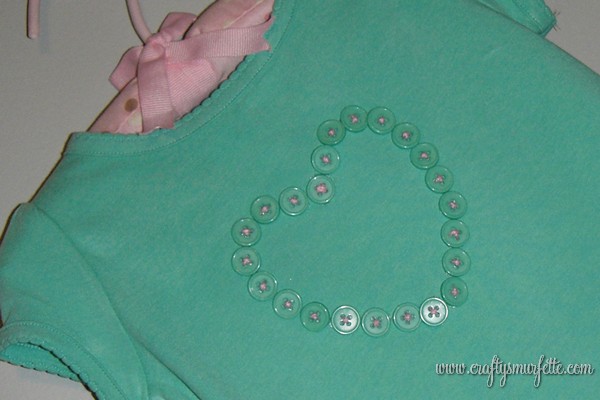
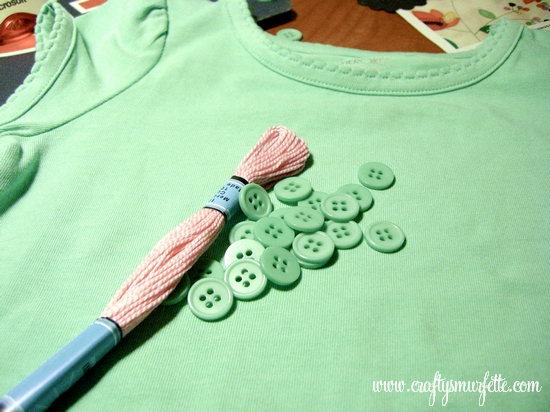
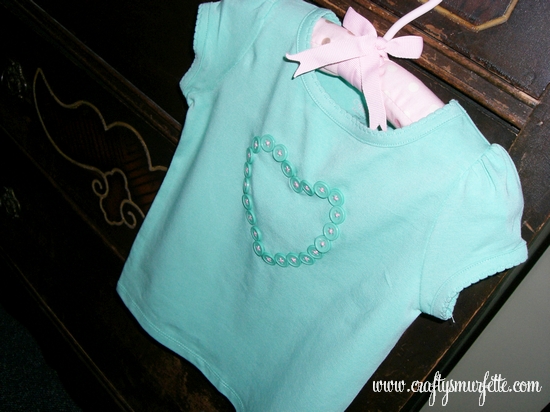
I had originally purchased this aqua t-shirt with the intentions of making my niece a bunny shirt for Easter.  Since that didn’t happen, I decided I needed to do something quick with the shirt so I could include it in a package I was planning to mail my sister that day.  So I started digging around in a couple of the plastic bins of craft supplies I have stashed in a closet and came up with some leftover buttons from a wedding project and a massive stack of embroidery floss.  Put all that together…and you get this Cute as a Button Heart Shirt.

It was super fast to make and turned out much better than I’d imagined.  I like that it looks like a more expensive boutique shirt, yet cost me right around $5.99 to make.

To make your own version you’ll need the following:

  • T-Shirt
  • Buttons (I used (25) 1 cm buttons for this project)
  • embroidery floss
  • needle
  • pencil to draw outline
  • heart shaped template (optional)
  • embroidery hoop (optional)
  • hot glue/fabric glue (optional)

Instructions:

  1. Press the shirt flat
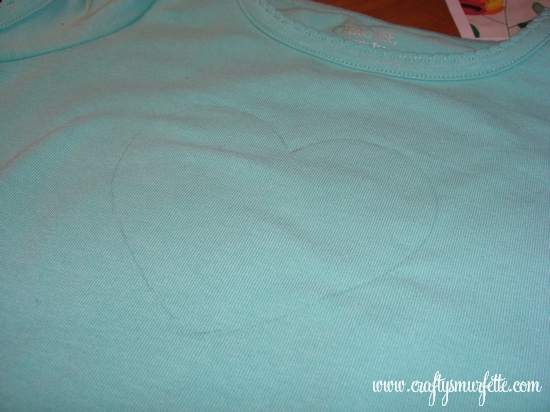
  2. Create Heart template and copy outline to shirt.  I used a regular pencil but a tracing pencil that washes away would have worked better if I’d had one.
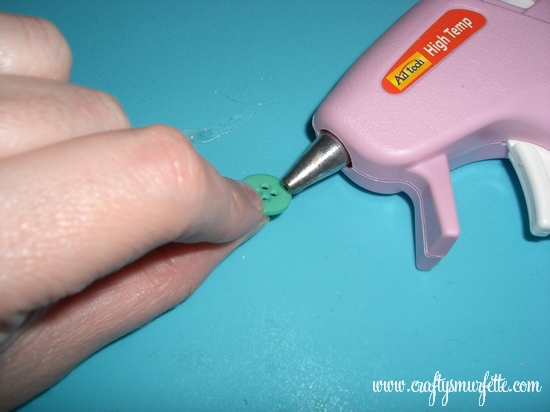
  3. If you want to add a little bit of extra attachment of the buttons to the shirt, take a moment to glue the edges of the buttons to the shirt.  Take care not to glue the centers so you can stitch them down in the next step.
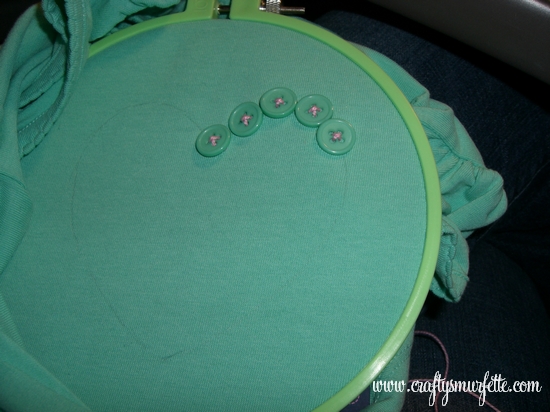
  4. Thread your needle with embroidery thread and tie off with a sturdy knot.
  5. Start in the center of the heart and stitch your buttons to the shirt with moving around the heart.  This is where an embroidery hoop might make the process much easier.
  6. And after about an hour….1 cute as a button heart shirt :

Oh…so about those cute pink shorts.  I have to admit I bought those Saturday on a trip to Target during April.  I know…I wasn’t supposed to be adding to the stash before I finish busting through it but if it was less than $1 does it count?  My local store had all their Easter goodies marked 75% off, but a nice lady watching me pick up a bag of Dove eggs told me it was actually ringing up 90% off.  Which included all their children’s Easter themed clothing.  So the shorts cost me a whopping $0.43 (including tax) and then I sewed a matching button in the middle of each of those cute little bows on the sides just to tie it all together.

Project Costs:
– TShirt –  from stash – otherwise Target – $5.00
– Buttons – free from stash – otherwise $1.99 for package, using 1/4 of package
– Embroidery Floss – free from stash – otherwise $0.99
GRAND TOTAL:  $7.98 if you needed to buy everything at once.
My Grand Total:  FREE from STASH (ok…$0.43 for the Easter Clearance shorts)

_________________________________________________________________________

Safety Note:   Make sure all buttons are glued and then sewn on securely.  Due to buttons, do not leave your baby unattended while wearing this garment.
_________________________________________________________________________

DIY: Sweet Race Car Onesie

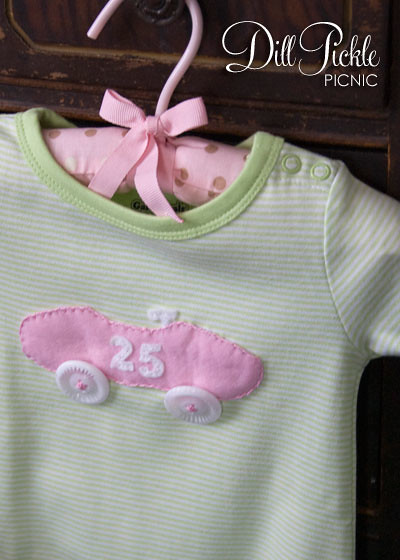
I have this “thing” where I feel like I need to make a little something for each and every baby/bridal shower I attend.  It’s a compulsion of sorts and often I stress myself out coming up with the perfect little handmade treat to go with the gift purchased off the registry.  With 4 people around me having babies and a few weddings thrown in you can see where I might have my hands full.  However, the gift below was not only the easiest to construct and economical, it was also the easiest to come up with.

You see my friend’s husband drives a race car in one of the local circuits.  He already has big dreams of his sweet little girl being the next female racing star, so it just stood to reason that she would need the proper attire even at her young age to support her favorite race team!  Granted here in the south there is a huge supply of NASCAR baby racing gear so I could have bought something commercially, but I thought she needed something a little more “sugar & spice” to mix with “my daddy rocks”.

Materials Needed:

  • Cotton Onesie
  • Fabric for car & numbers (non-raveling since there will be exposed edges)
  • Matching embroidery thread
  • 2 Large Buttons
  • Heat Tape

Supplies Needed:

  • Needle
  • Scissors
  • Template
  • Pencil or Pen
  • Iron

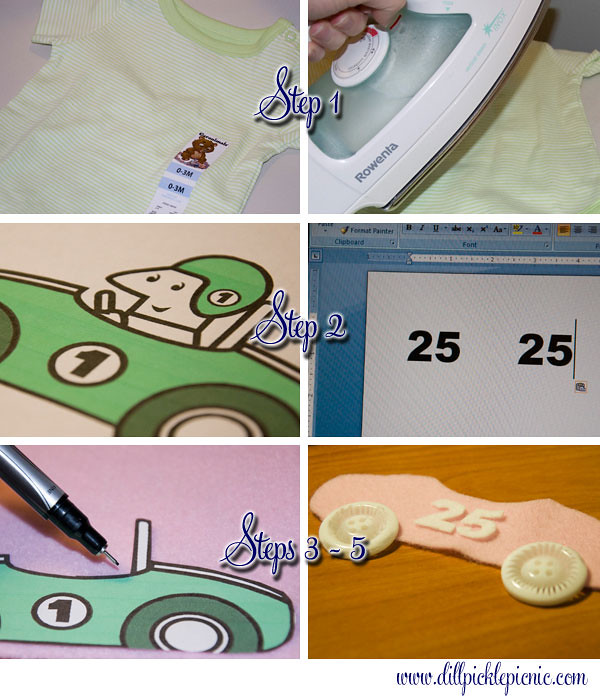
Instructions (text below pictorial):

  1. Remove all stickers and tags from onesie and press flat with iron.
  2. Print out your race car and number templates.  (I used a stock image from MS Clip Art and re-sized it to fit a smaller onesie)
  3. Cut out your race car shape.
  4. Trace template outline onto backside of fabric (I used a regular pen, however a fabric marking pen/pencil would be a better option).
  5. Use scissors to cut out along traced guidelines
  6. Repeat steps 3, 4, and 5  to create race car numbers
  7. Using embroidery thread  sew the numbers to the car.  I used a straight embroidery stitch and stitched down the center of each number.  You could also do this step with your sewing machine if you prefer.
  8. To help hold the car in place while you stitch place one small piece of Heat Tape down the center of the car and press onto the onesie.
  9. Now that the car is stead place the steering wheel under the edge of the car fabric and using the same method as in Step 7 sew it to the onesie.
  10. Switching embroidery thread to match the body of the car, use a blanket or edge stitch and sew along the car’s edge, attaching it to the onesie.
  11. Attach your button wheels to the car also with embroidery thread, careful to tie off all knots/etc. under the buttons or car to keep “itchy stitches” away from baby.

Cost Breakdown:

  • Onesie – Garanimals brand from Wal-Mart – $3.81
  • Embroidery Floss – Had on Hand from multipack purchase 2+ years ago
  • Pink  Felt – $0.26
  • White Felt – Had on Hand
  • Buttons – 4 Pack from Dollar Tree/used 2 – $0.53
  • Heat Tape – Had on Hand
  • Grand Total:  $4.60

_________________________________________________________________________

Safety Note:   Make sure all buttons are sewn on securely.  Due to buttons, do not leave your baby unattended while wearing this garment.

_________________________________________________________________________

What about you…anyone else have my same “I must make them something compulsions”?  And if so, please share some of your favorite DIY baby gifts…