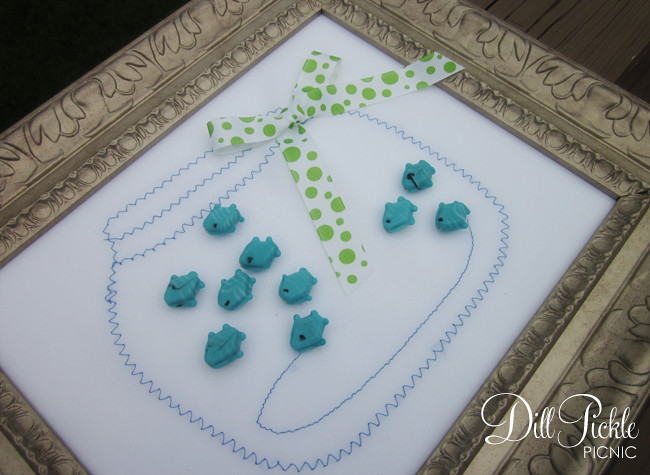
You’ve already seen the fishbowl message board I made as a gift to a friend. Now, let’s bring on the fish…the fish thumbtacks that is. I mentioned the Envelope of Doom in a previous post, this is second of the 3 (or more) projects I created using several components from the “envelope of doom“. Don’t have an envelope full of supplies…don’t worry. You could create this project using items from your local dollar store & craft store as well! This is one of the quickest projects I’ve taken on in ages.


.
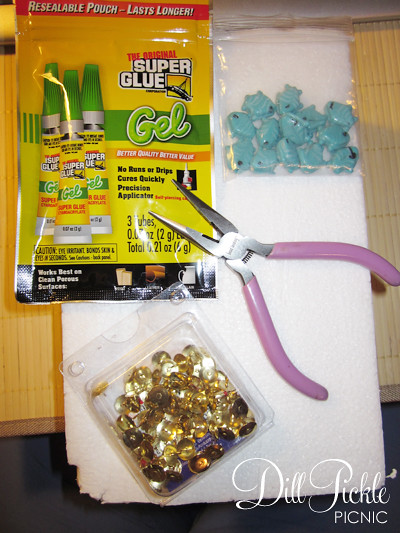
.Supplies & Materials Needed:
- Fish beads
Fresh from the envelope of doom, these happen to be glass - Thumbtacks
The old school, plain kind with flat tops - Glue
Any glue that will attach your bead material to metal will work here. I used super glue which held “ok”. One commenter suggested E6000 as a better option. - Foam block
Optional but extremely helpful - Pliers
Also optional for most people, but I’m not allowed to use super glue without the supervision of an adult and these help me not glue myself to things. One day I’ll tell you about the time I glued both hands to separate tools and needed my then boyfriend to rescue me. So many things will make more sense after that I’m sure! 😉
.
Instructions:
This is potentially the easiest tutorial I’ve ever written, and I think the photos tell the whole story.

- Count out the number of thumbtacks you need, and spread them out onto your Styrofoam block. By placing the sharp end into the foam it will hold them in place while you glue down the fish.
- Squeeze a medium-sized amount of super glue onto the first tack. I’m using the gel type of super glue from my local dollar store, this is because it is thicker and easier for me to work with. It also means fewer drips which makes it MUCH safer for me to use.
- Place a fish bead onto the drop of glue and press down. Let dry completely.
- I use the pliers to help center the beads really quickly before the glue sets. It is also helpful when removing them just in case they aren’t completely dry.
- Repeat for each tack
I had all the supplies in my stash to make these fun tacks, so my grand total was FREE! Gotta love that
Total Cost: $1.00 and up
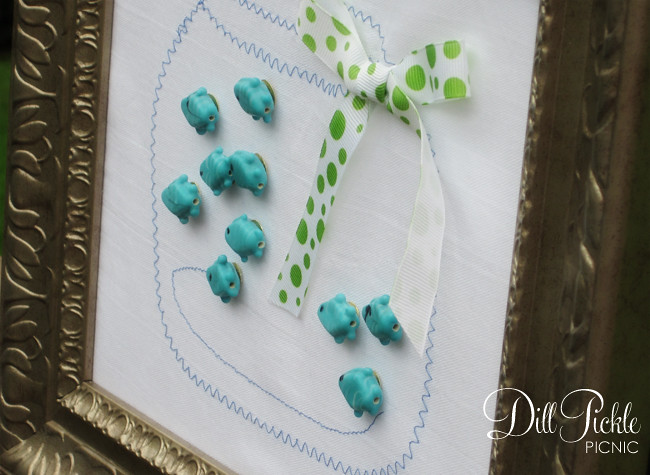
And after they dry, you end up with these cute little guys:

I think they really make the note board look more like wall art… even though now I wish I had painted the frame a fun green to match the ribbon.

I think this process could be fun to make all sorts of cute thumbtacks, so I see more of these in my future. How about you? Do you use cute things to attach things to your memo boards and if so where did you find your favorites?

Cute Idea bit that superglue will fail sooner rather than later. You’re better off using somethng like E6000.
Love the fishes and the board! When the wedding is over… I’m so doing this! (If my machine works. It’s motor is almost dead but I’ll be picking up an old foot petal one to restore that was my Baba’s sister’s).
ps. I totally thought you made Fimo fishes until I read that they were beads. =)
I have to make this. As soon as possible.
Heehee, that is too cute! What a great project, and I never would have thought of it! Will be going up on my blog soon. Love the fishbowl – the whole thing makes a super clever note board, have never seen anything like it. Now I’m thinking themed note boards…