DIY: Flower Arranging Simplified

I learned this trick from one of my high school friend’s mom years ago.  She is the quintessential southern mom and entertainer, so each time I have the opportunity to attend a shower,tea, or coffee that she is coordinating I make sure to take notes.  Want to see why….

This was from the Wedding Coffee they threw in my honor last Spring.  She just whips this up in a matter of moments.  It’s pretty amazing to watch!

I’m horrible at arranging live flowers.  It’s like I try to cram everything in the same place and end up with one side really over-weighing the other one…but using this little trick it’s a breeze to make sure you have things evenly placed.  It makes me *almost* look like I know what I’m doing….

Ignore the flowers in these photos, I used some leftover flowers my hubby gave me to get a bit more life out of them before they went into the trash and mixed in some of the knock-out roses & greenery from right outside our front door.

Supplies Needed:

  • Container to use for arrangement.
  • Floral Tape (or other waterproof tape)
  • Flowers & Greenery for arrangement
  • Snips or Scissors

Instructions:

  1. Take out your container and place it on a solid surface.  I like to use our milk glass leftover from the wedding, but a simple glass square from Dollar Tree would also work great.  Try to choose something with a wider opening so you can build your arrangement out with a bit more space.
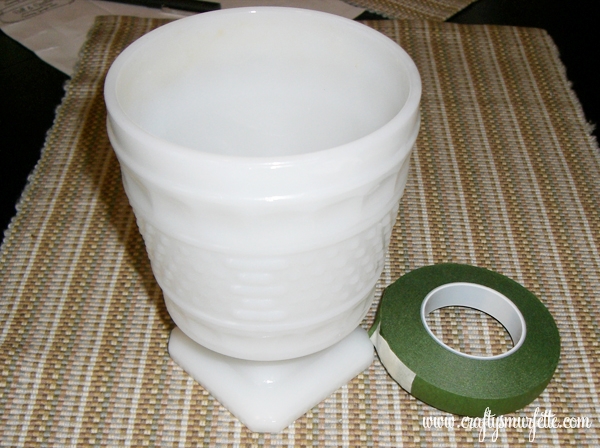
  2. Use scissors to cut strips of your floral tape that stretch the width of your container opening.  If floral tape is wider you might need to snip it in half width wise for ease of arrangement.
  3. Starting at one edge of the opening carefully place tape strips across the mouth of the container making sure to evenly space them apart all the way to the other side of the container.
  4. Turn the container and repeat this process going the other direction to create yourself a grid of sorts.
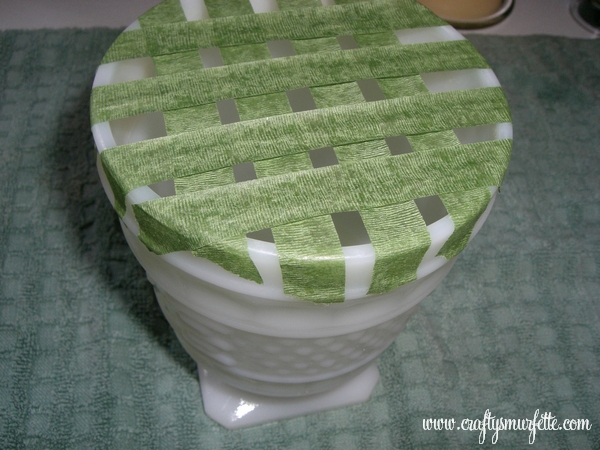
  5. Trim the stems of your flowers to be the depth of your container.  Make sure to leave a couple that are a bit longer to use in the middle.
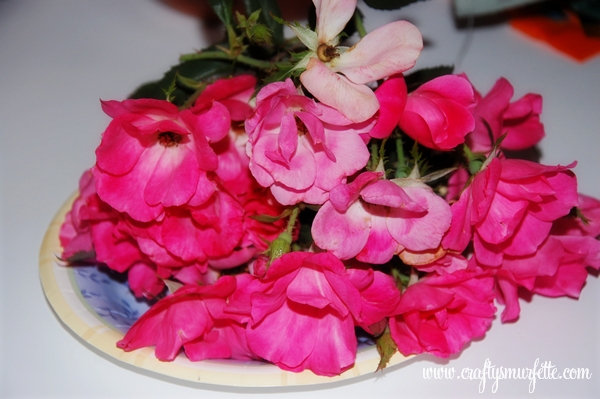
  6. Starting in the center, using slightly longer stemmed flowers, carefully insert one flower stem into one open square of your tape grid.
  7. Carefully add flowers to the grid working from the center to each edge to help create a rounded type of arrangement.
  8. Once finished with your flowers, feel free to go back and insert bits of greenery into the arrangement to fill it out a bit more.
  9. Display!

What about you, have you picked up any entertaining tips from your friend’s parents in your younger years that stuck with you?  If so, by all means share…

PS.  I just realized this was my 100th post!!  🙂
ReUse: TP Roll Candy Bunting

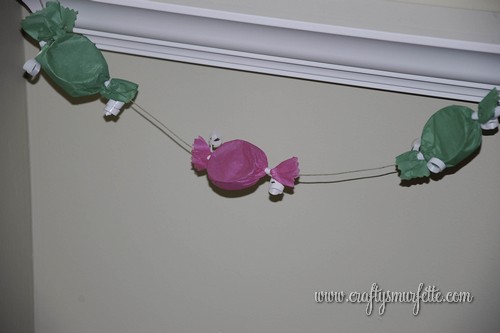
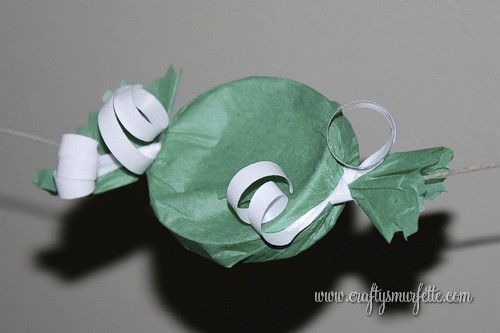
In honor of Earth Day & my April Stash Bust endeavors I decided to try my luck at reusing several TP(toilet paper) rolls because I’m not sure about your household but we seem to have an abundance of empty cardboard rolls.  I’m really loving bunting right now, so I set out to make some sweet candy bunting from my trash & stash…and this is what I ended up with:


What do you think?  I’m thinking it’s quite cute…and so easy to make that you could even have you kids help you with this project.  It could be fun for a child’s birthday party or even dressed up a bit more to hang behind a candy buffet.

Supplies Needed:

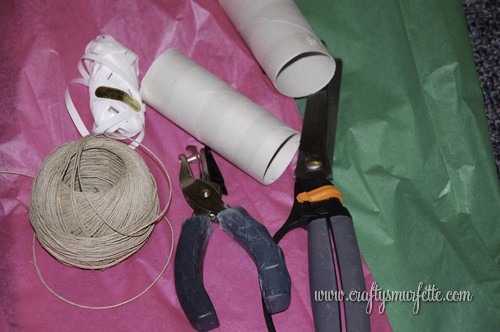
  • Toilet or Paper Towel cardboard rolls (1 TP roll averages 9 pieces of candy, or 4 feet)
  • Tissue Paper (you could also use fabric)
  • Curling Ribbon
  • Twine (Ribbon or Yarn would also work)
  • Hole Punch
  • Rickrack Scissors
  • Craft Knife or Scissors
  • Double-Sided Tape (optional)

Instructions:

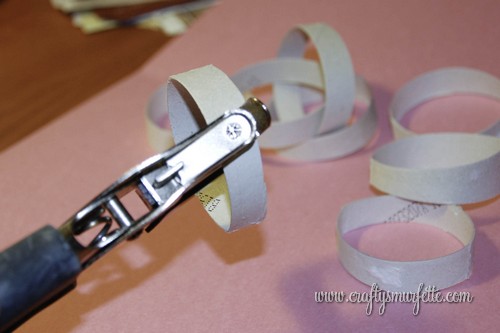
  1. Using your craft knife or scissors carefully cut your cardboard rolls into 1/2 inch pieces.  (If you are doing this project with small children this is a step an adult should complete ahead of time.)
  2. Using a standard hand-held hole punch punch two holes across the tube from each other.  Repeat this process for each of your 1/2 inch pieces.
  3. Cut bunting twine to your desired finished length.
  4. Cut your tissue paper (or fabric) into 5 inch square pieces using pinking sheers. (If doing this project with children this is another step that could be completed by an adult ahead of time.)
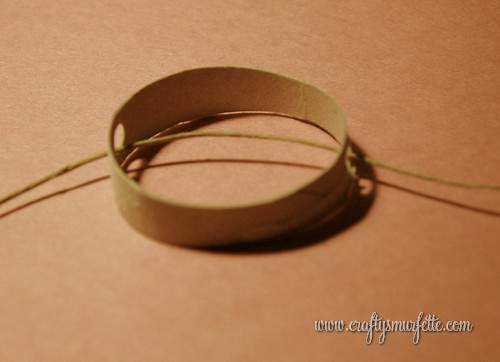
  5. Carefully thread one piece of cardboard onto the twine. (hint: To make this easier I actually taped one end of the twine to my table.  This helped keep one end stationary while I was threading from the opposite end.)
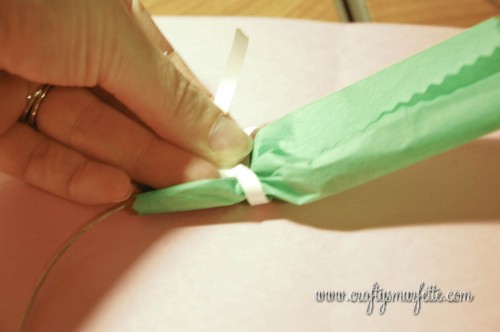
  6. Take a piece of tissue paper and place it under your threaded circle and fold it over to overlap in the front.  (hint:  You might find using a small piece of double-sided tape helpful to hold everything in place, but it isn’t necessary.)
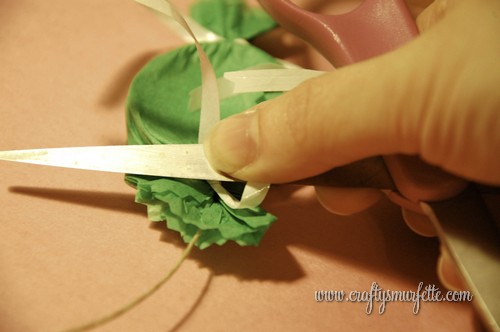
  7. Using 4 inch pieces of curling ribbon, tie off each side of your “candy” with a hard knot.
  8. Using scissors curl the ribbons to make a decorative tie.  (If you are doing this project with small children this is a step an adult should complete once the stringing process is completed.)
  9. Repeat the length of your twine.
  10. You can move the pieces slightly along the finished product to help evenly space them.
  11. Hang and Enjoy!


See…quick, easy, and a fun way to turn a common household trash item into something fun & decorative!

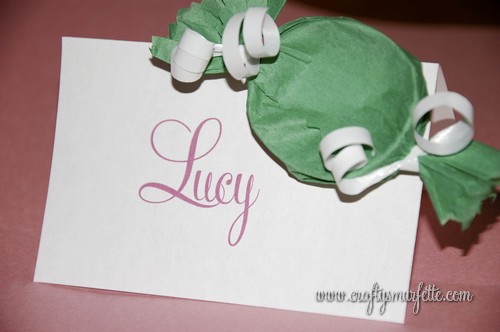
And if you have extra “pieces of candy” left over you could always glue them to place cards or signage for a sweet look.

Price Breakdown: Free from my trash & craft stash!
However, if you wanted to create these with no supplies on hand you could do so entirely from your local dollar store!

What crafty fun will you reuse trash & stash items for this week?


DIY: Folding Napkins into a Pocket

This post should kick off the beginning of our wedding DIY recaps. One of the projects I took on for our wedding was dressing up the table just a bit.  It seems that all too often with buffet dinners the tables can get “left out” of the decorating grand plan since it’s not really “necessary”.  I didn’t want to just go with rolled silverware/napkins to be picked up from the food line. Instead I wanted something a bit more formal, yet still in line with our not-so-shabby chic surroundings.  By setting each place setting with the silverware and folded napkin with menu, I think it gave our tables a bit more color and pop…even if my husband did call me crazy for obsessing over it! 😉


Since I’ve already posted our menu template that was created to fit inside a folded napkin, and the paper napkin wraps we used for seating cards, today we’ll go over how to easily fold your napkins into the pocket shape.  I know there are quite a few different methods out there, so I used bits and pieces and ended up with this one working best for me.

Items Needed:

  • Napkins (the ones we used for our wedding were purchased from Ikea)
  • Iron & Ironing Board
  • Something fun to put in the pocket 🙂

Instructions:

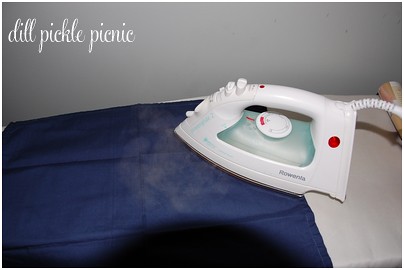
  1. For best display iron napkins flat before starting folding process.
  2. Place napkin front (or finished) side down
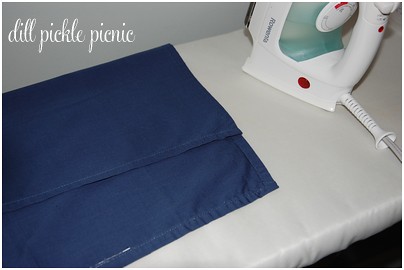
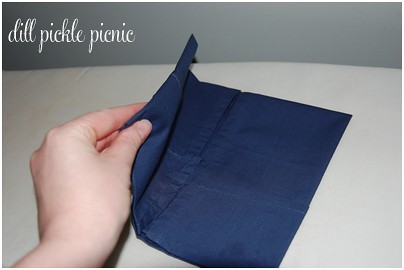
  3. Carefully fold the top horizontal edge (the one farthest away from you) down about 3/4 the length of the napkin.  Iron top portion of napkin for crisp edge.
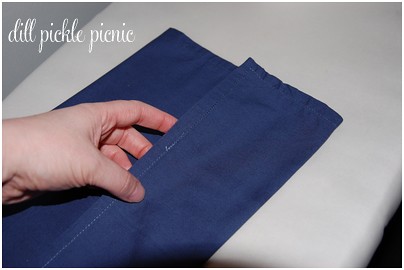
  4. Fold the bottom horizontal edge up and over the previous fold.  This will create your pocket and again iron to create crisp fold.  (Hint:  This set controls the depth of the pocket, so simply adjust your fold size for larger/smaller pocket).
  5. Now, flip the whole napkin over so that the pocket it now face down on your ironing board.
  6. Fold each vertical side of the napkin into the middle so that they meet flush and form a square.  Once again press for crisper look.
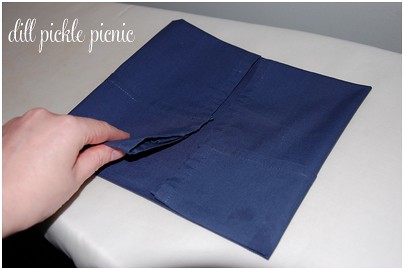
  7. Finally fold the left side over on-top of the right side and press one final time.
  8. Add menu, favor, or other fun item into the pocket and set your table.

Afterthoughts:

This is where I’ll be honest and forewarn you that ironing and folding 100’s of napkins will take a WHILE.  I did the first 50 by myself over several nights and it seemed to be taking forever to fold, add the menus, & the name card wraps.  Then with the help of two wonderful friends was able to finish the second 50 in a few hours in an assembly line fashion.  If you are doing this for a larger event I HIGHLY recommend the assembly line approach skipping the middle ironing steps and only iron at the beginning to make sure the napkin is flat to start with.  All in all…I’m still really happy with how everything turned out.

If you are following along with our DIY wedding table scape so far we’ve (click for details):

ReUse – Powdered Drink Container Storage

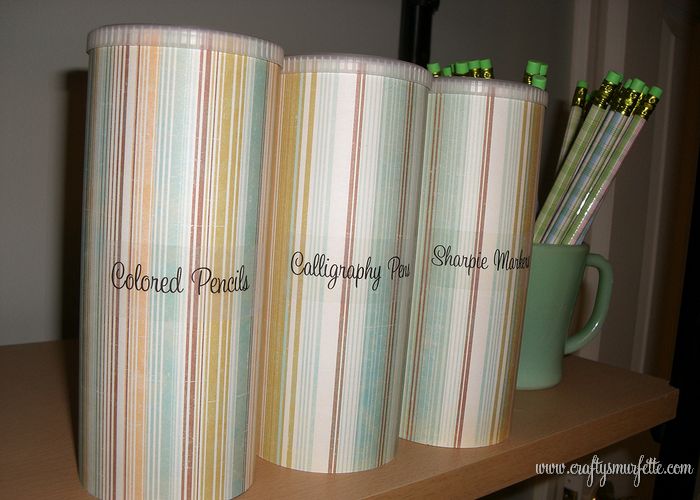
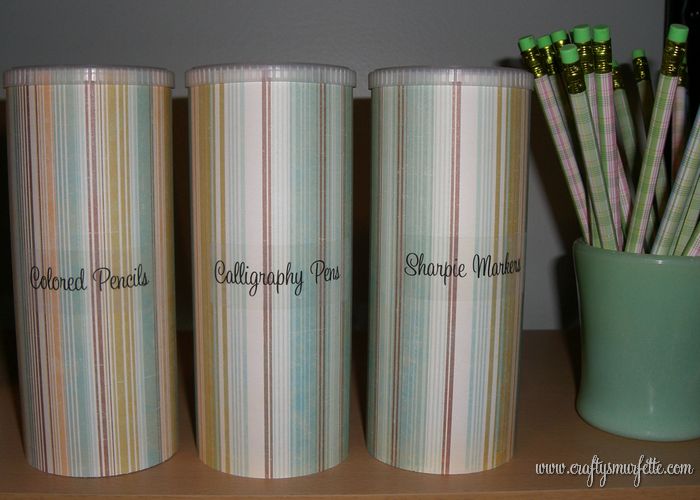
Earlier today I posted about using old Crystal Light plastic containers to make cheap and safe “big girl” candles for my friend’s little girl.  Afterwards I remembered I had never shown you how I use these containers in my craft room/office for storage.  Before I had all my pens/pencils in a large flower pot on my desk, but I was NEVER able to find the specific type of writing utensil I was looking for.  Now, I know right where they are…and they look stylish sitting on the shelf as well.  🙂

Supplies & Materials:

  • Plastic Powdered Drink tubes (ex. Crystal Light)
  • Clear Address Labels
  • Computer & Printer
  • Scrapbook Paper
  • Double-Sided tape or Xyron Machine
  • Scissors or Paper Cutter

Directions:

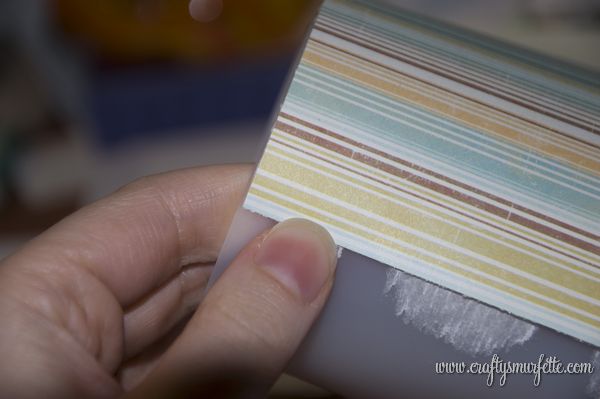
  1. Start out by cleaning the plastic container and removing all labels.  Dry throughly afterwards.
  2. Measure the height of your plastic container.
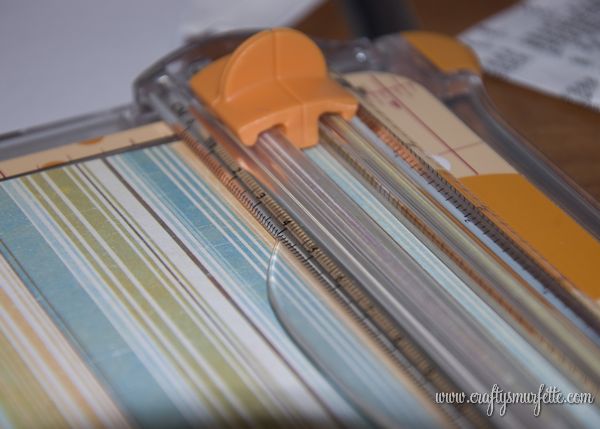
  3. Using your scissors or paper-cutter cut a piece of scrapbook paper to the correct height.
  4. Wrap paper around your container and make a small mark where the edges meet (adding .25 inch to allow for a better seal/overlap).
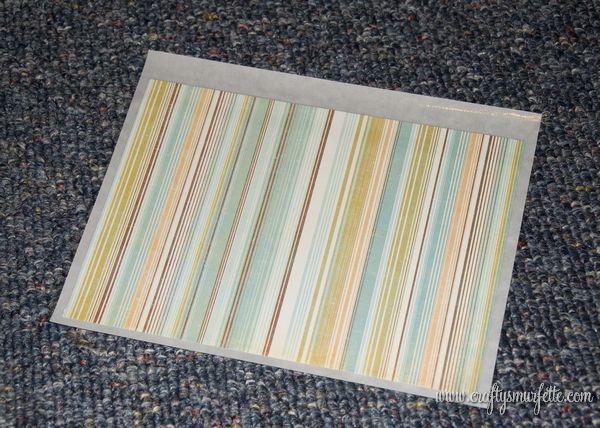
  5. Using your scissors or paper-cutter cut the piece of scrapbook paper to the correct width.  Use this piece as a template to cut other pieces for more containers.
  6. If using an Xyron machine run your pieces of cut scrapbook paper through the machine.
  7. Carefully remove the backing from the paper and carefully wrap it around the plastic container, taking care to smooth out to prevent any air bubbles. (If using double-sided tape run a piece down the height of the container and attach one end of the paper.  Then attach another piece of double-sided tape to the inside of the finishing edge and carefully smooth around so that the paper is smooth and the edges are sealed).
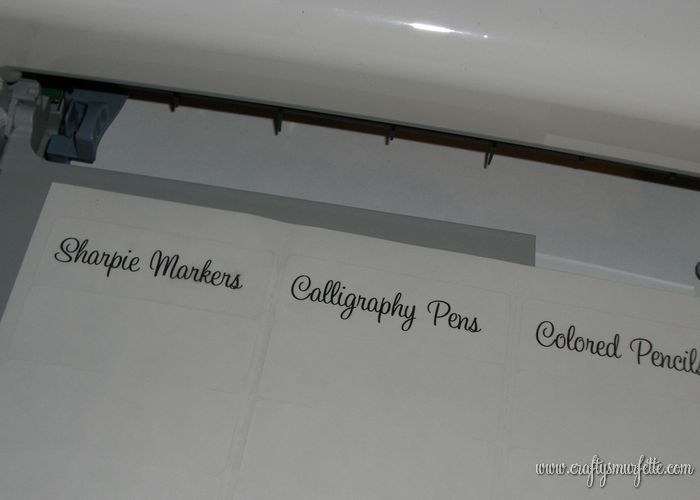
  8. Using your word processor of choice, print out your clear labels for each container
  9. Apply your labels and fill up your containers with their new contents. 

Cost Breakdown:

  • Plastic Powdered Beverage Containers – Free from recycle bin
  • Scrapbook Paper – Free, leftover from wedding
  • Clear Mailing Labels- Free, leftover from wedding

Total:  FREE

Bonus:  These are so easy to make they would make a fun crafty project for the kiddos as well!  You could also cut a small hole in the lid to make a stylish coin jar!

Reuse, Recycle – Thanksgiving Banner

If you are anything like us, you throw away several “chip board” style boxes every week, between cereal, granola bars, and yogurt packs it adds up.  Now, if you are anything like ME, then you love using chip board & kraft paper for your crafting projects…do you see where I’m going with this? 

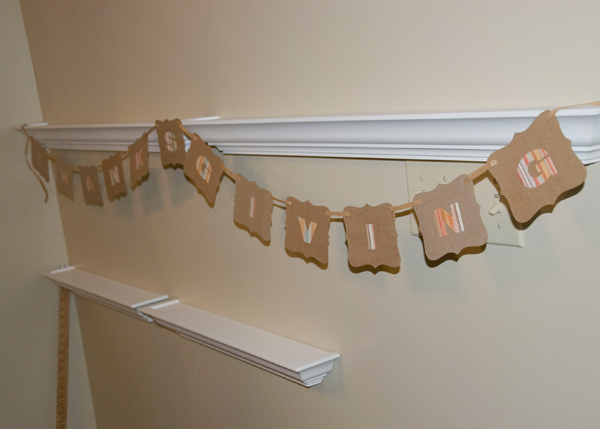
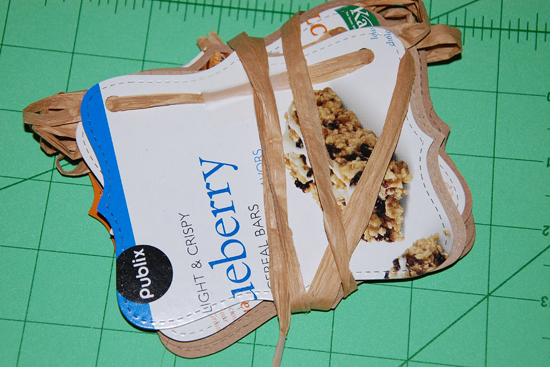
For projects that are one-sided, why not reuse something that you would just be throwing away (hopefully in the recycle bin)?  So stick around and I’ll show you how to turn these:

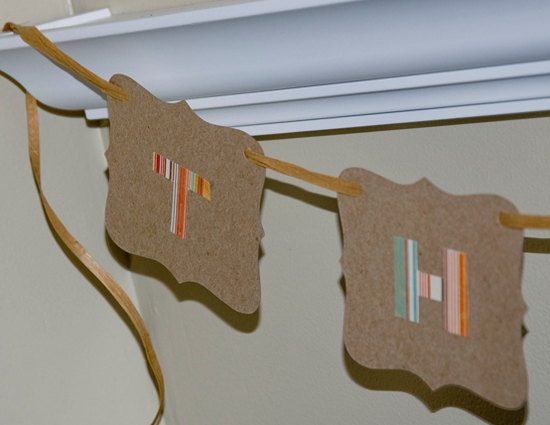
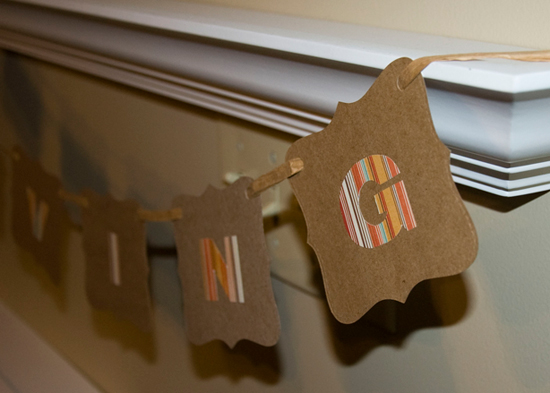
Into this:

Materials:
– card board boxes destined for the trash
– scrapbook paper to make letters
– 3 yards of raffia (twine, ribbon, or yarn… use what you have)
– tape

Tools:
– Cuttlebug (or edge punch, or scrapbooking scissors)
Top Note Die from Stampin Up
– Standard Hole Punch
– Glue Stick, School Glue, or Xyron (again use what you have)
– Scissors
– Bone Folder

Instructions:

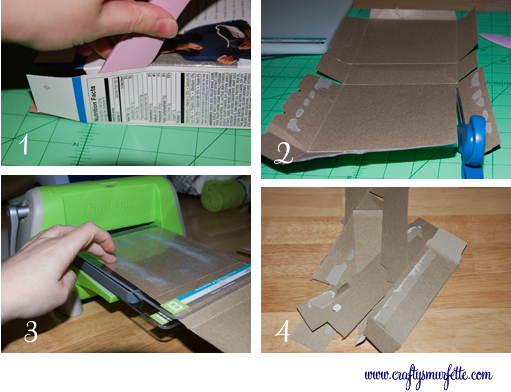
  1. Carefully pull apart glued seams on each of the cardboard boxes.  I use a bone folder to help open up the more difficult areas.
  2. Using scissors cut off all side flaps from both sides of each box.  For larger (cereal sized) boxes you will also need to cut the larger areas into small pieces that will fit through your Cuttlebug or Bigz machine.
  3. Carefully stack the Top Note die and the card board and run through the die cutting machine (careful to use acrylic plates as indicated by each machine’s instructions).  Repeat as many times as necessary to cut 6, 12 or 18 (depending on your selected message). 
    Note:  Don’t worry if you don’t have a Cuttlebug, or the Top Note Die. You can get an equally fun look by marking off rectangular pieces and cutting out with scrapbook scissors OR also from cutting out with regular scissors and then using an edge punch.
  4. Put leftover cardboard aside for tomorrow’s project 🙂
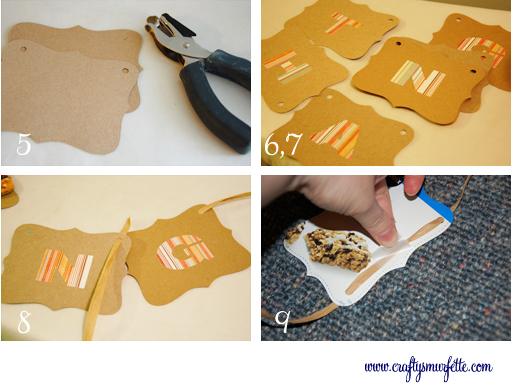
  5. Use hole punch to carefully punch the top area of each piece and set aside
  6. Using your scrapbook paper carefully cut out the letters for your desired message.  I like using 2 inch sized letters.  If you have letter dies you could use them to easily punch out your letters, you could also use stickers or pre-cut chip board letters.  OR you can always use old school stencils to trace letters in reverse on the back of your scrapbook paper and cut them out with scissors (that’s what I did) 🙂
  7. Use your glue product to attach letters to card board pieces.
  8. String your card board pieces with the raffia.  To be consistent I always start from the front of each piece of card board, so that the raffia piece is behind the shape. 
  9. To help keep my pieces in place I use a bit of tape on the back of each piece to keep them from sliding.
  10. Hang & Enjoy!!


Another really fun feature to this quick & cheap project is that it folds up to store really easily, so we can use it again next year! 

Price Breakdown:
Since I used boxes that were going to be thrown away, and other materials I already had literally lying around my craft table…it was FREE!!!! 

And did you notice a hint for tomorrow’s crafty post in the photos above?  Yep, check back tomorrow for another reuse project.

Registry Review – Ona Pitcher

Several people have asked me recently what my favorite things from our wedding registry are.  It’s one of those things where I can’t just pick one…so between crafty fun I’m going to recap a few of our faves and why.

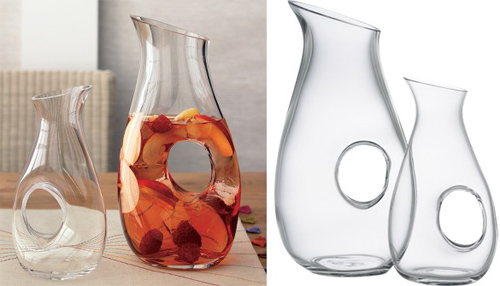
Today we made the trip to our local Crate and Barrel to exchange some extra glasses… but since the bath mat we had our hearts set on wasn’t in stock we left with a gift card instead.  Now, I’ve decided I’ll be using it on a couple of these Ona Pitchers.  They come in two sizes and are quite stylish too!

onapitcher(photo source: Crate and Barrel)

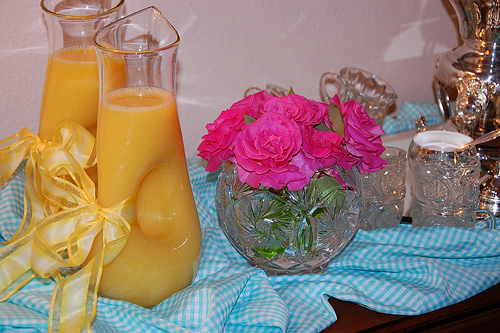
So, I know you’re thinking but how can you review something you’ve never used.  In April some of my best friends and their moms honored me with a bridal coffee and the local hostess-with-the-most  had 4 of these pitchers she used for water and OJ.  I fell in love with them then and there.  They are the perfect size, and I love how they can be both simple and elegant.  These beauties can make store bought lemonade look homemade 🙂

3654932454_03de020704(photo source:  personal photo)


Semi-DIY – Fabric Petal Flowers

This weekend during all the rain I *gasp* pulled my sewing machine of the basement to finish up a project I started as a gift to my florist/day of coordinator.  I’m super pleased with how it turned out and I hope she feels the same way.  However, I’m being a bit of a tease since I won’t post photos of the finished product until she receives it in the mail.  BUT…I will show you a small piece of the finished product because it could have SO many uses.    The 3-D Fabric Flower!

I played around and made several of these (or at least something similar) using leftover scraps from covering our jam jar favors.  Then I found this tutorial at …and All Things Nice that explained things much better and my flowers came out much cleaner this way. 

I made very few changes:

  • I added in an extra petal
  • My circles were 3 inches in diameter since I already had them cut out from a previous project and wanted larger flowers anyway.
  • I added leaves to the back of my flowers.
    • For some flowers I used left over felt to cut out a leaf shape which I stitched around with embroidery threat and attached it to the back of the flower
    • For others I simply cut out a larger circle and made two leaves using the petal technique from and All Things Nice‘s turorial
  • I attached a small circle of felt to the back of the flower and attached the button before it was attached to the final product
  • Instead of sewing my flower to the end product I attached a snap to the flowers and the backside to the final product.  This way they can be changed out for several different looks.

There are so many ways you could use these flowers!  A few running through my head right now are for:

  • attach a stem and use a bunch of them for a floral arrangement
  • attach stems and use a bunch for a rehersal bouquet for a wedding
  • a toss away bouquet for a wedding
  • a fun pin to add to a wool jacket
  • a fun pin to add to a hat or boggin
  • attach to a hair elastic or barrett for a cute little girl’s hair decoration

Here is a teaser of what I used my fabric flowers for 😉

What will you use your fabric flowers for?


Inspiration – French Wire for Fall

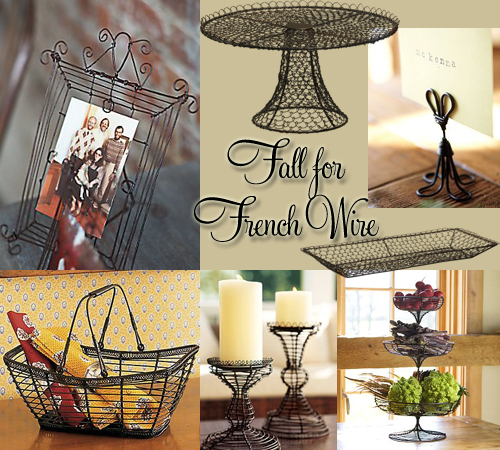
I keep drifting to fun pieces of “french wire” this fall.  I think they would be wonderful for a fall wedding or your Thanksgiving spread.  I also think they are timeless pieces you could use for years to come.

board_frenchwire

(source clockwise from top left:  Wire Sculpture Frames from Anthrpologie, Wire Pedestal from Crate & Barrel, French Wire Place card holders from Pottery Barn, Wire Tray from Crate & Barrel, French Wire 3-Tier Stand from Pottery Barn, French Wire Pillar Holders also from Pottery Barn, and French Wire Basket with Handle from Pierre Deux)

Why do I love french wire so?  First up, I posted about these Wire Sculpture Frame from Anthropologie weeks ago and I’ll admit that I’m debating ordering a few for our guest room.  Then I ran across this wire pedestal and tray from Crate & Barrel.  It will hold a 12 inch cake with style, and for $18.95 it’s a deal as far as pedestal’s go.  I could see it with a vintage lace doily on the pedestal with cupcakes stacked on top (or a yummy carrot cake).  And wouldn’t the tray be fun for holding cookies or other baked goodness?  It’s also only $18.95.  Then there are thesese place card holders from Pottery Barn.  They would not only make nice place card holders, but I could also see them holding table numbers, menus, food labels, and even photos on my mantle!  Then a simple search for French Wire on the Pottery Barn site yielded more goodness in the 3-Tier Stand, Pillar Holders, several baskets and even a French Wire Chandelier. And you can’t beat Pierre Deux for French Wire Baskets. 

What’s new out there right now that just screams fall decorating and parties to you?

Decor Inspiration – Office "to-do"

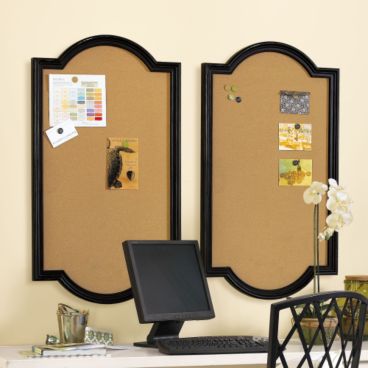
I’ve been looking for something that involves cork boards to use in office for ages.  I wanted a way to post pieces of ongoing projects in an organized, yet attrative fashion (important since I sometimes hold customer meetings in my office as well).  I had decided on two large cork boards that I would make out of two large frames, with the corkboards covered in fabric…but that still didn’t solve the part about how to break down the different projects.

Then yesterday the Pottery Barn Kids catalog arrived.  I always think it’s funny that we get both these and the Babies version when we are so, so far away from even thinking about the little creatures…but sometimes I glance through them for birthday present ideas for my little cousins.  And there it was…I think I might have to change it up just a bit since I don’t want days of the week…but now I think I have an idea up my sleeve!  Now to find two large frames similar to these from Ballard Designs on the cheap!

ballard_belhaven

(Source: Ballard Designs)

img53l

(Source: Pottery Barn Kids)

Decor Inspiration – Reduce – Reuse?

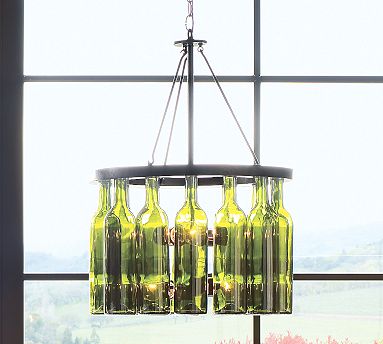
Has anyone else seen the new Pottery Barn catalog for Fall 2009?  I’m loving all the vintage looking inspiration (even through it doesn’t fit the “look” of our house).  Something that really caught my eye was this recycled wine bottle light fixture.  It reminds me of the cute wine bottle vases and candle holders some of those craftybees whipped up.  Wouldn’t this but fun hanging at a vineyard wedding?  or on my back deck…ok it’s a bit pricey so maybe not but it’s seriously fun.

pbarn001

(Photo Source