
While menus weren’t a must have for our wedding, I think having them gave the table-scape a little “something, something” tied in with the napkins. Plus since we did a buffet it gave everyone an idea of what to expect when their table was dismissed to be served. I created our menu template using good ole Microsoft Word with Feel Script font (but used a free substitute on the templates below). Other than cutting the paper they were one of the easiest DIY projects I completed for the wedding.
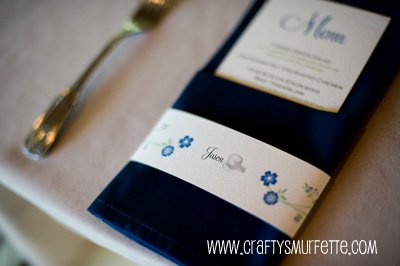
(photo by Climie+Co, name blurring my me)
Tools Needed:
- Paper Cutter (or have it precut at Kinko’s,etc)
- Color printer that will allow for custom paper sizes
- Feel Script Font (or Monterey BT Font which is free to download here)
- My Menu Template created in MS Word (saved for Word 95-2005)
Supplies Needed:
- 8.5 x 11 inches Ivory or White Cardstock – 1 sheet makes 3 menus (I used cover stock from PaperSource in Luxe White but Cold Press watercolor paper would work well also)
Instructions:
- If you don’t already have it loaded on your computer, download and install the font of your choice. This project uses Copperplate Gothic (which came with MS Word) and Monterey-BT.
- Download the Menu Template from above and update to your menu items of choice. Verify that the paper size is set to a custom size with a width of 3.66 inches and a height of 8.5 inches.
- Cut your standard sized paper into 3 menu sized pieces*. Each menu is setup to be 3.66 inches wide, so a 1/3 of a standard sheet of paper’s width if in landscape mode. Using your paper cutter cut each sheet into 3 equal pieces. To make this process less tedious I constructed a “guard” of sorts using a post-it note placed in the correct cutting position. Then I could just line my paper up against it’s edge and make a consistent sized cut each time. In retrospect it would have been even easier if I’d used a piece of heavier cardstock taped to my cutting deck so I have more of a solid edge to line up against. With my cutter and this easier method of alignment, I could easily cut through 2 pieces of coverstock at a time.

- Load the menu paper into your printer and print only 2 or 3 menus to start with to ensure everything is working correctly.
- Print your menus out in smaller sized groups to verify consistency in the printer feed. I did groups of 20 which worked well with my HP Deskjet D4160.

- Have a glass to wine to celebrate a quick and painless DIY project.
- Be sure to take a photo of the finished product and email it to me! I love detail photos!!
*Because my printer works well with custom sized paper I cut my paper into the correct menu sized pieces before printing. This meant not having to use a more time consuming program like Adobe Illustrator to create cut marks and spaces between each menu to allow for cutting, etc. It also meant that once the printing was finished so were the menus. I would suggest cutting a regular piece of copy paper into the correct size and verify your printer can handle the custom size before precutting all your paper.
**If you have hundreds of menus to create you could easily take your paper to Kinko’s or some similar place to have it precut. You would need to pay for 2 cuts, so typically less than $4.00.
Pingback: 10+ Places To Buy Printable DIY Wedding Menu - WeddingHaze
Pingback: 10+ Places To Buy Printable DIY Wedding Menu - WeddingHaze
Thank you so much for posting this!! The link posted to the font doesn’t work, but I managed to find it here:
http://www.sofontes.com.br/fonts/m/106/1328
Absolutely love this, have u ever done a peacock feather version of both?
How do I get the font to print correctly? It shows up perfectly fine on my apple/mac computer, but when I print it or load it on a pc, the spacing and font is all wrong. Thanks!
-Katie
Hi Katie,
Sadly, the file was created back in 2009 so I’m guessing it’s because of the updates to MS Office or the font utilized is no longer available to download. You might be able to select a different font from the options on your PC and have it align better. I’m going to try to get those download files updated later during the summer but you can most likely change the font to have it work better in the interim.
I wasn’t able to download the Monterey BT Font. Can you break down the steps for installation.
Hi,
I was wondering if you could share as well the template for the paper band with the flowers, I found it so cute and a such chic finishing.
Thank you very much in advance!!!
Jo
This post has the template/instructions for the napkin wrap:
http://dillpicklepicnic.com/2009/08/11/diy-seating-card-napkin-wraps/
And this is a link to all the various napkin wrap templates I have put together to date:
http://dillpicklepicnic.com/category/napkin-wraps/