Challenge: Craft it Forward Reveal Part 1

Ages ago you might have seen several posts about a fun little crafting challenge/giveaway I participated in called “Craft it Forward”.  If not, check out this post for all the details.  I ended having a really hard time getting in touch with the 5 winners (who knew it would be so hard to give something away) and I ended up with only 2 participants.    Hopefully my next challenge/giveaway will be a bit more successful (hint, hint…there might be something coming up in September).

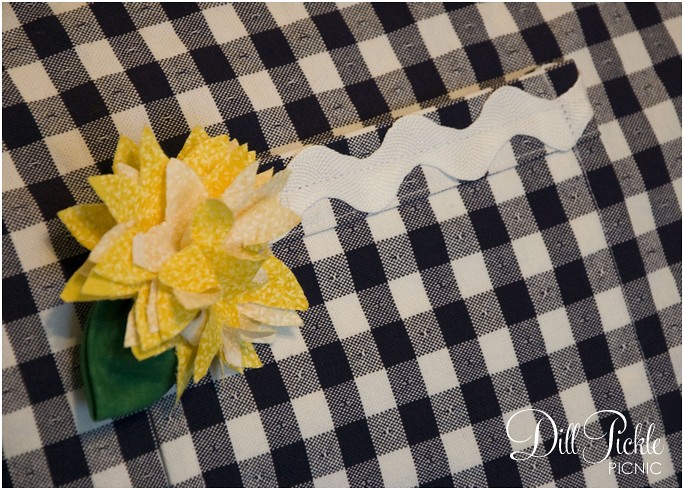
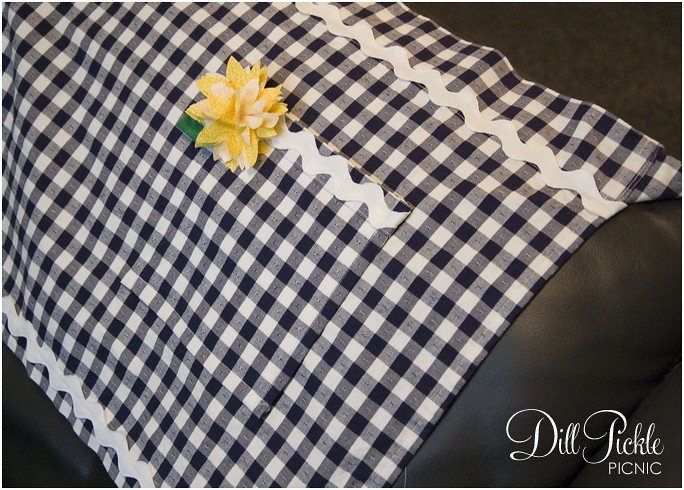
Today, it’s time to show off the goodies that the the lovely Lisa M found in her mailbox earlier this summer.  Using that large bolt of fabric I picked up at Goodwill for $2.00, I created this little apron for her:

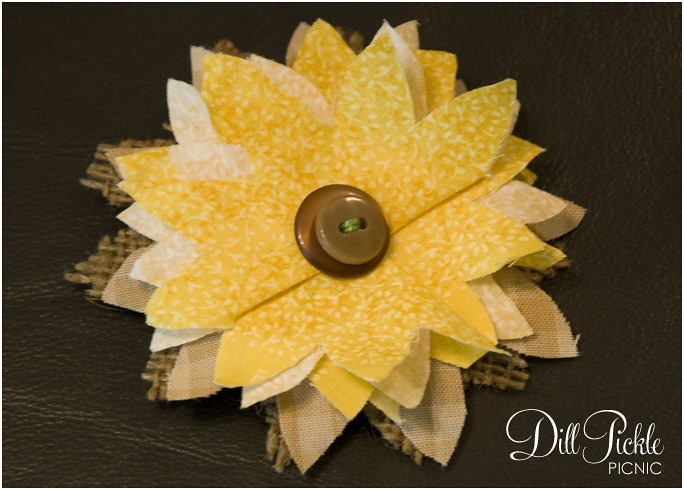
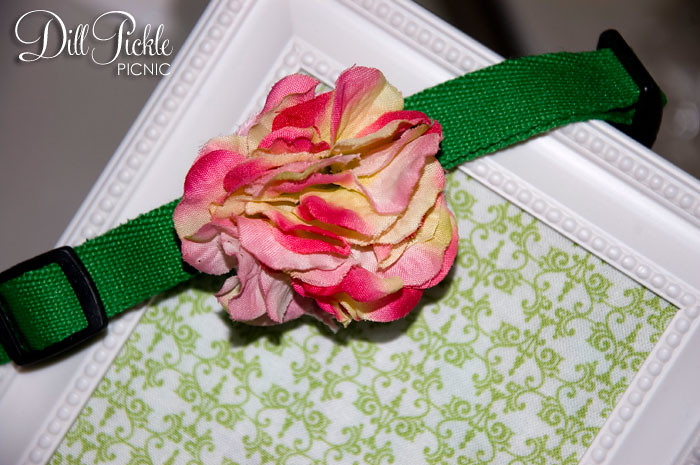
And since the flower could get a bit dusty with all that baking, there is an extra flower pin to switch it up with from time to time:

And finally to help get her started on her own Craft-it-Forward projects I included a little bag of crafty items from my ever growing stash:

It was really fun getting back into sewing (this was the first project I had sewn start to finish in a long time) and it was especially fun to just sit down without a pattern and see what I could come up with.  Lisa, I hope you are enjoying your apron and have as much fun as I did when you do your crafts to pass along.

Check back on Monday to see the second project from my crafting it forward.  Have you ever participated in a crafting challenge?  And if so, did you have problems getting your winners to respond so they could collect their prizes?

Review: If you craft, you should swap!

Do you Swap-Bot?  No, that isn’t some sort of robot comic…it’s a super-fun swap site that brings together crafters (and non-crafters) from all over to participate in item swaps through the good old fashioned mail.  This description from the site sums it up pretty well:

What is Swap-bot?

Do you like sending and receiving snail mail? Do you like writing letters, making crafts, or putting together fun packages? You should try swapping! Swap-bot is a online service that organizes group swaps and a community of creative individuals. Swap-bot takes the hassle out of participating in group swaps by organizing all of the participant information and doing all of the partner assignments. On Swap-bot, you can host swaps, join swaps, and chat with other swappers from all over the world. Give it a try!
Click here to read more about the Swap-Bot

I originally happened upon Swap-Bot during the Weddingbee Valentine Swap in February (click here to see my post on that swap).   Once I had completed the Valentine exchange and saw how easily  I was intrigued about this swapping community and how it worked.  My problem is I enjoy making things but often don’t have a reason to do so…and swapping might give me an outlet to experiment with new techniques and methods!   After a couple more simple swaps (postcards and handmade envelopes) I was hooked.

Through Swap-Bot I’ve been able to swap different things with people all over the US, and a few other countries as well.  While I’m sure every group has it’s problem children, I have yet to encounter a less than wonderful person on Swap-Bot.  I’ve found a group of people that love crafting as much as I do, and go out of their way to cheer a fellow swapper when they are down.  The other fun thing for me is the great variety and range of crafters involved.  In one swap I might receive an item from someone who is just learning to sew and my next swap might be an old pro.  Each swap is hosted by another member and comes with a set of rules/suggestions to follow for that particular swap.  One example might be to only use recycled materials, or only spend $1…all things that make it a bit of a challenge to master!  I’ve swapped aprons, thrift store finds, postcards, craft stash items, stickers, handmade envelopes, embellished tote bags, and all sorts of other things.  Sometimes I might not necessarily be able to use what I receive (and it’s ok to re-gift later) and other times I LOVE them…and that’s all part of the fun.

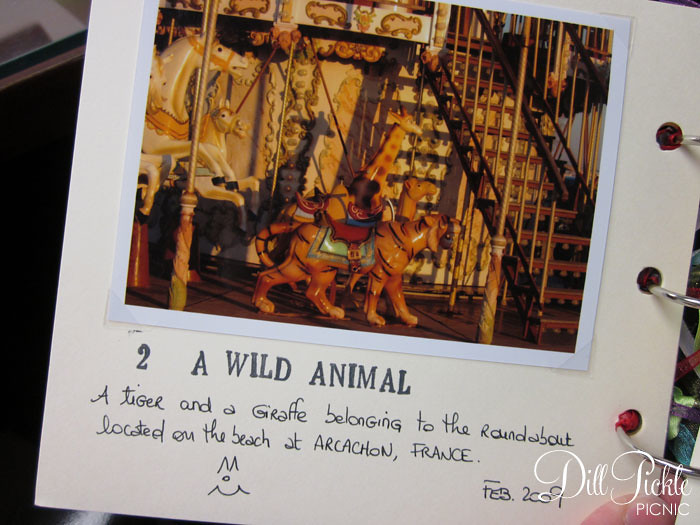
Check out a few of the fun items I’ve either sent or received through Swap-Bot:

These are a few photos of a book of photos put together as part of a photography scavenger hunt I received from a wonderful new blog friend in France!
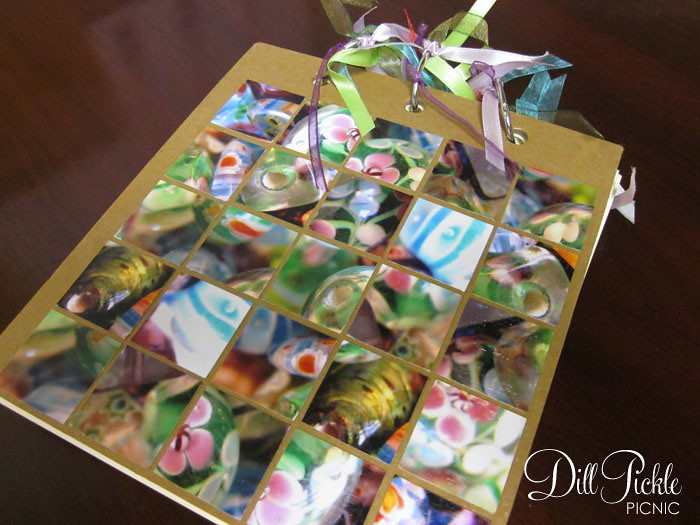
Would you have guessed the cover collage was a single shot of glass beads?  Pretty fun huh?

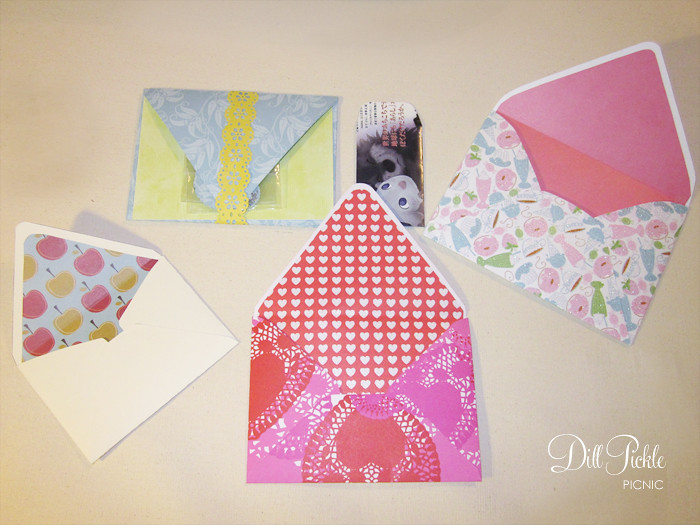
And here are a few shots of handmade envelopes I’ve sent to people in Florida and England:

Cons:  Can be addictive & if you aren’t careful with the swaps you choose could add up to more $$ than you think

Pros:  Too many to list!! 🙂

I love swapping and I think you might as well!  Do you Swap?  If so share the sites you use and what you think?  And if you don’t check out Swap-Bot and see if it’s for you.

Hope to swap ya soon!

**Note** I do not work for nor do I receive any support or benefit from my recommendation of any products, websites, or corporations.  These are purely my options based on my experiences with these products, websites, and corporations.

DIY: Flour Sack Boo-tiful Pillow Cover

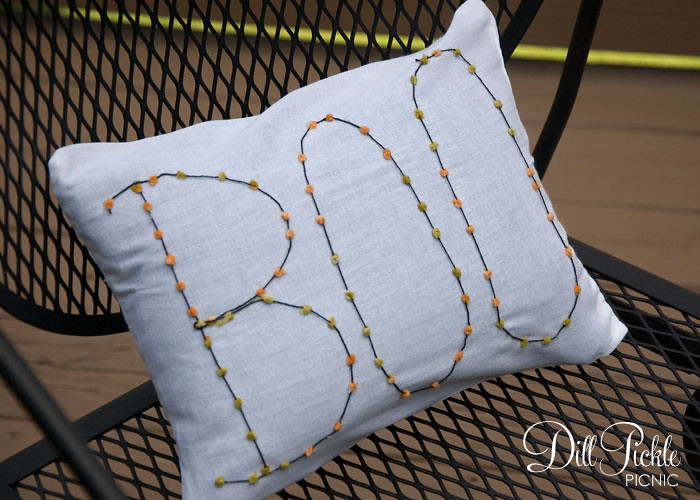
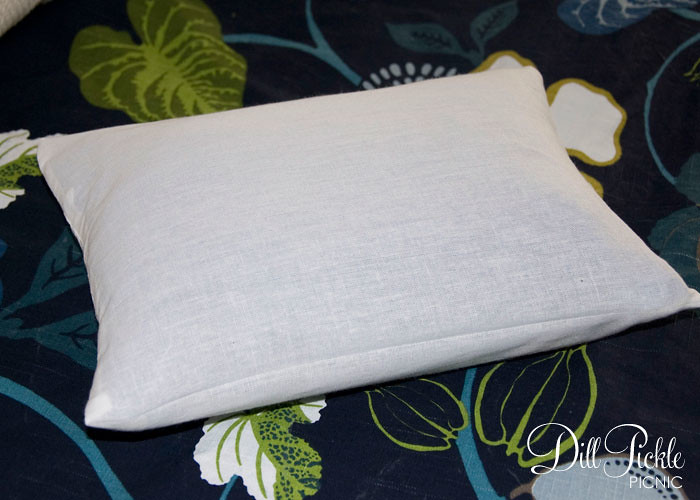
I know Halloween is still a few months away, but I couldn’t resist posting this fun (and cheap) project now.  It was easy & cheap…plus it’s tied to the infamous  “envelope of doom“,  so that makes it even spookier 😉  My Boo’tiful Flour Sack Pillow Cover:

Supplies Needed:

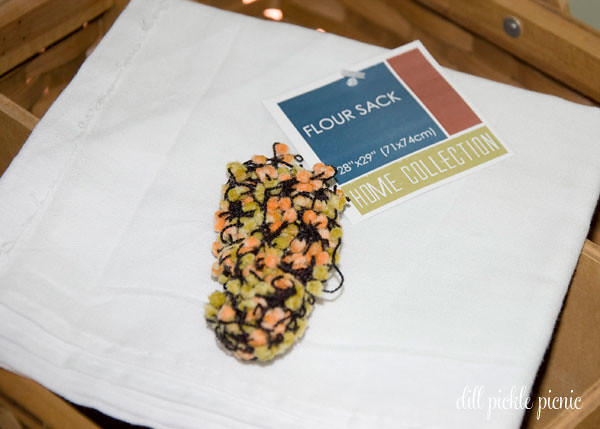
  • Fabric for pillow cover, I used a Flour Sack Cloth from my local Dollar Tree.  You will one piece of fabric that is 14 x 14.5 inches.
  • Small Pillow or stuffing
  • Yarn or Other Trim to make letters
  • Sewing Machine with matching thread
  • iron & ironing board
  • glue (I used hot glue)
  • Ruler

Instructions:

  1. Gather all your materials and press the fabric to remove all creases.
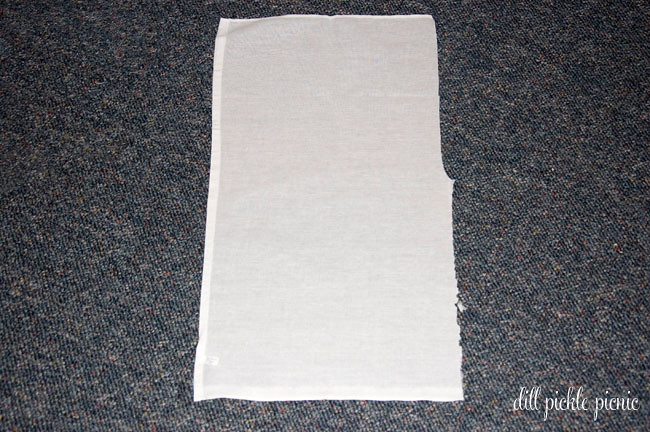
  2. If using the thin flour sack fabric you will need to cut the fabric in half length wise.  If you remember I used the other half of this same piece of flour sack to make this fun fish pin board.
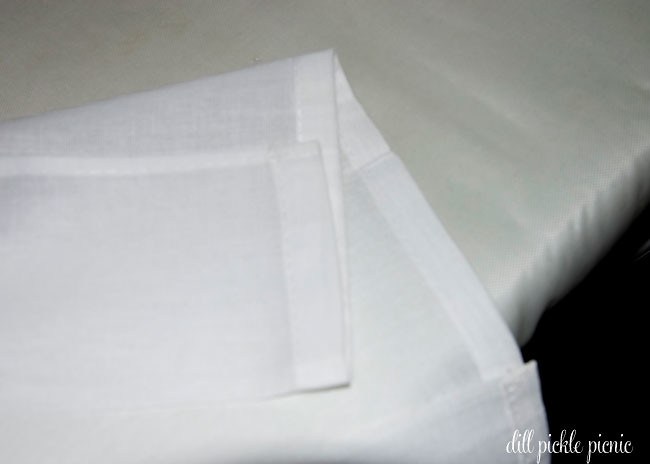
  3. Using your ruler pull the top edge of the fabric to the back 3.25 inches and stitch down along the bottom edge.
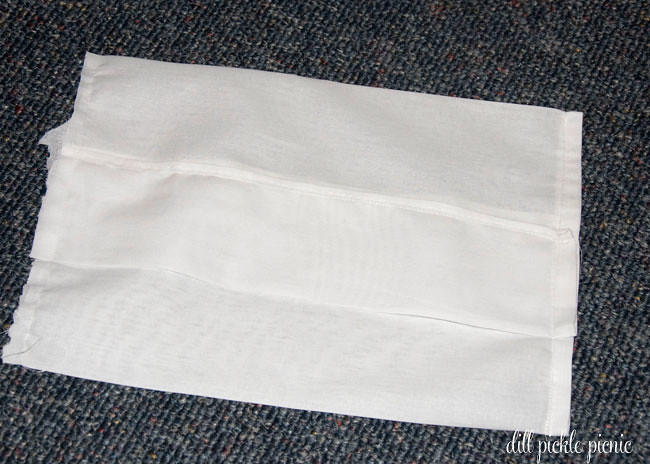
  4. With the sewn edge facing down, pull the bottom edge of the fabric up and over to the top 6.5 inches and press.
  5. Using your ruler pull the top portion down 7 inches.  It will overlap the pressed portion from step #4
  6. Take the folded fabric package to your sewing machine and sew both the left and right sides closed (leaving a 1/4 inch seam)
  7. Turn the pillow cover inside out and you are ready to use.
  8. If you don’t have a small pillow already you could either use a pre-purchased accent pillow form, or fill it up with stuffing 🙂

Then to make it boo’tiful:

  1. Place a piece of cardboard inside the pillow cover to keep any stray glue from gluing it closed.
  2. I wasn’t sure of my freehand skills so using a washable pencil I drew a quick outline of my letters.
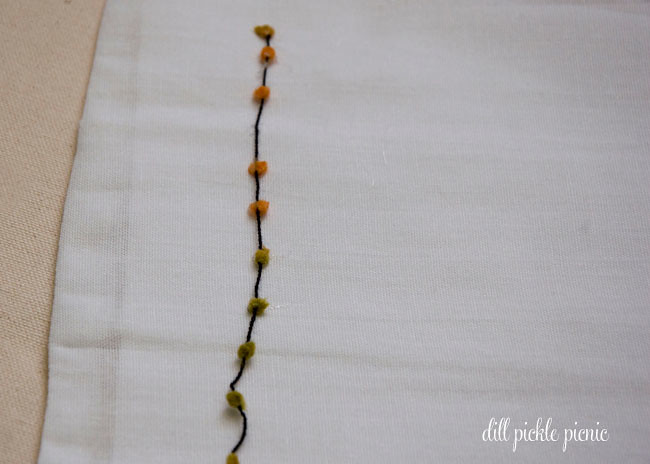
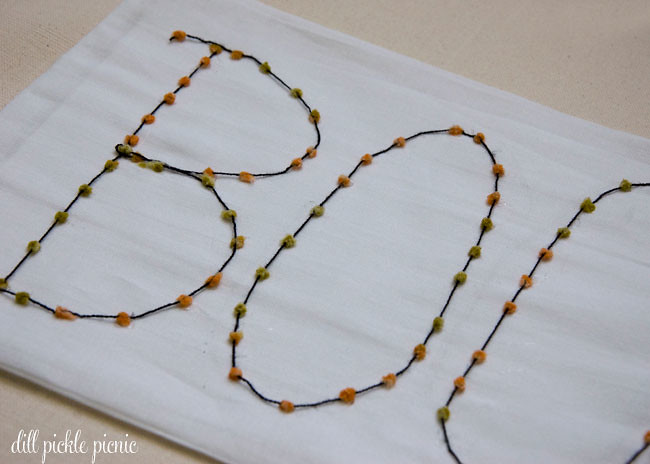
  3. I took my spooky yarn from the “envelope of doom” and glued it around the letter outlines.
  4. To make it a bit more sturdy for future washings I added several stitches around the furry dots to hold everything in place.
  5. Let dry/cool
  6. Remove cardboard, stuff, and enjoy!

Total Cost:  $1.00 and up

Using Envelope templates…of doom!

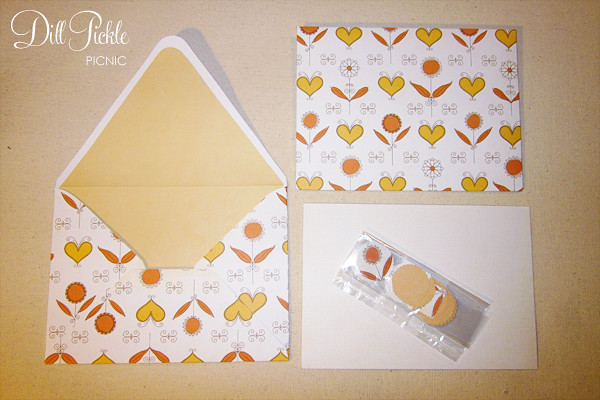
I love paper and I love office supplies.  There, I admitted it, so when I found a fun piece of paper in my envelope of doom I figured what better than to turn it into paper office supplies.  If you’ve followed my blog for a while you already know I love both lining envelopes and making my own envelopes, and some of my favorite tools are the templates you can purchase from Paper-Source.  I’ve more than gotten my money’s worth out of the ones I own, so when I was in the store a few weeks back taking a little class and saw the new baby sized envelope template I had to try it out.

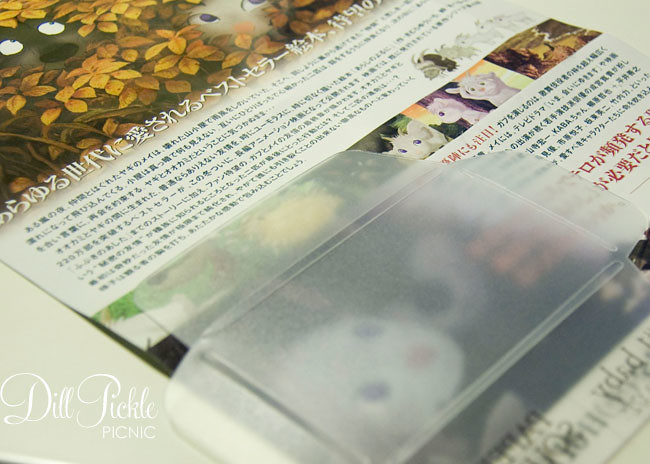
This is the template kit I choose, the other option had pink paper selection but looking around here should explain how much I love blue and green so naturally I selected the “pool” color selection.

And this is the paper I found folded up in my envelope of doom!

Using their envelope templates is super-simple.

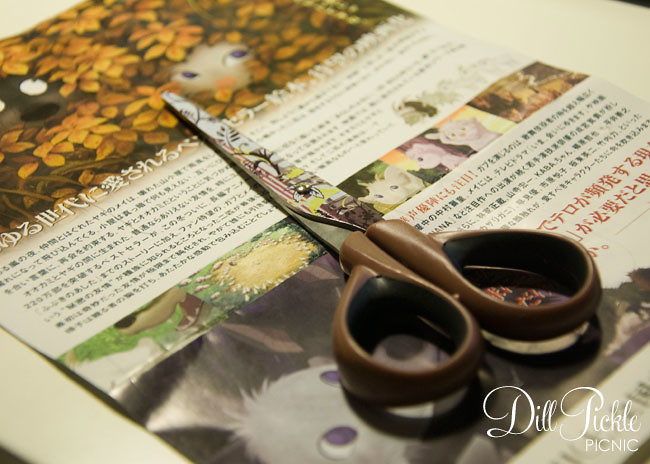
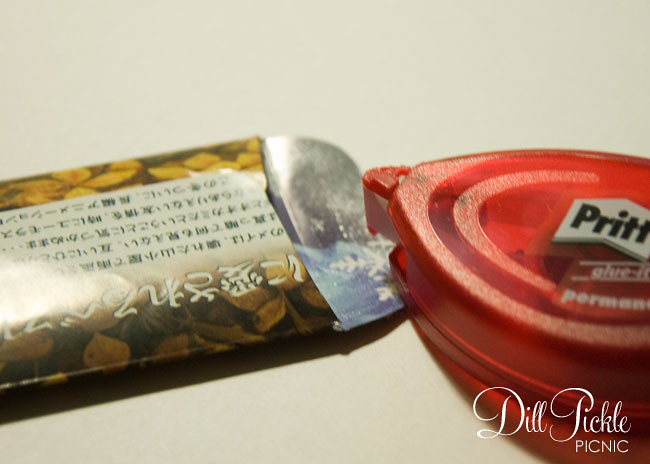
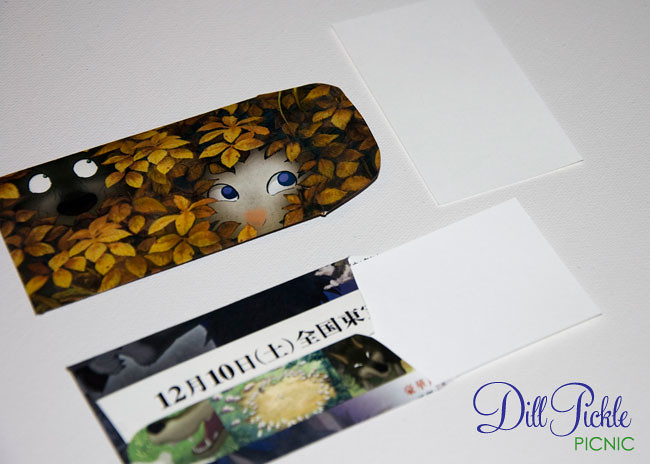
  1. Trace around the template on the reverse side of the paper.
  2. Cut out along the lines
  3. Score where the inner opening of the template are (I use a scoring board from Martha & love it)
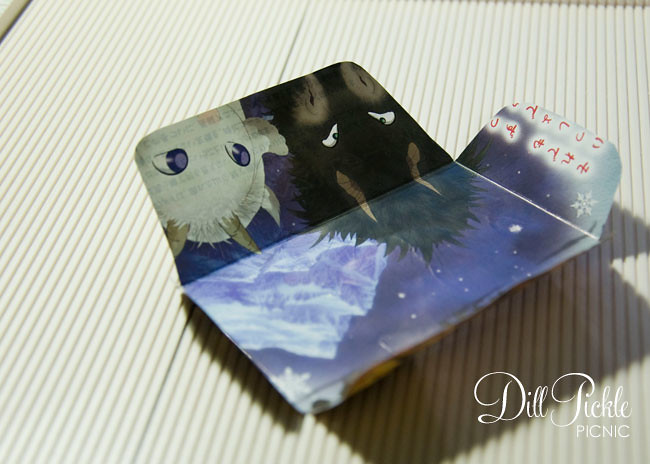
  4. Glue the edges
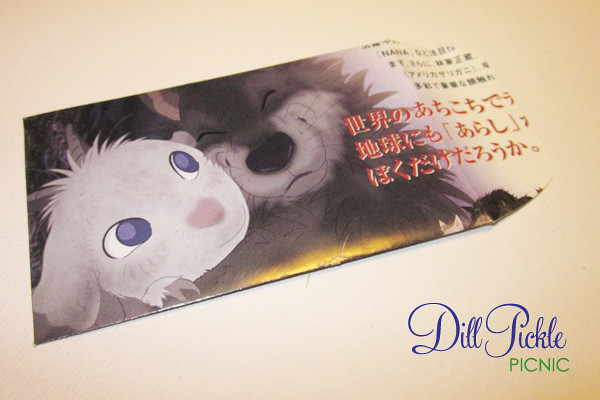
  5. Put those babies to use, these just happen to be the perfect size for a business card!

So basically I used contents from my “Envelope of Doom” to create “Baby Envelopes of Doom” 😉  In keeping with the rules of the game, the items were to be gifted to someone else…and these just so happened to be included in a swap package I was sending out!  I love it when things work out like that!

** I have been in no way compensated for my options or the products referenced above.  These are purely my unsolicited options of crafty products I use and adore! **

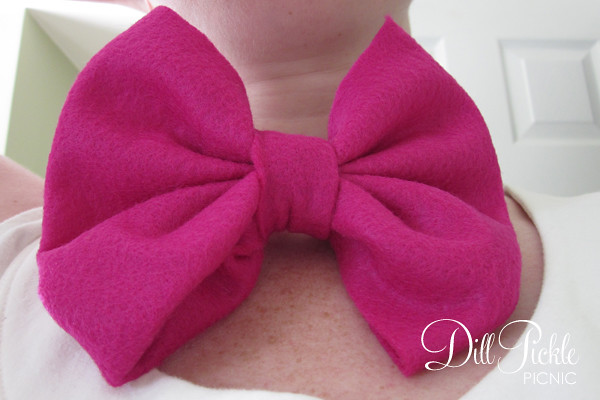
DIY: No Sew Bow Tie

I’ve been making these quick bow ties for years.  They are great for quick dress-up items and even Halloween costumes and had originally put this quick & easy tutorial together as a set of images to share with a local crafty bride.  The day before her wedding she was looking for some last minute bow ties for photobooth props and not finding anything to her liking.  So, I snapped a few photos to get her started and then she rocked them out in her true artistic fashion.    Below is the quick and dirty tutorial to whip up your own photobooth or next impromptu costume.

Supplies Needed:

  • 1 piece of felt (or other fabric) for each bow tie.
  • elastic headband or wooden dowel
  • scissors
  • hot glue

Instructions:

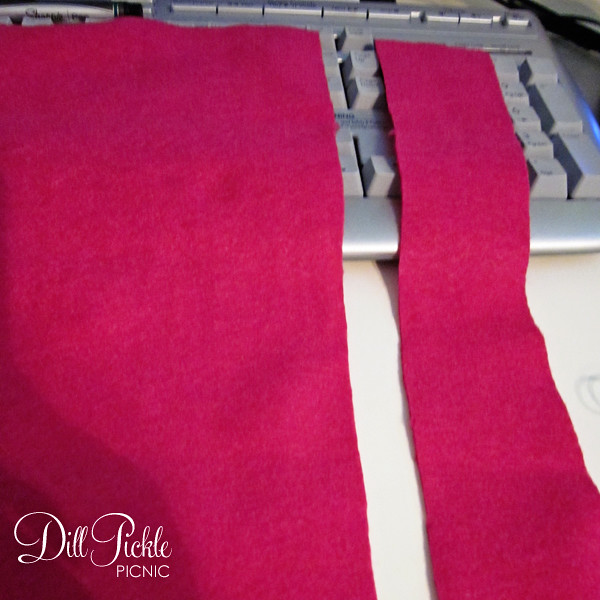
    1. Start by cutting off the piece that will become the center of your tie.  If using a standard size piece of craft felt, just cut down one edge vertically and approximately 2 inches wide.
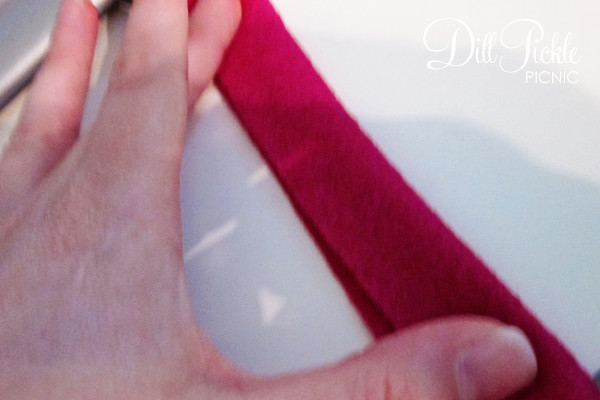
    2. Fold each of the edges of the larger piece of felt to the inside.  Hot dog style. I leave a small opening in the center to make it a small bit larger, but this is not necessary.

    1. Take the long skinny piece of felt, and fold in half.

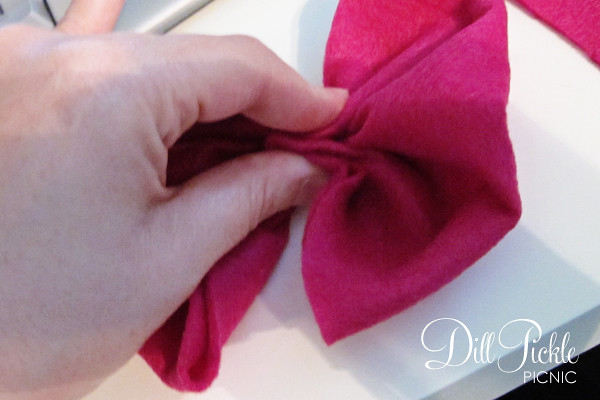
    2. Take the large piece from step 3 and squish it to the center (from both the top and bottom) to create the “bow” shape.
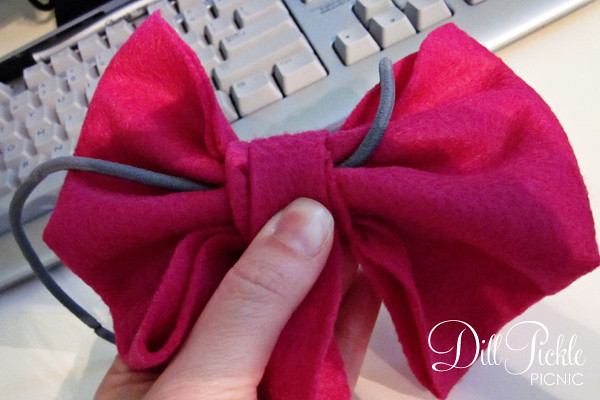
    3. Use the skinny piece to wrap around the center of the bow to hold it together.  Secure the piece to the back of the bow with hot glue and then trim the excess length off with scissors. If you are using an elastic headband for your bow tie secure it underneath this center piece as well.
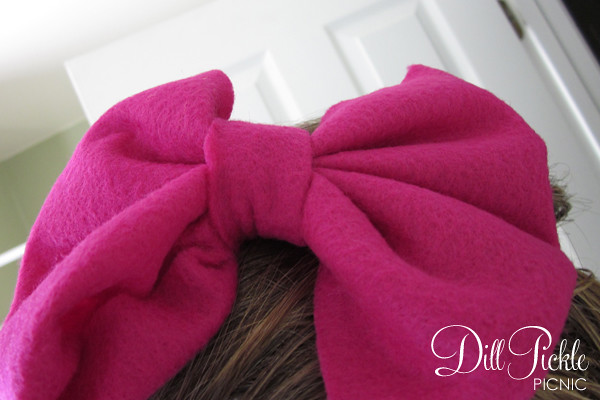
    4. Ready to wear…either as a bow tie or a large bow headband.  Or if you are using for a photobooth attach a wooden dowel to the back as perfectly demonstrated by the Über creative Lauren (go ahead, link over and check out her super fun photobooth photos while you are at it)


So, there you have it a no sew fun bow tie in less than 5 minutes!  Try them out, you’ll have fun I promise 🙂  How will you use your no sew bow ties?  Wedding photobooth props?  Halloween costume?

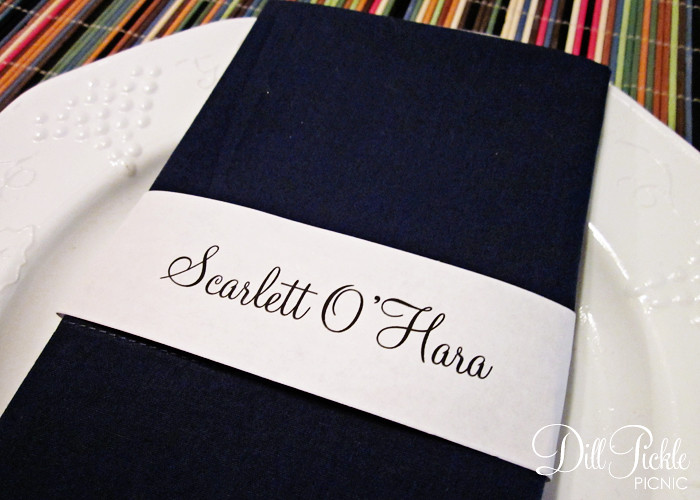
DIY: Simple Napkin Wrap

I received an email over the weekend from a bride-to-be working on ways to keep costs down for her upcoming 400 person wedding.  Her request was a simple napkin wrap template…no graphics, just elegant text.  So, Meredith this one is for you, and the possibilities of ways to use this wrap are endless!


Click to Download:  picklepicnic_textonlywrap

The template above use the Monterey BT font which is free to download from Sofontes.  New to Napkin Wraps?  No worries, visit this post for step-by-step instructions on how to use my napkin wrap templates!

DIY: Fishy Thumbtacks

You’ve already seen the fishbowl message board I made as a gift to a friend.  Now, let’s bring on the fish…the fish thumbtacks that is. I mentioned the Envelope of Doom in a previous post, this is second of the 3 (or more) projects I created using several components from the “envelope of doom“. Don’t have an envelope full of supplies…don’t worry. You could create this project using items from your local dollar store & craft store as well! This is one of the quickest projects I’ve taken on in ages.

.

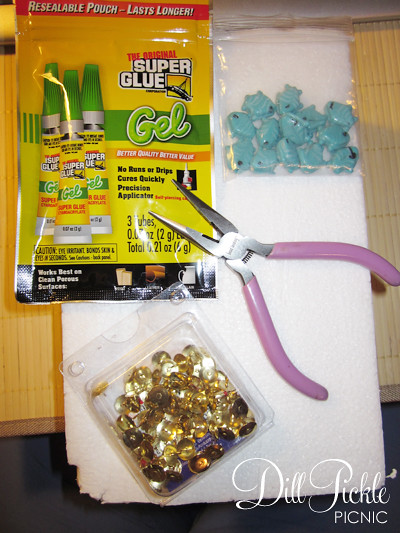
.Supplies & Materials Needed:

  • Fish beads
    Fresh from the envelope of doom, these happen to be glass
  • Thumbtacks
    The old school, plain kind with flat tops
  • Glue
    Any glue that will attach your bead material to metal will work here.  I used super glue which held “ok”.  One commenter suggested E6000 as a better option.
  • Foam block
    Optional but extremely helpful
  • Pliers
    Also optional for most people, but I’m not allowed to use super glue without the supervision of an adult and these help me not glue myself to things.  One day I’ll tell you about the time I glued both hands to separate tools and needed my then boyfriend to rescue me.  So many things will make more sense after that I’m sure! 😉

.

Instructions:
This is potentially the easiest tutorial I’ve ever written, and I think the photos tell the whole story.


  1. Count out the number of thumbtacks you need, and spread them out onto your Styrofoam block.  By placing the sharp end into the foam it will hold them in place while you glue down the fish.
  2. Squeeze a medium-sized amount of super glue onto the first tack.  I’m using the gel type of super glue from my local dollar store, this is because it is thicker and easier for me to work with.  It also means fewer drips which makes it MUCH safer for me to use.
  3. Place a fish bead onto the drop of glue and press down.  Let dry completely.
  4. I use the pliers to help center the beads really quickly before the glue sets.  It is also helpful when removing them just in case they aren’t completely dry.
  5. Repeat for each tack

I had all the supplies in my stash to make these fun tacks, so my grand total was FREE!  Gotta love that

Total Cost: $1.00 and up

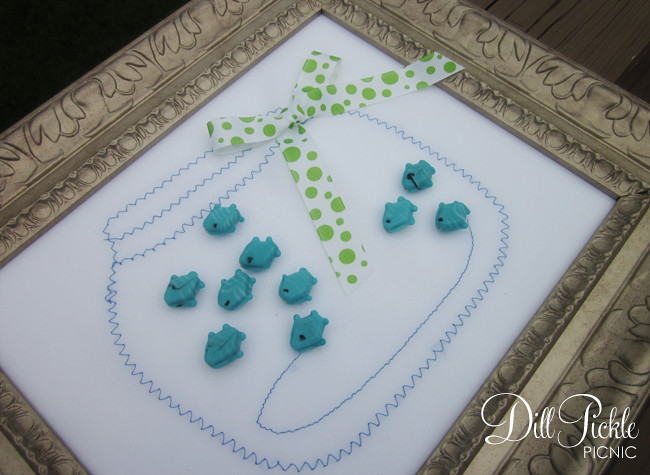
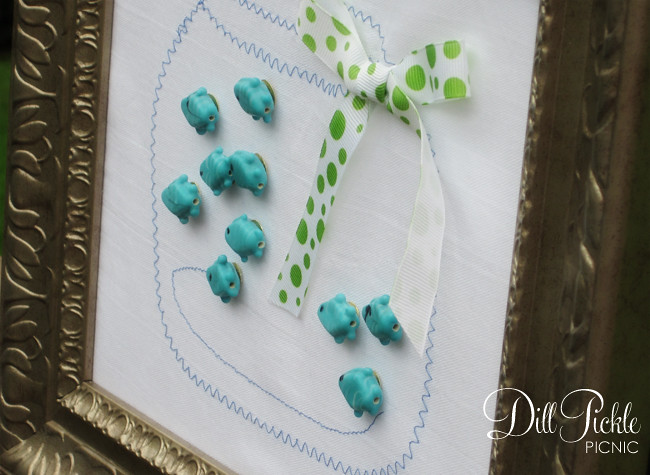
And after they dry, you end up with these cute little guys:

I think they really make the note board look more like wall art… even though now I wish I had painted the frame a fun green to match the ribbon.

I think this process could be fun to make all sorts of cute thumbtacks, so I see more of these in my future.  How about you?  Do you use cute things to attach things to your memo boards and if so where did you find your favorites?

DIY: Sewn Fishbowl Note Board

This is a project I have wanted to attempt for quite a while.  I’ve read several tutorials utilizing freezer paper for applique methods wondered if it was as easy as it seems.  All in all I’m happy with how it turned out, but I did have several problems along the way.

Materials Needed:

  • Freezer Paper (not pictured)
    large enough for pattern and an inch margin on all sides
  • Fabric to applique
    I choose to use a Flour Sack from my local dollar store
  • Thread in corresponding color
  • Photo Frame with the glass removed
    I used an 8×10 frame we had in the basement
  • cork or Styrofoam – should be large enough for frame opening
    I used Styrofoam since it is readily available in the trash heap at my office.

Tools Needed:

  • Marker to trace pattern (or print directly on freezer paper)
  • Scissors
  • Iron & Ironing Board
  • Sewing Machine
  • Xacto knife or cutting tool

Instructions:

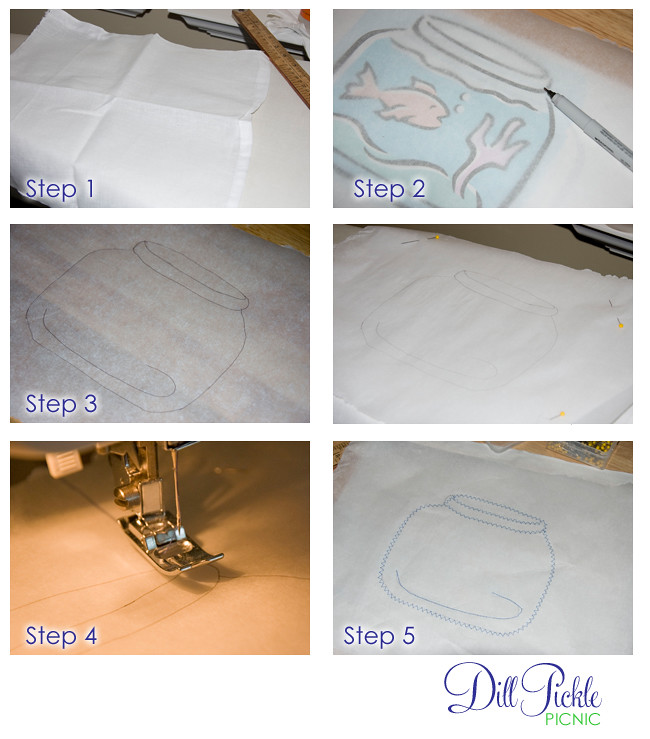
  1. Cut your material down to the correct size.  Measure the opening to your photo frame and add 1.5 inches to both the horizontal & vertical measurements.  You will use this later when attaching to the frame.
  2. Transfer your pattern to the freezer paper.  This can be accomplished in one of two ways.  I chose to simply print out my template and use a marker to trace it onto the freezer paper.  However, you could also run the freezer paper through an ink jet printer on the paper side.
  3. Remove your pattern and center your pattern in the middle of your piece of fabric, paper side up.  Using the iron with no steam, press your freezer paper to the fabric.  I was a bit unsure how it would hodl so I also pinned the corners for added “holding power”.
  4. Now using your sewing machine, simply sew over your template lines using your favorite stitch setting.  For my message board I chose to use a fun zigzag stitch.   You can see I got off my pattern a bit, but don’t worry…you can fix this later.
  5. Remove the fabric from your machine and carefully tear the freezer paper away.  This is where I had issues…major issues.   I ended up having to use the craft knife to carefully cut the paper away.  I don’t recommend this since it’s also easy to cut your stitching this way.

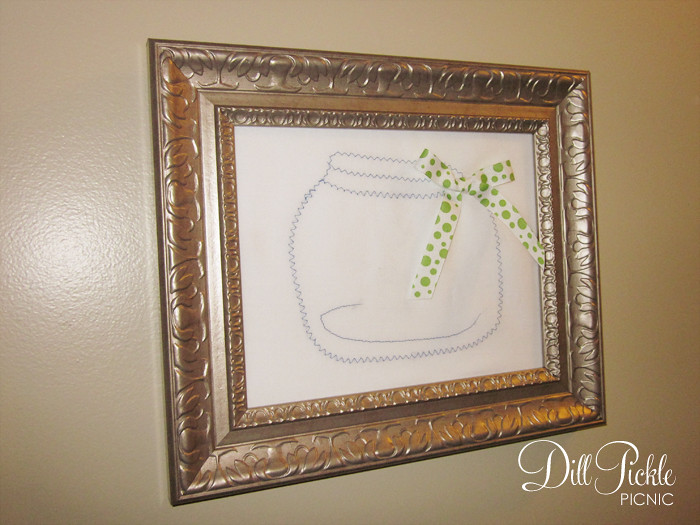
  1. Now is the perfect time to embellish your fishbowl a bit.  Remember by mistake, I decided to use some leftover wedding project ribbon to add a colorful bow to this fishbowl.  I just tied the bow, trimmed and singed the edges of the ribbon, and then stitched it to the fabric.  Press the fabric when you are finished to create a smooth surface for your message board.
  2. Now it’s time to cut your cork or Styrofoam.  The easiest method I found was to place your material on a cutting mat.   Take the glass you removed from the frame and place onto your foam.  Line up the outside edges so you have fewer cuts to make.
  3. Using an Xacto knife (and being careful not to cut yourself on the glass edge) cut around the edge of the glass pane.  Make sure your cuts are over your cutting mat.
  4. Time to put it all together.  Carefully center your fishbowl fabric over the cut piece of foam/cork.  You could easily use spray adhesive on the back of the fabric to help hold it in place while you complete the assembly.
  5. Take your foam/cork sandwich and insert into the opening of your frame, and fold edges to the center of the foam/cork.  I used clear packing tape to hold the edges down.
  6. Replace the back of the frame.  If it doesn’t sit completely flush, you could also use clear packing tape to hold the back securly to the frame.  This is necessary to keep everything all nice and wrinkle free.
  7. Hang and Enjoy

Everything used came from my stash, except the Flour Sack towel from the dollar store.

Total Cost:  $1.00 and up

Cute huh?  Oh…wait….where are the fish?  Don’t worry!  I have a post about fish coming up later!

So, overall I wasn’t impressed with my first experience using freezer paper.  Have any of you out there given it a try with better luck?  If so, please help me out…what did I miss?

DIY: Flower Power Dog Collar

I mentioned the Envelope of Doom in a previous post, the part I’m not sure I mentioned was the second portion of the challenge.  The goal was to create projects you could gift to someone in your life…preferably not yourself.  So, with those rules in mind this is first of the 3 (or more) projects I created using several components from the  “envelope of doom“.  Don’t have an envelope full of supplies…don’t worry.  You could create this project using items from your local dollar store as well!

This gift is for a friend with a cute new puppy.  A puppy who needs a little something frilly to let folks around the dog park know she’s a little girl. 🙂

.

Supplies Needed:

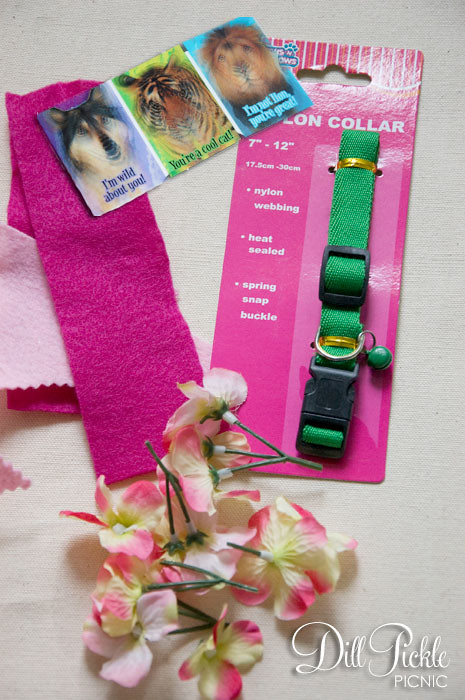
  • Collar
    (shhhh…don’t tell her it started as a kitty collar.  Just remove the bell and she’ll never know)
  • Felt Scraps
  • Plastic Scraps
  • Embroidery Thread
  • Silk Flowers
    ones with many small blooms work best to make a fuller flower
  • Scissors
  • Glue
    I used hot glue, but even double-sided tape would work to hold the plastic to the felt while you cut and sew.
  • Needle
  • Hole Punch (optional)

.


.


.


Step by Step Instructions:

  1. Start off by taking your flowers completely apart.  Some crafty person could be able to use the stem pieces later, but I just tossed them in the recycle bin for plastics.  For this project I used 3 sets of the pink hydrangea “blooms”.
  2. Because this will end up on a collar for a fun, bouncy doggy it needs some stability so bring on those holographic Valentines (if you don’t have Valentines on hand you could use any sturdy bound for the trash plastic product).  Using a large spool of thread as a guide outline a circle and cut out with a pair of scissors.
  3. Using a rectangular hole punch make two punches to the center of the piece of plastic.  You will use these later to attach the flower to the collar so place them at least 1/2 inch apart.
  4. Attach your disk to a scrap of felt with a small amount of glue, and then trim around the edges.  Be careful to leave a 1/4 inch overhang to use for attaching it to the flower later.  Then use this piece as a template and cut a second felt circle.
  5. Take the non-plastic felt circle of felt, take a needled threaded with matching embroidery thread knotted on the end and bring through the center of the felt circle. Take 1 flower petal and sew it to the center of the circle with one stitch that goes on either side of the center hole.
  6. Fold one half of the first petal over hot dog style so that half of the felt circle is exposed.  Stitch down an additional petal to the side of the existing petal.
  7. Repeat Step 6 until surface of felt circle is covered (leaving space around the outer edges to attach to the bottom).   The more petals you use the fuller your flower will be.

  1. Thread your need with matching embroidery thread and bring both lose ends of thread together so it’s doubled.  Run needle through the finished side of the felt covered plastic disk and through the second hole back to the finished side.  (see photo above)
  2. Place the plastic disk side of the bottom piece on top of the bottom of the flower.
  3. Using embroidery thread & needles, use a blanket stitch to sew the two pieces together.  When finished the plastic disk should be completely hidden inside the felt/flower sandwich.
  4. Using thread ends left from Step 2 re-thread your needle and attach the flower to the collar.  You could either stitch it directly to the fabric of the collar…or I ran the needle around the plastic collar stay piece and tied it off after several wraps.  This holds it in place, but also allows the collar to “grow” with little Miss Lucy.
  5. OR…don’t have a puppy you need a collar decoration for?  That’s OK, you could use this same method and just attach a pin back and use it for a brooch, hat or bag embellishment.

Total Cost: $1.00 and up

CDog wasn’t home when I took these photos, and I haven’t received any of Lucy sporting it yet…so a large stuffed animal came out to model it for you 😉

So, there you have it….Project #1 completed.  So now let’s chat…do you craft things for your pets?

Welcome to Dill Pickle Picnic

Hi!  Welcome to my new little piece of internet real estate.  I’m still cleaning up old posts, so just overlook that for now…but I was itching to get back to blogging so here we are.   I’m sure a few of  you are curious about a few things so in this post I’ll try to answer those questions and then tomorrow…back to crafty fun!

Why the new blog?
I’ve know for a while that if I were ever going to seriously “blog” I would need to rename it.  While I loved my CraftySmurfette moniker (and still do), the name still contains a trademarked little cartoon creature.  As a personal blog it was fine, but even opening an Etsy store with that name seemed like a bad idea.  Right now my crafty little creations aren’t getting a lot of traffic, but they have started to grow a small bit which made me realize that now was better than later.  So…here we are:  a new blog, all the old posts, a backlog of posts to catch up on since I’ve been away, room to grow,  and most importantly a fun new name that is all me!

What’s up with that name anyway?
It was a childhood thing…my BFF from childhood and I used to spend summer days and Sunday afternoon at my grandparents farm.  We LOVED dill pickles, so as kids we would pack our picnic baskets with a jar of dill pickles, napkins, plates, forks, & 2 cans of Mt. Dew.  Basket in hand we would set off to find our picnic spot…far away from random chores my grandma could dream up.  My grandmother, however, thought we were crazy.  Why on earth would we want to pack just pickles when she had all sorts of fried foods ready for us?  Thus, our dill pickle picnics were born, and are still a running joke with my friend & mom. For example, it’s not odd for me to receive a jar of sliced dill pickles as part of a birthday gift.  Dill pickle picnics are one of my fondest childhood memories, so carefree and fun.   Memories of summer days full of endless creative adventure, friendship, and whimsy…don’t we all wish we could feel that type of joy again?  This is my attempt to bring some of those feelings back, well, that and my outlet for my crafty stress relief.  Plus given my love of mason jars, it just seemed perfect 🙂

Who made it look so cute?
The amazingly creative Joy of HowJoyful.  Seriously, she is possibly the most creative person I’ve ever known (in real life & online).  Want a blog template?  She can whip you up one in no time.  Need an ugly dress recreated?  She’ll whip it into something amazing.  Need a new camera case or teddy bear pattern?  She has tutorials on her blog to help you out.  I’m thinking she might be able to help us all achieve world peace as well.  Seriously, Joy is a pleasure to work with.  I’m in the “online” world professionally so I had quite a few ideas of how things need to look and act, Joy took it all in stride and created exactly what I was dreaming of in ways I hadn’t imagined.  If you need a new look, shoot her an email.  While you are checking out her blog go ahead and comment for your chance to win one of her handmade handbags.  Go ahead, it’s ok….

What will you post about?
I still plan to use this as my space to talk about all things crafty.  There will still be tutorials of projects I’ve completed, in addition I’ll be posting photos of other projects, reviews of crafty products I like, and other stuff as I think about it.  Suggestions are always welcome!  Talk to me, what would you like to see more of?

Will you post about anything other than crafts?
Yes & No.  No, not on this particular blog.  I’d like to keep it pretty craft focused…but…Yes, I’ve also decided I need a place to randomly blog about our life.  So, once I get everything cleaned up here on Dill Pickle Picnic, I’ll be adding a sub-blog “Dill Pickle Picnic at Home”.  There I’ll share photos from vacations, talk about shoes I’m in love with, and vent about things that annoy me.  I’ll still be blogging anonymously but I think it’s still possible to “get to know us” without knowing our last names & where we work.  Sound fair?

Speaking of crafts and since I read that all posts need photos 😉 How about a teaser of a project I’ll post about next week
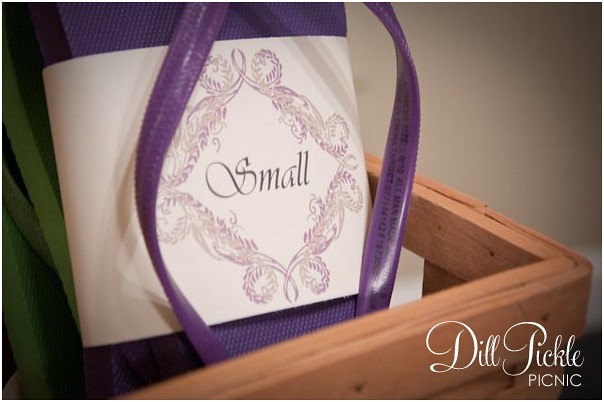
I think that covers it all…now you tell me:  what would you like to see Dill Pickle Picnic become?  What would you like to see more of?  Less of?