DIY: Cute as Button Shirt

So, let the April Stash Bust posts resume (Yes, I realize it’s now May).  Mid-April I had the perfect weekend to get a few stash busting projects finished up since the hubby was at his dad’s to attend the first Indy Car Race in Alabama.  Racing just isn’t my thing so I opted to stay home and tackle our weed filled flower beds instead.  So, Saturday after spending the majority of the day working in the yard and finding out my credit card number had been stolen, I retired to my little craft room to see what I could whip up.
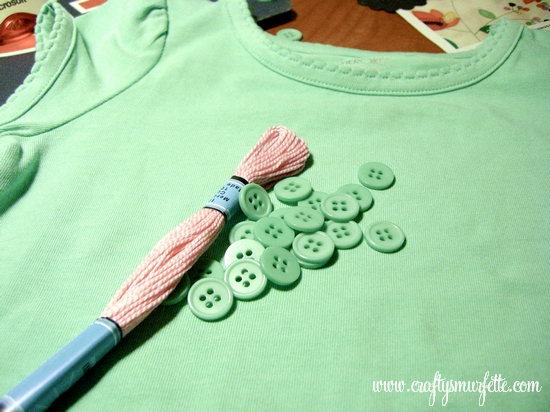
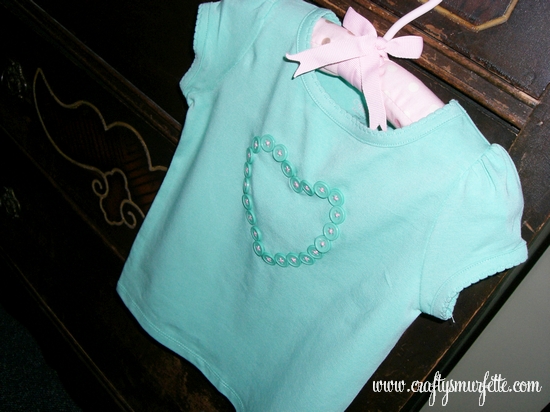
I had originally purchased this aqua t-shirt with the intentions of making my niece a bunny shirt for Easter.  Since that didn’t happen, I decided I needed to do something quick with the shirt so I could include it in a package I was planning to mail my sister that day.  So I started digging around in a couple of the plastic bins of craft supplies I have stashed in a closet and came up with some leftover buttons from a wedding project and a massive stack of embroidery floss.  Put all that together…and you get this Cute as a Button Heart Shirt.
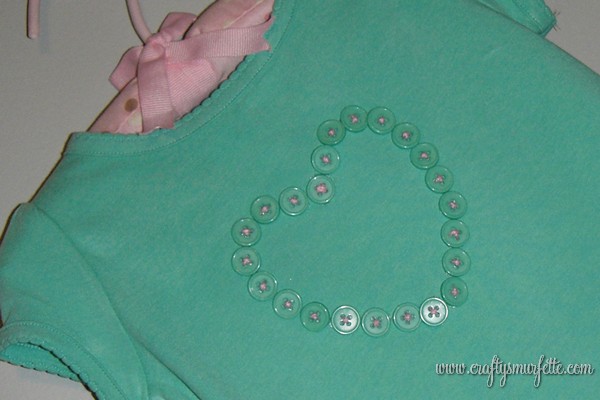
It was super fast to make and turned out much better than I’d imagined.  I like that it looks like a more expensive boutique shirt, yet cost me right around $5.99 to make.

To make your own version you’ll need the following:

  • T-Shirt
  • Buttons (I used (25) 1 cm buttons for this project)
  • embroidery floss
  • needle
  • pencil to draw outline
  • heart shaped template (optional)
  • embroidery hoop (optional)
  • hot glue/fabric glue (optional)

Instructions:

  1. Press the shirt flat
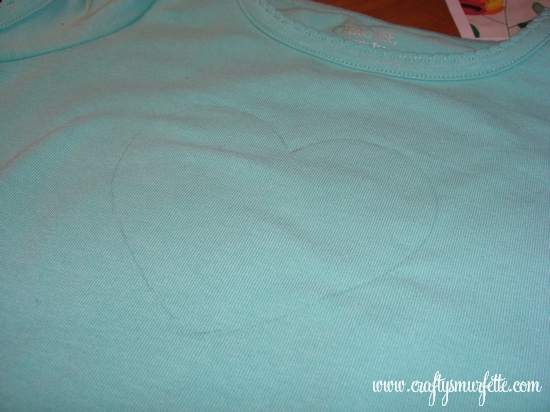
  2. Create Heart template and copy outline to shirt.  I used a regular pencil but a tracing pencil that washes away would have worked better if I’d had one.
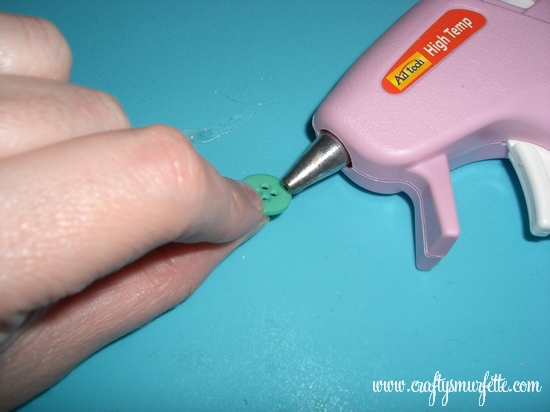
  3. If you want to add a little bit of extra attachment of the buttons to the shirt, take a moment to glue the edges of the buttons to the shirt.  Take care not to glue the centers so you can stitch them down in the next step.
  4. Thread your needle with embroidery thread and tie off with a sturdy knot.
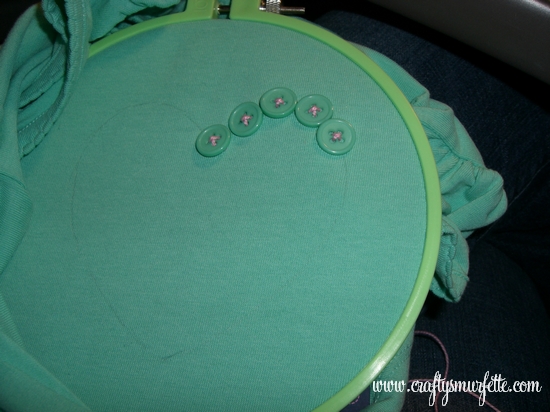
  5. Start in the center of the heart and stitch your buttons to the shirt with moving around the heart.  This is where an embroidery hoop might make the process much easier.
  6. And after about an hour….1 cute as a button heart shirt :
Oh…so about those cute pink shorts.  I have to admit I bought those Saturday on a trip to Target during April.  I know…I wasn’t supposed to be adding to the stash before I finish busting through it but if it was less than $1 does it count?  My local store had all their Easter goodies marked 75% off, but a nice lady watching me pick up a bag of Dove eggs told me it was actually ringing up 90% off.  Which included all their children’s Easter themed clothing.  So the shorts cost me a whopping $0.43 (including tax) and then I sewed a matching button in the middle of each of those cute little bows on the sides just to tie it all together.

Project Costs:
– TShirt –  from stash – otherwise Target – $5.00
– Buttons – free from stash – otherwise $1.99 for package, using 1/4 of package
– Embroidery Floss – free from stash – otherwise $0.99
GRAND TOTAL:  $7.98 if you needed to buy everything at once.
My Grand Total:  FREE from STASH (ok…$0.43 for the Easter Clearance shorts)

_________________________________________________________________________

Safety Note:   Make sure all buttons are glued and then sewn on securely.  Due to buttons, do not leave your baby unattended while wearing this garment.
_________________________________________________________________________
DIY: Sweet Race Car Onesie

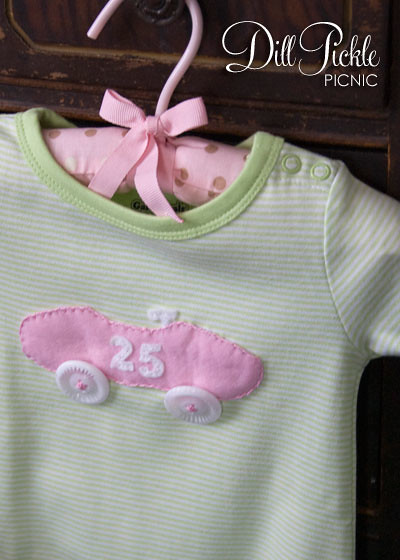
I have this “thing” where I feel like I need to make a little something for each and every baby/bridal shower I attend.  It’s a compulsion of sorts and often I stress myself out coming up with the perfect little handmade treat to go with the gift purchased off the registry.  With 4 people around me having babies and a few weddings thrown in you can see where I might have my hands full.  However, the gift below was not only the easiest to construct and economical, it was also the easiest to come up with.

You see my friend’s husband drives a race car in one of the local circuits.  He already has big dreams of his sweet little girl being the next female racing star, so it just stood to reason that she would need the proper attire even at her young age to support her favorite race team!  Granted here in the south there is a huge supply of NASCAR baby racing gear so I could have bought something commercially, but I thought she needed something a little more “sugar & spice” to mix with “my daddy rocks”.

Materials Needed:

  • Cotton Onesie
  • Fabric for car & numbers (non-raveling since there will be exposed edges)
  • Matching embroidery thread
  • 2 Large Buttons
  • Heat Tape

Supplies Needed:

  • Needle
  • Scissors
  • Template
  • Pencil or Pen
  • Iron

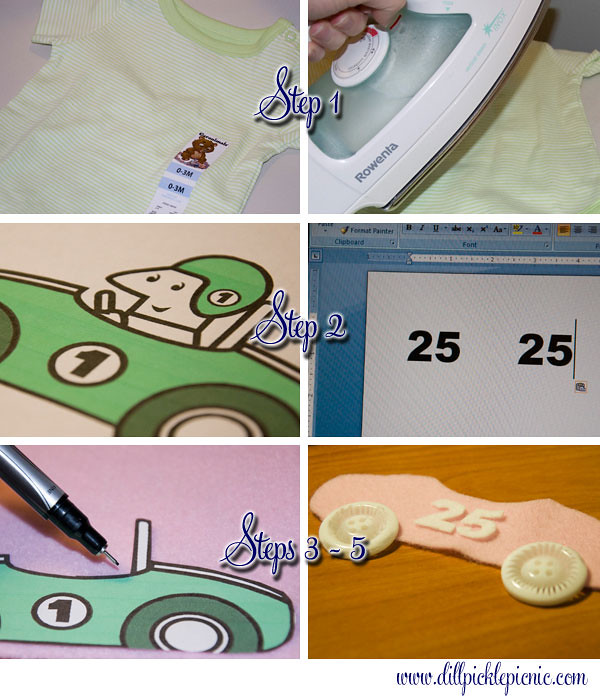
Instructions (text below pictorial):

  1. Remove all stickers and tags from onesie and press flat with iron.
  2. Print out your race car and number templates.  (I used a stock image from MS Clip Art and re-sized it to fit a smaller onesie)
  3. Cut out your race car shape.
  4. Trace template outline onto backside of fabric (I used a regular pen, however a fabric marking pen/pencil would be a better option).
  5. Use scissors to cut out along traced guidelines
  6. Repeat steps 3, 4, and 5  to create race car numbers
  7. Using embroidery thread  sew the numbers to the car.  I used a straight embroidery stitch and stitched down the center of each number.  You could also do this step with your sewing machine if you prefer.
  8. To help hold the car in place while you stitch place one small piece of Heat Tape down the center of the car and press onto the onesie.
  9. Now that the car is stead place the steering wheel under the edge of the car fabric and using the same method as in Step 7 sew it to the onesie.
  10. Switching embroidery thread to match the body of the car, use a blanket or edge stitch and sew along the car’s edge, attaching it to the onesie.
  11. Attach your button wheels to the car also with embroidery thread, careful to tie off all knots/etc. under the buttons or car to keep “itchy stitches” away from baby.

Cost Breakdown:

  • Onesie – Garanimals brand from Wal-Mart – $3.81
  • Embroidery Floss – Had on Hand from multipack purchase 2+ years ago
  • Pink  Felt – $0.26
  • White Felt – Had on Hand
  • Buttons – 4 Pack from Dollar Tree/used 2 – $0.53
  • Heat Tape – Had on Hand
  • Grand Total:  $4.60

_________________________________________________________________________

Safety Note:   Make sure all buttons are sewn on securely.  Due to buttons, do not leave your baby unattended while wearing this garment.

_________________________________________________________________________
What about you…anyone else have my same “I must make them something compulsions”?  And if so, please share some of your favorite DIY baby gifts…

DIY: Large Matchbox Candy Boxes

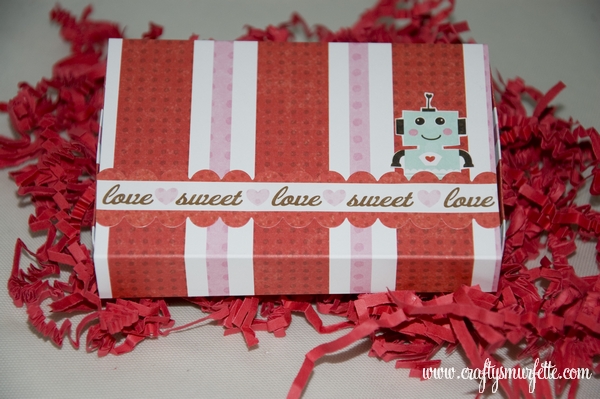
Yesterday I showed off a few of the candy box Valentines I handed out this year.  I think they turned out far better than I expected and I have a few ideas up my sleeve for ways to use them in the future.  Today…I’ll go through how to make your own!  Warning:  this is a photo heavy post because I think it makes it a bit easier to follow along with the process.

Tools Needed:

  • Cutting Device of Choice (Scissors work great, and I used a cutting board and craft knife)
  • Ruler
  • Bone Folder or Scoring Pad (I used my new Martha Scoring board look for a review coming soon).

Supplies Needed:

Instructions:
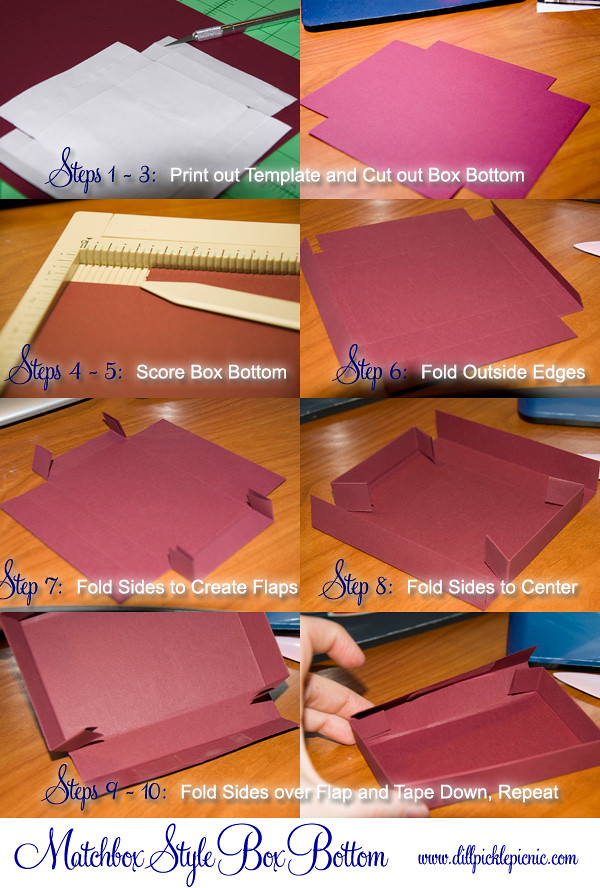
Creating the Box Bottom (instructions below photo)

  1. Print out the template for the box bottom and cut it out with scissors.  If you plan to make several boxes it might be easier to go ahead and trace the template on a sheet of stencil plastic before cutting it out so you have a sturdier template.
  2. Lay the box bottom template down on the long edge of your sheet of paper and align it to the left or right edge to decrease the number of cuts you’ll make later.
  3. Cut out your box bottom along the blue lines on the template (this will be the outside edges and then an extra inside cut on each side to create the side flaps.
  4. Now it’s time to score the sides.  Using your template’s green lines faintly mark the lines to be scored on the inside of your box bottom.
  5. Carefully score the box from the inside (this only matters if your paper is different on the flip side) using a bone folder or scoring board.  I typically use a ScorPal, but picked up the new Martha one at Michael’s recently and decided to give it a spin).
  6. Now it’s time to fold! Turn your box so that it is laying horizontally on your table, and start by folding the left and ride sides down.  Feel free to add a piece of double-sided tape inside the center of the fold if you want to make the box a bit more sturdy.
  7. Now on the same pieces fold the sides to create the flaps (these will be created by the internal cuts you made earlier).
  8. Fold the outside edge of both horizontal sides of the box toward the center (do not tape).  Repeat by folding it over again towards the center (again not taping).
  9. Open up the folds, and place a piece of double-sided tape on the inside of the outside fold, and make sure that the side flaps are “down”.  The left and right sides of the box should form a bracket shape on both sides.
  10. Carefully fold the horizontal side of the box flap over the flaps and press down on the inside of the box to seal the tape.
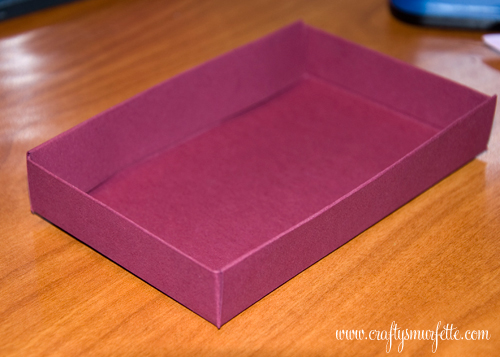
  11. Repeat for other side of the box… and you are finished with the box bottom!

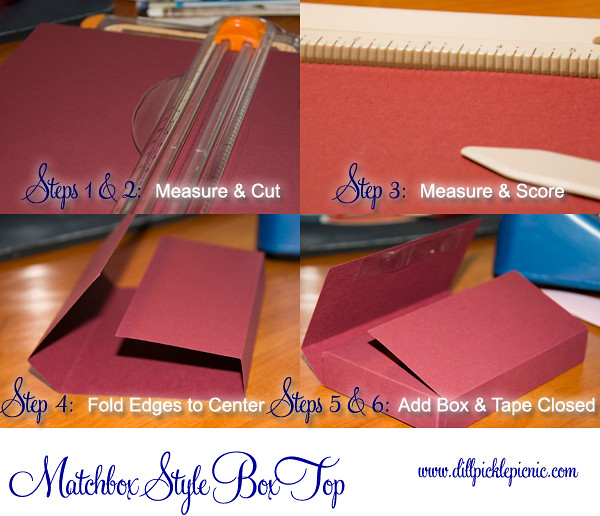
Creating the Box Top (instructions below photo):

  1. This is the easy part, no template required (but feel free to make one if it makes it easier on you)!  Take out the sheet of paper leftover from cutting out the box bottom.
  2. Using the 8.5 inch edge you didn’t cut from before measure up 4 3/8 inches and cut straight across creating a rectangle that is 4 3/8 inches by 8.5 inches.
  3. Lay the paper out horizontally and again using your ruler & scoring tool score the rectangle from top to bottom vertically in the following increments (from left to right).  This is where the Martha score board was a wonderful addition, I didn’t have to mark out the scores since the ruler is built right in!  Note:  All measurements are in inches and measured from left to right from the edge of the page.
    1. 2 inches
    2. 2 3/4 inches
    3. 5 3/4 inches
    4. 6 1/2 inches
  4. Carefully fold all scores upwards toward the center of the page.
  5. Insert the box bottom with the open side down
  6. Carefully fold top around the bottom and secure with a piece of double-sided tape.
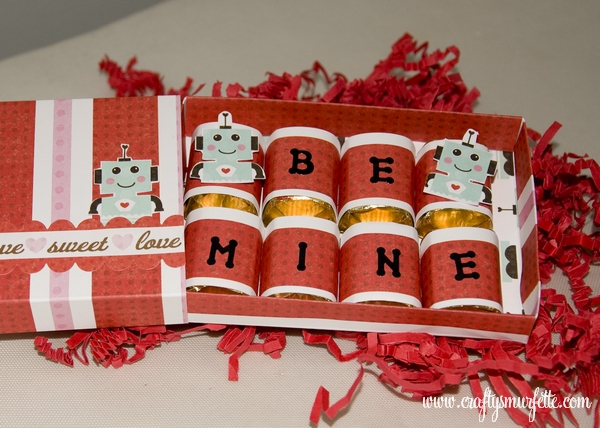
  7. You now have a box perfectly sized to hold 8 Hershey’s Nuggets (or a gift card perhaps).

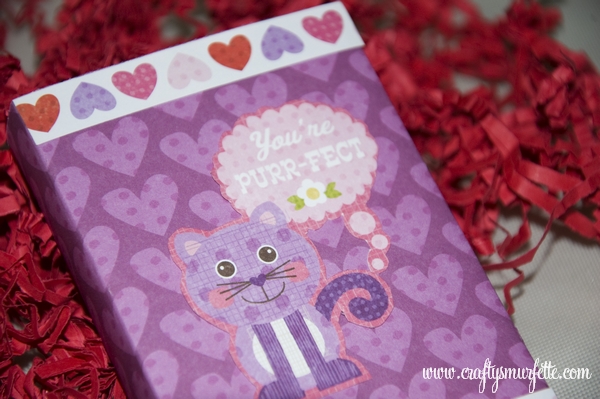
(Click here to see more Valentines Boxes)

Now…how will YOU decorate your candy box?

Semi-DIY: Embellished Apron Tutorial

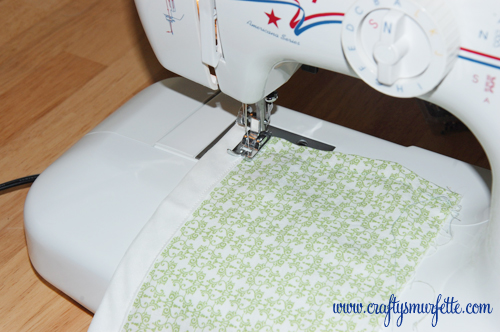
So, a while back I revealed the first of my vendor thank you gifts…the frilley functional apron for our florist/DOC.  Today, I’ll walk you through a quick tutorial on the top portion to help get you started making your own.  The trick to making this a quick project was to once again go the semi-DIY route.

Supplies Needed:

  • PreMade apron, I used a plain white one from the re-do line at Target.
  • 1 Package of 1/2 in quilt binding
  • 1.5 yards of 4 inch eyelet
  • .5 yard of fabric for ruffles (mine was 44 inches wide)
  • matching machine thread to make and attach ruffles
  • embroidery thread for monogram
  • Felt for flowers or flower leaves (1 piece per 2 flower and 6 leaves)
  • 1 snap set for each flower to attach (only if you want to be able to switch them out)

Tools Needed:

  • Sewing Machine
  • Embroidery Needle
  • Hand Sewing Needle
  • Heat transfer pencil
  • iron & ironing board
  • straight pins
  • rotary cutting blade & cutting mat

Instructions:

Before I started doing anything to the apron my first step was to wash & dry it.  This took out the sizing and made it a bit softer and easier to work with.  It also made it all wrinkly, which made it a bit more shabby chic since that was the look I was going for.  Then I started work on the monogram on the bib of the apron, since I knew this hand sewing piece would take the longest. 

Hand Embroidery Setup & Directions:

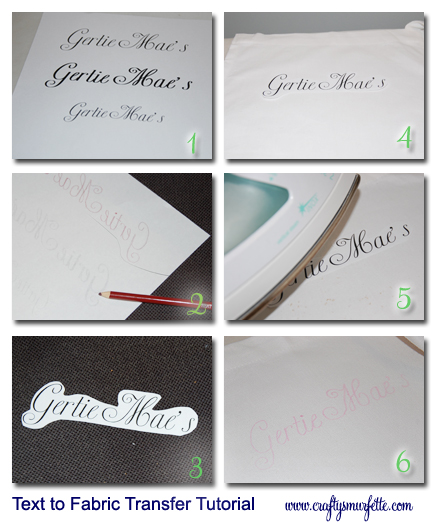
csmurf_texttofabric

  1. Setup your text in the word processor of your choosing and print them out on standard printer paper.
  2. Flip the paper over and using your iron-on transfer pencil trace over the text.  To make this process easier I used a light box, if you don’t have one visit Weddingbee’s Mrs. Stiletto to learn how to make your own. (hint before I owned a real light box I have been known to place a clip lamp under an old glass-topped coffee table).
  3. Cut out around your text for easier placement on your apron (or other fabric item).
  4. Carefully pre-iron your apron top and leaving the apron on the ironing board, place your template, printer side up on your fabric.
  5. Iron over the paper, careful not to move or wrinkle it. I use a high heat seating with no steam.
  6. Let cool for a few minutes, and then carefully remove the paper revealing your text template on your apron.  Now you are ready to start sewing!
  7. Using embroidery thread stitch over your letters to complete your monogram or phrase.  I used a simple outline stitch but a chain stitch would also work well (use the links to view tutorial videos).  I did this while watching NFL football games with the hubs.

Making  Ruffles:
Since the eyelet was purchased pre-ruffled that meant I would only need two more rows of complimenting ruffles.  For this project I used leftover fabric from our wedding cake table, but provided your fabric is wide enough you can easily get 3 ruffles per each 1/2 yard.

  1. First measure the width of your apron bottom and multiply by 1.5 (or 2 if you want really ruffly ruffles) and cut the fabric section into that width.
  2. To make cutting easier I first ironed my fabric, folded it in half lengthwise and pressed it again.
  3. Using the rotary cutter and cutting mat I cut 2 strips of fabric that was 4 inches in height.
  4. Take out your quilt binding and cut it into strips the same width as your fabric.  Cut one piece of binding per each fabric strip and sew to bottom edge of what will become ruffle.
  5. Using either your sewing machine to run a long loose stitch down the top of the ruffle, or do like I did and hand sew a long straight row of loose stitches to the top of the ruffle.  Make sure to leave threads on both ends so you can pull to form the ruffle.
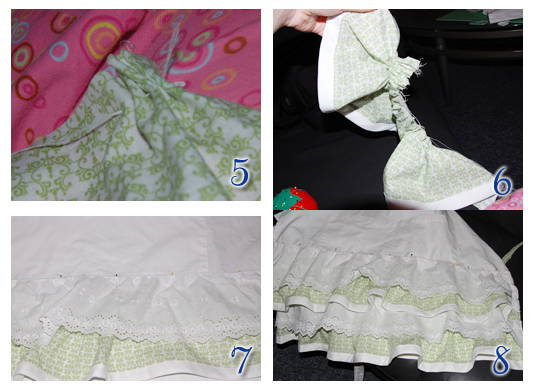
  6. Pull threads to make fabric ruffle, and spread out to be the width of your apron
  7. Pin in place
  8. Using sewing machine, sew ruffle into place
  9. repeat with remaining eyelet and ruffles

Semi-DIY: Embellished Vendor Apron – Reveal

A few weeks ago I posted a link to help with making 3D fabric flowers, with the following teaser photo:

And now that the finished product has made its way to the lovely vendor recipient, I can show you the finished product.  First, a little back story:

For our June wedding I was sure I needed or even wanted a DOC (day-of-coordinator).  I plan things fairly regularly for work, so really this shouldn’t have been any different.  Only…it was!  In addition to the wedding planning I was also in the middle of some serious work-place drama and stress.  Due to family situations that just went from bad to unimaginable my boss stepped back for several months , leaving me & our assistant to “hold down the fort”.  I thought I was managing everything quite well…until a discussion over table linens left me a sobbing mess, standing in Ikea, on Valentines Day.  It was that day Brainy and I agreed I needed help.  We worked to find vendors to scale back my DIY efforts and he took over several areas of wedding planning (Honeymoon & Music to name a couple).  One of those vendors was our florist.  Since we were getting married in such a small town I was really, really worried about the florist in particular.  I grew up in a small town, and had never had a great floral experience with anyone there.  Everyone we asked recommended her, and it was often just assumed that brides there hired her to be their DOC as well.  After our first meeting I was sold on her as the florist, but not sure I needed a DOC.  Then Brainy reminded me of Ikea and said for the low cost it would be fine….and you know what?  It was more than “fine”.  She rocked!  Honestly, I still feel like we didn’t pay her enough, and the best thing was she didn’t seem like a vendor.  Instead, she felt like a long lost family friend and everyone that met her at the wedding raved about how sweet and helpful she was.  So, I decided I wanted to “create” her a small token of appreciation (in addition to rave reviews) but I wasn’t sure what.  One afternoon I remembered a funny conversation we had during the days leading up to the wedding and it hit me, she needed a frilly apron. 

So, using some leftover fabric she had painstakingly decorated our cake table with and a few other items, I whipped up a functional frilly apron to keep her clothes all clean when she is working on her floral goodness.  Since I haven’t sewn in a few years (at least), I was super happy with how it turned out.

Remember those 3D Flowers?  I created 3 different matching flowers and attached half of a snap to the back of each one, then sewed the back half of one of the snaps to the top of the apron.  So she can change them out, and easily remove it for laundering.  Notice how the frills didn’t cover the whole apron?  That way she isn’t wiping her hands on the ruffles.  And yes, I hand embroidered the shop name on the top. 

I’m hoping she loves it almost as much as I loved having her keeping our wedding in line!  Let me know if you are interested in a tutorial for this project and I’ll put one together and post.

Semi-DIY – Fabric Petal Flowers

This weekend during all the rain I *gasp* pulled my sewing machine of the basement to finish up a project I started as a gift to my florist/day of coordinator.  I’m super pleased with how it turned out and I hope she feels the same way.  However, I’m being a bit of a tease since I won’t post photos of the finished product until she receives it in the mail.  BUT…I will show you a small piece of the finished product because it could have SO many uses.    The 3-D Fabric Flower!

I played around and made several of these (or at least something similar) using leftover scraps from covering our jam jar favors.  Then I found this tutorial at …and All Things Nice that explained things much better and my flowers came out much cleaner this way. 

I made very few changes:

  • I added in an extra petal
  • My circles were 3 inches in diameter since I already had them cut out from a previous project and wanted larger flowers anyway.
  • I added leaves to the back of my flowers.
    • For some flowers I used left over felt to cut out a leaf shape which I stitched around with embroidery threat and attached it to the back of the flower
    • For others I simply cut out a larger circle and made two leaves using the petal technique from and All Things Nice‘s turorial
  • I attached a small circle of felt to the back of the flower and attached the button before it was attached to the final product
  • Instead of sewing my flower to the end product I attached a snap to the flowers and the backside to the final product.  This way they can be changed out for several different looks.

There are so many ways you could use these flowers!  A few running through my head right now are for:

  • attach a stem and use a bunch of them for a floral arrangement
  • attach stems and use a bunch for a rehersal bouquet for a wedding
  • a toss away bouquet for a wedding
  • a fun pin to add to a wool jacket
  • a fun pin to add to a hat or boggin
  • attach to a hair elastic or barrett for a cute little girl’s hair decoration

Here is a teaser of what I used my fabric flowers for 😉

What will you use your fabric flowers for?