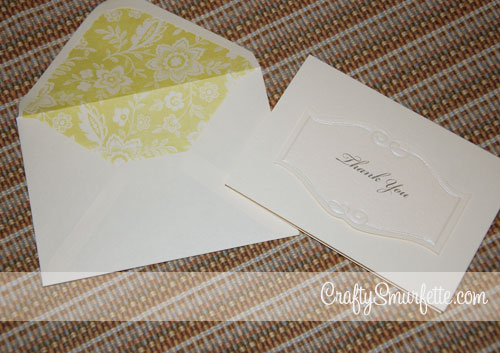
One of the simplest and most cost-effective ways to jazz up your DIY invitations, thank you notes, save the dates, etc. is with lined envelopes. I used liners to take “just ok” but economical Michael’s Thank You notes to the next level (you can see them in this post) but since I’ve been asked several time how to line an envelope and where to find templates, I decided to just create a post on making your own template for lining envelopes and list out the best resources I’ve found.
There are quite a few DIY guides out there to how to make envelope liner templates, and I’ve used quite a few of them.
- This one from Being Crafty has quite a few references to helpful templates
- Paper-Source is of course the go-to for premade liner templates sized to match their envelope stock. They sell the liner templates in a package that contains the 4-bar, A2, A6, A7, A9, 5 3/4″ square and 6 1/2″ square templates. They are made from a sturdy plastic and if you plan to use either Paper Source or Waste Not Paper envelopes the $9.50 is worth it for a perfect match.
- Paper-Source also sells precut envelope liners in quite a few prints and solids (for those who want the look with less work). These will also fit Waste Not Paper envelopes as well.
- For the really custom look, You can also create your own envelopes with the Paper Source envelope template kit. This $15.00 kit also contains sturdy plastic templates for 4-bar, A2, A6, A7 and 5 3/4″ square envelope sizes. I’ve used these to make envelopes from old maps and lined them with a solid paper that turned out really cute.
But what happens when you don’t live near a Paper-Source, and don’t have time to have the templates shipped to you? Or what do you do if you have envelopes with square flaps? or pointy flaps? Then you do what I’ve done several times through the wedding planning process, make your own template! It’s really not hard at all….
Tools Needed to create Envelope Liner Template:
- A piece of Stencil Plastic or other clear plastic to make liner template
- Black Sharpie Marker
- Scissors
- Kraft Knife & cutting pad
Materials Needed for Lining Envelopes:
- White School Glue Stick or Double Sided tape
- Printed Paper for liners (a thinner paper works best, I used thin scrapbook paper or a thicker wrapping paper)
- Envelopes to be lined
- Kraft Knife & cutting pad
- Bone folder
- Optional heavy books to hold paper still
Instructions for Creating your template:
The one thing I like to do when I’ll be using a particular sized liner over and over is to create the template in a bit more sturdy fashion to keep the wear and tear to a minimum.
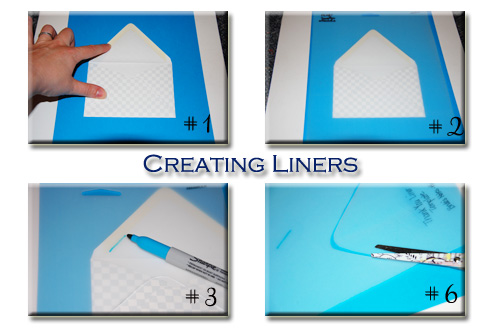
- Take one envelope and place it on a firm surface like a cutting mat.
- Place the sheet of stencil plastic over the envelope, tape it to your table to help hold it in place if needed.
- Using the Sharpie marker start tracing around the inside of the flap on the inside where the glue-line stops. This will allow the liner to fit right below the sticky part that seals the envelope. Follow the glue line to the outside edge of each envelope.
- Next trace just inside of the bottom edge of the envelope.
- Finally place a ruler to connect the top lines with the bottom line. Move this line just inside the outside edge of the envelope to allow the liner to slide down inside the envelope. Repeat on the other side.
- Cut out the liner and label your template with a sharpie so you’ll have it handy next time you need to line a new envelope of this size
Instructions for Using an Envelope Liner Template:
Paper Recommendations & Notes:
Now, you are ready to use your liner to cut out the liners from your selected paper. I recommend a thinner stock of paper for envelope liners for several reasons. 1) it is easier to work with when it comes to folding down the flaps and 2) it doesn’t add as much extra weight to the envelope. For those using liners for wedding invitations or the such you know how much drama extra postage costs can be. So a thinner liner paper equals less added weight to worry about paying for later. For the most recent set of liners I used thin scrapbook paper from a bulk “My Minds Eye” book of papers. I liked how it had a variety of “vintage” floral prints. If you are making 4-Bar sized envelope liners, a piece of 12×12 paper you should be able to get 4 liners with a small piece left over that would be a perfect size to reuse as a belly band if you are also DIY’ing your invitations. You’ll also find for A7 & A9 liners you will have less wasted paper left-over if you use standard sized paper (8.5 x 11), with A9 liners using the standard paper will also equal less cuts!
Cutting Out Your Envelope Liners:
There are tons of how-to articles out there on how to cut out envelope liners, and they are all equally helpful. Everyone has to find the way that works best for them. Some cut out each liner individually after using the template to draw around the back. That works wonderfully, however, I had over 100 of these to cut out and I found that a little too slow. So I came up with a slightly different way to go faster with more uniform cuts. Again there is no right or wrong way to do this…just find the method that words best for you!
- Place your cutting mat on a sturdy flat surface.
- Stack 2 or 3 sheets of your paper to be cut so that all the edges are perfectly in line.
- Place stack of paper onto the cutting mat, making sure that everything is still perfectly aligned. I like to line up the paper using the grid on my mat to ensure I end up with straight lines.

-
Optional: Place a couple books or other heavy objects in the middle of the paper to help keep everything firmly in place. Sewing or pattern weights would also work great for this.

-
Lay your liner template down in the bottom left corner of the stack of paper. Take care to align it on both the bottom and left sides, which will give you fewer cuts to make. And few cuts = saved time!!

-
Using one hand to hold the template steady, use the other to run the Kraft knife firmly around the edge of the template. Make sure to apply enough pressure to cut through all the layers of paper, and keep the knife blade firmly against the edge of the template for the smoothest cuts.
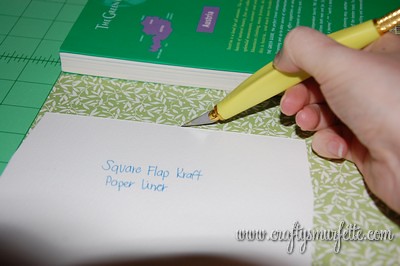
-
Remove the liners you just cut and move the template to line up again in the lower left corner of the paper. Repeat on the top section of your paper after you have cut all the way across the bottom. If you are using wrapping paper make sure to cut off a piece that is no longer than your cutting mat so it is easier to manage. Once you have all your liners cut out…it’s time to put them in the envelopes.
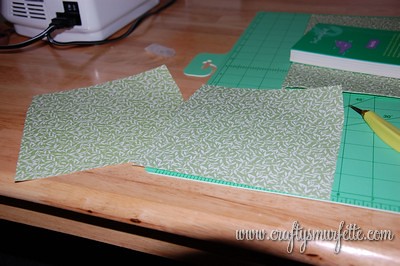
-
Slide the new liner inside the envelope and line it up so that the top of the liner is just below the glue line.

-
Turn the envelope over to the front side, and flip the flap backwards so you are looking at the back of the liner paper.

-
Apply glue stick to the back side of the liner paper

-
Press flap firmly down onto glued area.
-
Flip the envelope back over and use the bone folder to carefully run along the inside edge of the fold while you close the envelope.

-
Once closed use the bone folder to run along the fold to ensure the envelope will stay closed.

(Optional Tip): If you have a Scor-Pal (mine came in really handy during the wedding prep) you can set up a scoring template and easily score all your liners really quickly. To do this line up the base of the envelope in the upper corner and mark the correct line on the tray with a post-it note to serve as your template to know where to score each liner.
Using this method I was able to cut 16 liners in 5 minutes, which is MUCH faster! Hope this helps a few of you out, and if you have questions please don’t hesitate to email me.
**Note** I do not work for nor do I receive any support or benefit from my recommendation of any products or corporations. These are purely my options based on my experiences with these products and corporations.



 Download template:
  Download:
  Download:
