Semi-DIY: Creating Coasters – Part 2

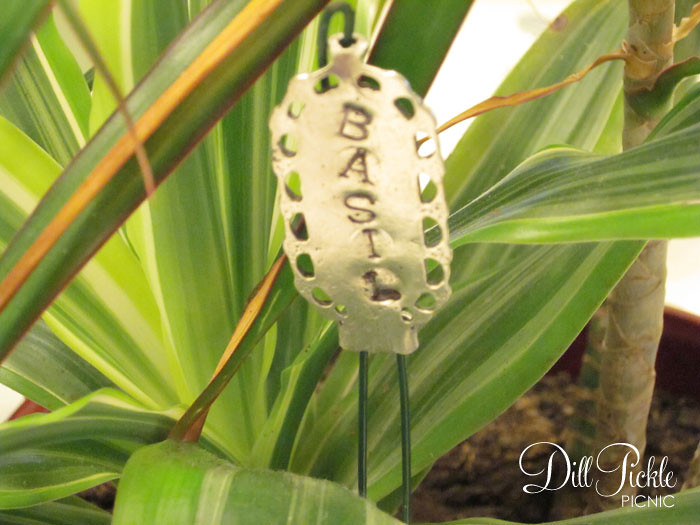
So yesterday you saw our first re-purposed item coaster attempt, today I”ll show you the latest additions and how they came about.

Back in June, the boy and I celebrated one glorious year of marriage with a fun little trip to Asheville, NC.  We took a couple days off from work, and the hubs planned out the where/when/how and kept it as a surprise destination until the morning we left.  He chose Asheville because 1)I had never been 2) it offered plenty of outdoor activities (which we both enjoy) 3) it offered nice lodging & dining options and 4) being at a high elevation that Atlanta it would be a nice relief from the oppressive heat that has plagued the Atlanta area this summer.

All I can say about reason #4 is HA!   Mother Nature definitely didn’t get that memo, and instead it was a sweltering mess of high temperatures mixed with humidity from the depths of places known for fiery torture.  Any of your familiar with Weddingbee might remember that Mrs. Snow was getting married in Asheville in June…yes, it was the same weekend and she blogged about the crazy weather swing as well.  So, we rearranged several of the things the boy had in his plans so we didn’t melt away in the oppressive heat…and in the midst of wandering around we realized that weekend was also the River District Artists Studio Stroll.

So we drove over and wandered around through several of the studio’s, not really looking for anything in particular.  Then right before turning around to make our way back to the car (and out of the heat) we walked into Michael Hofman’s Studio.  Michael makes beautiful pieces of porcelain pottery using antique lace to make impressions into his pieces.  Some of the lace he uses is centuries old, from things like christening gowns & wedding dresses.  It was quite interesting to meet him, and see part of his process in action.  He was even telling us about someone who brought in their grandmothers wedding dress to use to create their wedding china (incidentally the dress was not harmed in the process).  So we looked around thinking we might pick up a serving platter, but then the boy picked up these small square plates and said “hum? think they could be coasters?”

So, we picked up two of the square tapas plates.  Once home, we again brought out some felt pads from the local dollar store (the thinner of the selection this time) and added one to each corner of the plate.

Instant coasters, that once again provide a useful reminder of our anniversary trip!  Look at the lace details up close…aren’t they stunning?  Those lace details also provide a place for beverage sweat to pool, gotta love it when something is both beautiful and useful. 🙂

Can you tell we tend to purchase only mementos that have an actual use around our house?  We tend to buy art or handmade pieces to commemorate special trips or events…that and I buy magnets (which I still need to figure out what to do with since I’ve picked up magnets from my travels my entire life).  What do you pick up as mementos of special occasions or trips?

Semi-DIY: Creating Coasters – Part 1

We don’t like coasters.   There…I’ve said it out loud.  That’s not to say that we prefer to place our sweating beverage glasses or bottles directly onto surfaces, I’m just saying  we haven’t found any that we BOTH found aesthetically pleasing.  Then something happened…we stopped shopping for them and instead focused on things we could make into them.  This is the story about how we used these little guys from the local dollar store to solve our coaster dilemmas.

dollar store felt floor protectors

Last year while on a bit of a family vacation with the boy’s family we noticed this fun piece of flattened pottery on a deck side table in the house we were staying in.  It was the perfect size for a couple of glasses and still appealed to both our senses of design.  Interestingly enough we already owned a bowl in a similar pattern from the same pottery studio that the boy uses on his bedside table to store the contents of his pockets each night.  Do you see where I’m going with this?  Yep, we looked around the shops that weekend in search of a plate to use as a coaster on our living room end table. We ended up choosing the small triangular plate from The Good Earth Pottery, their stuff is great in not only is it appealing to the eye, it is also dishwasher and oven safe as well.

Then to keep our fun new find from scratching up our tables we just added one of the little felt pads to each corner.


Instant extra large coaster!  What’s really nice is when I am lazy and fill up a Nalgene bottle with water…it fits on the coaster with no worries as well.  As do ice cream bowls, large coffee mugs…you get the picture. You can see in the next photo how the colors in the plate match our rug, but sadly what you can’t tell is how nice it looks on our end table.

Overall, I’m really pleased with how our initial attempts to use something not originally intended as a coaster worked out.  The benefit we never considered when we initially picked this piece was how any sweat from glasses placed on top would pool in the small groves of the pattern , this means the bottom of the glass stays drier than if the piece were a completely flat surface.  Plus, the coaster also serves as a very useful reminder of our trip to Highlands, NC. 

Come back tomorrow and I’ll show you round 2 of our coaster experiment! 🙂

How have you re-purposed items to create the “thing” that seemed to elude you otherwise?  Was it a success?

DIY: Stamped Plant Marker

This is one of my final “envelope of doom“ projects, but it’s one you could use for many other things.  I’ve been wanting to try my luck at stamping metal objects with my letter punches I picked up a while back with a 50%  off coupon and this gave me the perfect excuse.  I think I still need to work on the pressure I “stamp” or hammer each letter with…but overall I was happy with how it turned out.  Since these items were intended to be gifts, I included this little guy in a SwapBot package (visit this post for more info on swapping).

Project 4 - Stamped Plant MarkersAnd yes, I realize that isn’t Basil.  My basil plant just died so this was my indoor option. 🙂

Supplies Needed:

Project 4 - Stamped Plant Markers

  • Letter Punches, I have the Making Memories Stamping Die Set
  • Metal item to use as plant marker
  • Large piece of floral wire (not pictured)
  • Hammer
  • Solid surface (in my case our sidewalk)
  • Black permanent marker or paint
  • Glue (like E6000) – optional depending on your item

Instructions:

1. Gather your metal item to stamp.  I’m using a metal pendant from my envelope of doom, but metal washers or even flattened spoons also look fun!  Use your imagination.

2. Find a solid surface that won’t scar, but also won’t give when you hammer the letter into the metal.  If you are worried about concrete marring the opposite side of the item and your set didn’t come with the little mat like mine did, you could always put down a thin layer of fabric to protect the item.

3. Measure to determine if your word will fit on the item

4. Start from the top, pick the first letter and align on the item.  Hit with hammer.  (sidebar: I was a bit frustrated with something the afternoon I attempted this project so it was great stress relief to hammer on something…although it might have caused to hit a few letters too hard.

5. Repeat with the letters down the length of the item.  You’ll get the hang of how much pressure you need after a few letters so having a test piece to work on first would be helpful to some.
Project 4 - Stamped Plant Markers

6. Next it’s time to make those stamped letters stand out a bit more.  Using a black permanent marker or paint quickly color in the first letter and then wipe the excess off so that only the groves are painted. Repeat for each of the letters.

Project 4 - Stamped Plant Markers

7. Now it’s time to attach your metal tag to the wire.  If you are using a flattened spoon, you can skip this step since you already have a stake on your tag!  This is also where your version will differ from mine…I had a loop on the top and two pieces on the bottom of each side. So I was able to bend each of these pieces towards the back of my piece.

8. This is also where your version will differ from mine…I had a loop on the top and two pieces on the bottom of each side. So I was able to bend each of these pieces towards the back of my piece.

9. Fold your wire in half and start to attach it to the back of your metal piece.  For a washer open the wire up much like I have below to form an inverted “V” and then glue to the back of the washer.  I was able to feed the wire up through the top loop and then secure it to the back by bending the sides down on top of it.

Project 4 - Stamped Plant Markers

10. Let glue dry, add to plant and enjoy 🙂

Project 4 - Stamped Plant Markers

Do you label your garden plant? We didn’t do such a great job of that this year, but next year I plan to create DIY plant markers.  If you’ve created your own please share your favorite garden marker project links.

PS.  I hope each of you has a wonderful Labor Day Weekend & War Eagle!

DIY: Flour Sack Boo-tiful Pillow Cover

I know Halloween is still a few months away, but I couldn’t resist posting this fun (and cheap) project now.  It was easy & cheap…plus it’s tied to the infamous  “envelope of doom“,  so that makes it even spookier 😉  My Boo’tiful Flour Sack Pillow Cover:

Supplies Needed:

  • Fabric for pillow cover, I used a Flour Sack Cloth from my local Dollar Tree.  You will one piece of fabric that is 14 x 14.5 inches.
  • Small Pillow or stuffing
  • Yarn or Other Trim to make letters
  • Sewing Machine with matching thread
  • iron & ironing board
  • glue (I used hot glue)
  • Ruler

Instructions:

  1. Gather all your materials and press the fabric to remove all creases.
  2. If using the thin flour sack fabric you will need to cut the fabric in half length wise.  If you remember I used the other half of this same piece of flour sack to make this fun fish pin board.
  3. Using your ruler pull the top edge of the fabric to the back 3.25 inches and stitch down along the bottom edge.
  4. With the sewn edge facing down, pull the bottom edge of the fabric up and over to the top 6.5 inches and press.
  5. Using your ruler pull the top portion down 7 inches.  It will overlap the pressed portion from step #4
  6. Take the folded fabric package to your sewing machine and sew both the left and right sides closed (leaving a 1/4 inch seam)
  7. Turn the pillow cover inside out and you are ready to use.
  8. If you don’t have a small pillow already you could either use a pre-purchased accent pillow form, or fill it up with stuffing 🙂

Then to make it boo’tiful:

  1. Place a piece of cardboard inside the pillow cover to keep any stray glue from gluing it closed.
  2. I wasn’t sure of my freehand skills so using a washable pencil I drew a quick outline of my letters.
  3. I took my spooky yarn from the “envelope of doom” and glued it around the letter outlines.
  4. To make it a bit more sturdy for future washings I added several stitches around the furry dots to hold everything in place.
  5. Let dry/cool
  6. Remove cardboard, stuff, and enjoy!

Total Cost:  $1.00 and up

Using Envelope templates…of doom!

I love paper and I love office supplies.  There, I admitted it, so when I found a fun piece of paper in my envelope of doom I figured what better than to turn it into paper office supplies.  If you’ve followed my blog for a while you already know I love both lining envelopes and making my own envelopes, and some of my favorite tools are the templates you can purchase from Paper-Source.  I’ve more than gotten my money’s worth out of the ones I own, so when I was in the store a few weeks back taking a little class and saw the new baby sized envelope template I had to try it out.

This is the template kit I choose, the other option had pink paper selection but looking around here should explain how much I love blue and green so naturally I selected the “pool” color selection.

And this is the paper I found folded up in my envelope of doom!

Using their envelope templates is super-simple.

  1. Trace around the template on the reverse side of the paper.
  2. Cut out along the lines
  3. Score where the inner opening of the template are (I use a scoring board from Martha & love it)
  4. Glue the edges
  5. Put those babies to use, these just happen to be the perfect size for a business card!

So basically I used contents from my “Envelope of Doom” to create “Baby Envelopes of Doom” 😉  In keeping with the rules of the game, the items were to be gifted to someone else…and these just so happened to be included in a swap package I was sending out!  I love it when things work out like that!

** I have been in no way compensated for my options or the products referenced above.  These are purely my unsolicited options of crafty products I use and adore! **

DIY: Sewn Fishbowl Note Board

This is a project I have wanted to attempt for quite a while.  I’ve read several tutorials utilizing freezer paper for applique methods wondered if it was as easy as it seems.  All in all I’m happy with how it turned out, but I did have several problems along the way.

Materials Needed:

  • Freezer Paper (not pictured)
    large enough for pattern and an inch margin on all sides
  • Fabric to applique
    I choose to use a Flour Sack from my local dollar store
  • Thread in corresponding color
  • Photo Frame with the glass removed
    I used an 8×10 frame we had in the basement
  • cork or Styrofoam – should be large enough for frame opening
    I used Styrofoam since it is readily available in the trash heap at my office.

Tools Needed:

  • Marker to trace pattern (or print directly on freezer paper)
  • Scissors
  • Iron & Ironing Board
  • Sewing Machine
  • Xacto knife or cutting tool

Instructions:

  1. Cut your material down to the correct size.  Measure the opening to your photo frame and add 1.5 inches to both the horizontal & vertical measurements.  You will use this later when attaching to the frame.
  2. Transfer your pattern to the freezer paper.  This can be accomplished in one of two ways.  I chose to simply print out my template and use a marker to trace it onto the freezer paper.  However, you could also run the freezer paper through an ink jet printer on the paper side.
  3. Remove your pattern and center your pattern in the middle of your piece of fabric, paper side up.  Using the iron with no steam, press your freezer paper to the fabric.  I was a bit unsure how it would hodl so I also pinned the corners for added “holding power”.
  4. Now using your sewing machine, simply sew over your template lines using your favorite stitch setting.  For my message board I chose to use a fun zigzag stitch.   You can see I got off my pattern a bit, but don’t worry…you can fix this later.
  5. Remove the fabric from your machine and carefully tear the freezer paper away.  This is where I had issues…major issues.   I ended up having to use the craft knife to carefully cut the paper away.  I don’t recommend this since it’s also easy to cut your stitching this way.

  1. Now is the perfect time to embellish your fishbowl a bit.  Remember by mistake, I decided to use some leftover wedding project ribbon to add a colorful bow to this fishbowl.  I just tied the bow, trimmed and singed the edges of the ribbon, and then stitched it to the fabric.  Press the fabric when you are finished to create a smooth surface for your message board.
  2. Now it’s time to cut your cork or Styrofoam.  The easiest method I found was to place your material on a cutting mat.   Take the glass you removed from the frame and place onto your foam.  Line up the outside edges so you have fewer cuts to make.
  3. Using an Xacto knife (and being careful not to cut yourself on the glass edge) cut around the edge of the glass pane.  Make sure your cuts are over your cutting mat.
  4. Time to put it all together.  Carefully center your fishbowl fabric over the cut piece of foam/cork.  You could easily use spray adhesive on the back of the fabric to help hold it in place while you complete the assembly.
  5. Take your foam/cork sandwich and insert into the opening of your frame, and fold edges to the center of the foam/cork.  I used clear packing tape to hold the edges down.
  6. Replace the back of the frame.  If it doesn’t sit completely flush, you could also use clear packing tape to hold the back securly to the frame.  This is necessary to keep everything all nice and wrinkle free.
  7. Hang and Enjoy

Everything used came from my stash, except the Flour Sack towel from the dollar store.

Total Cost:  $1.00 and up

Cute huh?  Oh…wait….where are the fish?  Don’t worry!  I have a post about fish coming up later!

So, overall I wasn’t impressed with my first experience using freezer paper.  Have any of you out there given it a try with better luck?  If so, please help me out…what did I miss?

DIY: Flower Power Dog Collar

I mentioned the Envelope of Doom in a previous post, the part I’m not sure I mentioned was the second portion of the challenge.  The goal was to create projects you could gift to someone in your life…preferably not yourself.  So, with those rules in mind this is first of the 3 (or more) projects I created using several components from the  “envelope of doom“.  Don’t have an envelope full of supplies…don’t worry.  You could create this project using items from your local dollar store as well!

This gift is for a friend with a cute new puppy.  A puppy who needs a little something frilly to let folks around the dog park know she’s a little girl. 🙂

.

Supplies Needed:

  • Collar
    (shhhh…don’t tell her it started as a kitty collar.  Just remove the bell and she’ll never know)
  • Felt Scraps
  • Plastic Scraps
  • Embroidery Thread
  • Silk Flowers
    ones with many small blooms work best to make a fuller flower
  • Scissors
  • Glue
    I used hot glue, but even double-sided tape would work to hold the plastic to the felt while you cut and sew.
  • Needle
  • Hole Punch (optional)

.


.


.


Step by Step Instructions:

  1. Start off by taking your flowers completely apart.  Some crafty person could be able to use the stem pieces later, but I just tossed them in the recycle bin for plastics.  For this project I used 3 sets of the pink hydrangea “blooms”.
  2. Because this will end up on a collar for a fun, bouncy doggy it needs some stability so bring on those holographic Valentines (if you don’t have Valentines on hand you could use any sturdy bound for the trash plastic product).  Using a large spool of thread as a guide outline a circle and cut out with a pair of scissors.
  3. Using a rectangular hole punch make two punches to the center of the piece of plastic.  You will use these later to attach the flower to the collar so place them at least 1/2 inch apart.
  4. Attach your disk to a scrap of felt with a small amount of glue, and then trim around the edges.  Be careful to leave a 1/4 inch overhang to use for attaching it to the flower later.  Then use this piece as a template and cut a second felt circle.
  5. Take the non-plastic felt circle of felt, take a needled threaded with matching embroidery thread knotted on the end and bring through the center of the felt circle. Take 1 flower petal and sew it to the center of the circle with one stitch that goes on either side of the center hole.
  6. Fold one half of the first petal over hot dog style so that half of the felt circle is exposed.  Stitch down an additional petal to the side of the existing petal.
  7. Repeat Step 6 until surface of felt circle is covered (leaving space around the outer edges to attach to the bottom).   The more petals you use the fuller your flower will be.

  1. Thread your need with matching embroidery thread and bring both lose ends of thread together so it’s doubled.  Run needle through the finished side of the felt covered plastic disk and through the second hole back to the finished side.  (see photo above)
  2. Place the plastic disk side of the bottom piece on top of the bottom of the flower.
  3. Using embroidery thread & needles, use a blanket stitch to sew the two pieces together.  When finished the plastic disk should be completely hidden inside the felt/flower sandwich.
  4. Using thread ends left from Step 2 re-thread your needle and attach the flower to the collar.  You could either stitch it directly to the fabric of the collar…or I ran the needle around the plastic collar stay piece and tied it off after several wraps.  This holds it in place, but also allows the collar to “grow” with little Miss Lucy.
  5. OR…don’t have a puppy you need a collar decoration for?  That’s OK, you could use this same method and just attach a pin back and use it for a brooch, hat or bag embellishment.

Total Cost: $1.00 and up

CDog wasn’t home when I took these photos, and I haven’t received any of Lucy sporting it yet…so a large stuffed animal came out to model it for you 😉

So, there you have it….Project #1 completed.  So now let’s chat…do you craft things for your pets?

Bring on the Doom!

The Crazy Crafty Wicked Cool Envelope of Doom that it!

Long ago (ok a few months ago), and in a land far away (hey, California is pretty far away from Georgia) the lovely Michelle L. won a Stash Busting give-a-way and created a blog.  There she created treasures from her winnings and posted them for all to see.  One day Michelle hatched a devious plan and decided to share with the world her “stash”. Using her leftover winnings and her own personal “stash”, the “Crazy Crafty Wicked Cool Envelope of Doom” give-a-way was born.  In her words, “I’m calling them ‘envelopes of doom’ because the items are going to be pretty eclectic. Okay, insanely diverse. And a few, possibly mind-bogglingly awful. It’s up to YOU to re-imagine and transform them into wicked coolness.”  The winners were to, “promise to make at least three interesting things from the contents, and post them online for us all to see.  Also, since this is kind of a “craft-it-forward” deal, I think your assignment should be to make things for other people – in other words, come up with three gift ideas, and tell us how you gave your creations away.”

Now, that sounds like a challenge I’m up for…and as luck would have it.  I was one of the winners!

After a bit of a technical glitch that put my envelope a bit late arriving, I opened my mailbox and was off to an immediate start, chanting “must catch up, must catch up”.  I ripped it open and spread out the contents quickly take stock of the monumental task ahead of me.  Honestly, I’m not sure what to think of some of this stuff.  There is some odd yarn-like stuff, a panel of hologram valentines, and an expired Starbucks card.

I put all that aside for a moment and focused on these odd-looking pink squares.   Interestingly enough they matched up exactly with the green pixie stick deal which makes me think they might be some sort of construction toys…. Wanna see?

Oh, TOYS!  That’s it… I have a friend who collects Barbie & her assorted stuff…so I quickly assembled the 3 pieces together.  Do you see where I’m going with this?

Yes, my first project was to create an action figure doll size set of weights.  I even gave it a try myself…


Now that’s my kind of workout!

Just kidding Michelle…I’ll be posting at least 2 of my projects from doom in the upcoming week.  Couldn’t resist kicking off this challenge with a bit of crafty humor!

If you want to see the other goodies these lovely crafters are coming up with, check out Michelle’s blog:  Mich L. in L.A.

ReUse: TP Roll Candy Bunting

In honor of Earth Day & my April Stash Bust endeavors I decided to try my luck at reusing several TP(toilet paper) rolls because I’m not sure about your household but we seem to have an abundance of empty cardboard rolls.  I’m really loving bunting right now, so I set out to make some sweet candy bunting from my trash & stash…and this is what I ended up with:


What do you think?  I’m thinking it’s quite cute…and so easy to make that you could even have you kids help you with this project.  It could be fun for a child’s birthday party or even dressed up a bit more to hang behind a candy buffet.

Supplies Needed:

  • Toilet or Paper Towel cardboard rolls (1 TP roll averages 9 pieces of candy, or 4 feet)
  • Tissue Paper (you could also use fabric)
  • Curling Ribbon
  • Twine (Ribbon or Yarn would also work)
  • Hole Punch
  • Rickrack Scissors
  • Craft Knife or Scissors
  • Double-Sided Tape (optional)

Instructions:

  1. Using your craft knife or scissors carefully cut your cardboard rolls into 1/2 inch pieces.  (If you are doing this project with small children this is a step an adult should complete ahead of time.)
  2. Using a standard hand-held hole punch punch two holes across the tube from each other.  Repeat this process for each of your 1/2 inch pieces.
  3. Cut bunting twine to your desired finished length.
  4. Cut your tissue paper (or fabric) into 5 inch square pieces using pinking sheers. (If doing this project with children this is another step that could be completed by an adult ahead of time.)
  5. Carefully thread one piece of cardboard onto the twine. (hint: To make this easier I actually taped one end of the twine to my table.  This helped keep one end stationary while I was threading from the opposite end.)
  6. Take a piece of tissue paper and place it under your threaded circle and fold it over to overlap in the front.  (hint:  You might find using a small piece of double-sided tape helpful to hold everything in place, but it isn’t necessary.)
  7. Using 4 inch pieces of curling ribbon, tie off each side of your “candy” with a hard knot.
  8. Using scissors curl the ribbons to make a decorative tie.  (If you are doing this project with small children this is a step an adult should complete once the stringing process is completed.)
  9. Repeat the length of your twine.
  10. You can move the pieces slightly along the finished product to help evenly space them.
  11. Hang and Enjoy!


See…quick, easy, and a fun way to turn a common household trash item into something fun & decorative!

And if you have extra “pieces of candy” left over you could always glue them to place cards or signage for a sweet look.

Price Breakdown: Free from my trash & craft stash!
However, if you wanted to create these with no supplies on hand you could do so entirely from your local dollar store!

What crafty fun will you reuse trash & stash items for this week?


ReUse: Security Envelope Bunting

I’ve been saving envelopes with cool security patterns since I saw a cute cake bunting from the ever wonderful Martha made from her papers that mimic the same patterns.  So, what better time than during April’s Stash Bust to finally put those envelopes to use. Now after making a couple I think this would be an easily portable craft project to work on while I’m traveling for work and stuck in hotel rooms!

The possibilities of how to use these are endless!  You can use them to decorate a cake, create a pretty package wrapping, I’ve seen them attached to fronts of greeting cards, craft show displays… and of course you could use any type of paper to make the flags. 
How will you use your bunting?

OK, let’s get started!  This is a super simple project, but I’ll admit it is a bit more time consuming than I thought.  To help speed up the process I’ll include several hints in the instructions below.

Supplies Needed:

  • Security envelopes (for this project I used 2 envelopes from my power bill)
  • Toilet Paper Roll
  • Baker’s Twine or Embroidery Thread (5 ft)
  • Double Sided Tape, Xyron, or Glue Stick

Tools Needed:

  • Ruler
  • Scissors
  • Bone Folder or Envelope Opener (optional)
  • Paper Cutter (optional)

Instructions (written directions follow pictorial):

  1. Carefully take apart your envelopes exposing the inner security lining.  To do this I use my bone folder and carefully slide it between the seams to open them up.  You could also use an envelope opener or just pull them apart as well.
  2. Use your paper-cutter (or scissors) to square up the pieces, and remove the edges and window panes  (hint:  I’m putting those window panes off the side for another idea I have swimming around in my noggin).
  3. Now, using either your cutter (hint: it’s quicker and easier to get consistent sized pieces using a paper-cutter with built-in ruler) cut your envelope into 3/4 inch strips.
  4. Stack those strips up together and use your cutter to cut those into 2 inch pieces.
  5. Measure & cut a 5 foot piece of either embroidery thread or bakers twine  (hint: if you use embroidery thread use a piece of tape or glue to seal off both ends to keep it from separating as you add your flags).
  6. You will start assembling your bunting by placing the first flag 6 inches from one end of your twine and stop 6 inches from the other end to allow you room to tie up your bunting.
  7. Apply your choice of adhesive to your first flag and carefully fold it over the twine sealing the edges together.  For this example I used double-sided tape that ran half the length of the flag.  You could also use a glue stick but it will be a bit messier.  (hint:  if you have a Xyron machine you can run all your pieces through at once and then just peel them off and fold over the twine.  It made the process MUCH quicker).
  8. Continue this process by adding a new flag every 1.25 inches.  You can always tape a ruler to your desk to make it easier to decide where to place the next flag, but after the first few I went with the just eyeball it method.
  9. Once you have all your flags in place it’s time to snip the decorative edge.  For this process I just pulled up a podcast I wanted to listen to and used scissors to make a “V” snip on each edge.  (hint:  if you want consistent edges you could also use scrapbook scissors or even a triangle shaped paper punch)
  10. Hang it up and enjoy!

Wait…but how do I keep it from getting all tangled up until I’m ready to use it.
It’s simple:  a toilet paper roll

  1. Just take a toilet paper roll and cut a small slit in the top edge.
  2. Take one end of the bunting and slide it into the slit.
  3. Carefully roll your bunting around the tube and once at the other end tuck it inside the slit as well.
  4. There you go…all rolled up and ready to use!

So, let’s recap:  4 feet of cute bunting completely from my stash & trash!

Cost Breakdown:
– Paper for Flags – Free from recycling the envelopes from pesky utility bills
– Twine or Thread – Free from my stash (or $.99 new from JoAnn’s, will make 2)
– Glue/Tape – Free from stash (or $2.99 from Target, will make 25)
– Toilet Paper Rolls – Free from recycling
GRAND TOTAL: FREE from Stash or $0.60 per bunting

PS.  I’ve decided to list a few of my “crafty projects” in the etsy store over the next few weeks, it’s kinda sad how long it’s sat empty!