Semi-DIY: Valentines in a Snap for under $1

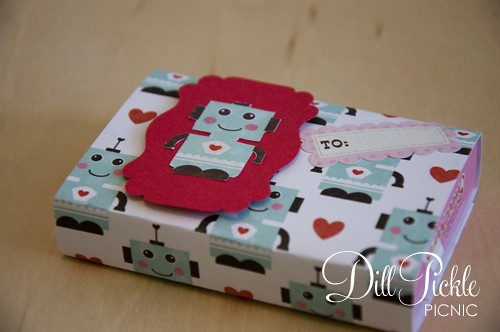
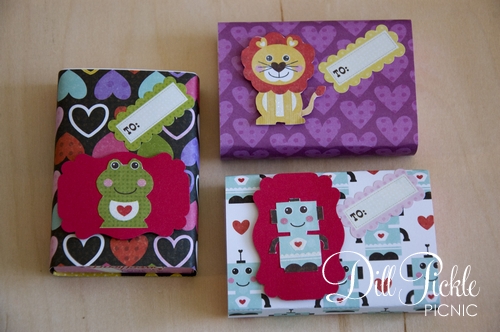
It’s been way too long since I posted a fun crafty treat and I’ve really missed it (and you guys)! Today’s Semi-DIY project is a quick and cheap way to dress up a simple box of candy.  It would be great for adults and the kiddos alike.  See…cute right?
DPP-2011ValSwap18

Supplies Needed:

  • Boxes of Conversation Hearts Candy – I picked mine up at the local Dollar Tree
  • Double Sided Tape
  • Scrapbook paper
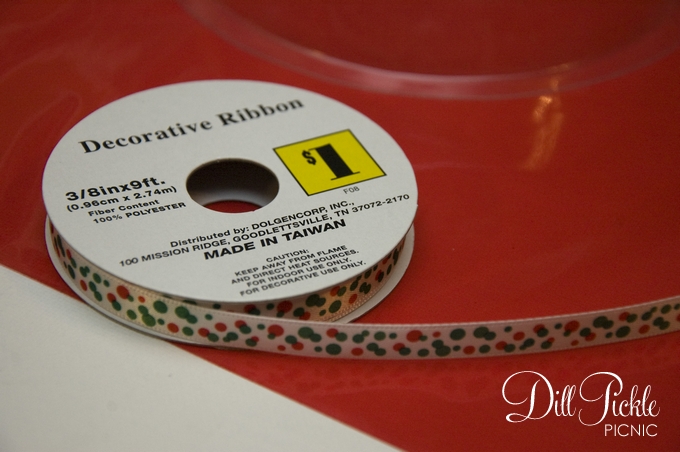
  • Stickers or other decorative items

Instructions:

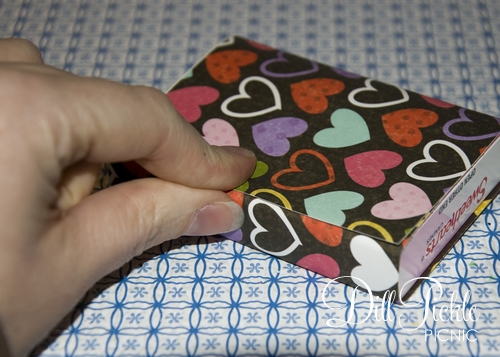
  1. Cut your scrapbook paper to the height and circumference of your candy boxes.  For the boxes I used the dimensions of the paper should be 3.5 inches wide by 7.5 inches long.
  2. Add a piece of double-sided tape to one end of the paper, and attach it to the back of your box.
    DPP-2011ValSwap25
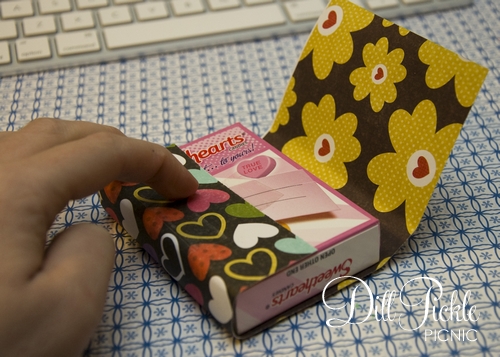
  3. Next, you will wrap the paper around the box and attach to the box with an additional piece of double-sided tape.  Do this underneath the overlaid section of the paper.
    DPP-2011ValSwap28
  4. Decorate with stickers and other assorted goodies.DPP-2011ValSwap30
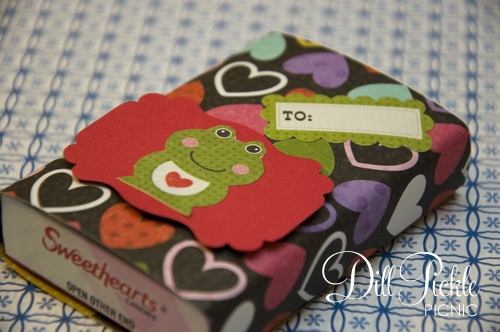
  5. Give to someone special!

Costs:

One of the great things about this project is that in additon to be simple, it’s also quite thrifty.  If you have a stash of scrapbook paper & stickers like I do then it’s virtually free since you just need to buy the candy.  My boxes of candy were purchased from the Dollar Tree in a package of 4 for $1 and you could also pick up fun Valentines stickers there as well.

$1.07 for 4, so 26 cents each!  Can’t beat that!

DPP-2011ValSwap21

DIY: Large Candy Decorations – Part 1

Can you believe it’s December already?  Wasn’t it just June?  I remember thinking the saying “time flies” was just one of those things older adults said. Much like walking to school in the snow, up hill both ways.  Sadly now I completely understand what they meant…this year has flown by!

Last year on a last minute, right before Christmas trip to Pike Nursery I noticed  their fun outdoor decorations.  They had these large peppermint patties.  It took me a minute but then it hit me…they made them.  So I snapped a photo thinking I should give it a try this year.

DPP-lgcandy17

DPP-lgcandy19

Supplies Needed:

DPP-lgcandy26

  • Tape
  • Scissors
  • Red (or any color)  cellophane wrap
  • Ribbon or twine
  • Clear Plastic Flower Pot Saucers (mine are 6 inch)

Instructions:

    1. Cut your cellophane into pieces larger than your saucers.  I doubled the diameter of my saucer, so 12 inches square for each 6 inch saucer.  Don’t worry if you have too much on the sides you can trim that later.
    2. Lay your first saucer in the middle of one of your pre-cut cellophane pieces, open side up.DPP-lgcandy7
    3. Pull the bottom half of the cellophane up and over the top of the open saucer.  Secure it with tape.DPP-lgcandy8

  1. Pull the top half of the cellophane down and hold closed with a tiny piece of tape.DPP-lgcandy9
  2. Now carefully gather one of the ends and tie with a small piece of twine.  You could also just use your decorative ribbon but since they will be outside I wanted to tie them with something a bit stronger.  Don’t worry if your ends are a bit long, you can always trim them when they are finished.
    DPP-lgcandy10
  3. Repeat the gathering and tying process on the remaining side.
  4. Now, cut pieces of your decorative ribbon, and tie over the twine to decorate your candy.DPP-lgcandy14

Want to make your candy into an extra large bunting to hang along your front porch?

Easy, just add your bunting twine or robe in behind your ribbon ties, hang, and enjoy!

DPP-lgcandy25

DPP-lgcandy22

Total Cost:

All of the supplies listed above were found at my local dollar store!  I spent a total of $3.00 which would make over 6 of these large candy pieces which supplies left over for a couple other projects you’ll see very soon
$1 and up

Like these candy decorations?
Then stick around…I’ll have additional ones later this week & next!

_______________________________________________________