
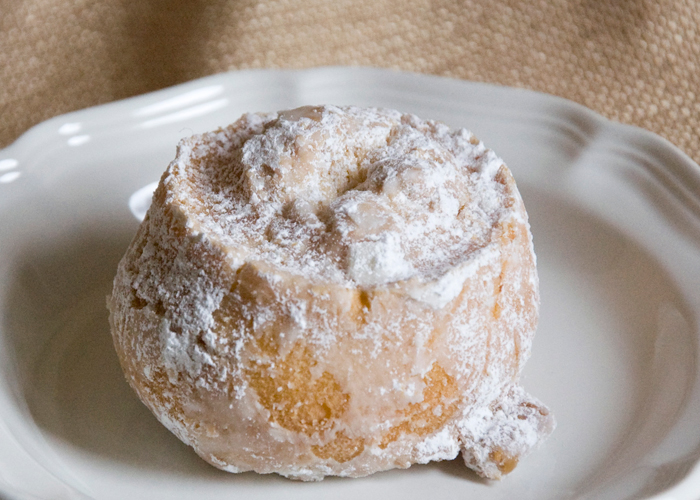
Buttermilk Cake Doughnut
Those of you who follow me on twitter have already heard of my love of these doughnuts, so today I’m sharing that love with the blogosphere. Dutch Monkey Doughnuts is a small, local doughnut shop in the northern suburbs of Atlanta that believes in making things from scratch and as locally obtained as possible. I had to smile when they posted the following tweet last week:
“So, a salesman from a doughnut shop supply company just dropped by, looking to add us as customers. The look on his face when I told him that we make all of our fillings, doughs and batters from scratch was priceless! “You make your blackberry jelly from real blackberries?” “Yup.””
These aren’t your standard glazed variety doughnut, with flavors like red velvet cake, carrot cake, jalapeno-cheddar w/bacon, pineapple coconut lime fritters, and the infamous dutch monkey they take it to the next level. I’m not a breakfast person but I love their cake doughnuts, they are like having permission to eat dessert for breakfast! 🙂 The standards are available daily (closed on Monday) but the real treat is the daily specials!
Standard Menu Includes: Raised Glazed, Chocolate Iced, Strawberry Iced, Cinnamon Sugar Rings, Buttermilk Cake, Creamsticks, Maple Bars, Apple Fritters, Cinnamon Twists, Buttered Maple Bacon, Lemon Meringue, Boston Creams, Cinnamon Rolls and The Dutch Monkey
Did I mention they also have the cutest little shop ever complete with porthole windows and step stools to allow the curious a glance at them hard at work in the kitchen? If you are up GA 400 north direction take a detour off Exit 13 and pick up a yummy doughnut…I’m 100% certain you’ll thank me!
Dutch Monkey Doughnuts
3075 Ronald Reagan Blvd
Cumming, GA 30041
Tuesday through Friday – 5:30am – 4pm
Drive-thru open 5:30am – 9:30am (weekdays only)
Saturday and Sunday – 7am – 1pm
Closed Monday


 What is Swap-bot?
 Would you have guessed the cover collage was a single shot of glass beads? Pretty fun huh?


 (photo source:
  (photo source: personal photo)