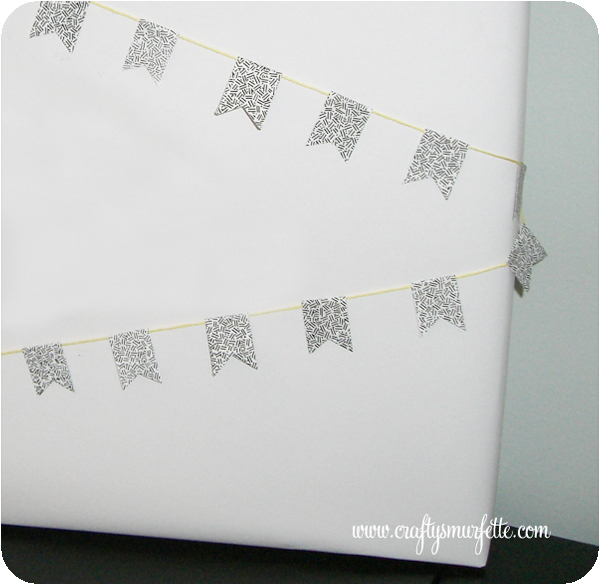
ReUse: Security Envelope Bunting

I’ve been saving envelopes with cool security patterns since I saw a cute cake bunting from the ever wonderful Martha made from her papers that mimic the same patterns.  So, what better time than during April’s Stash Bust to finally put those envelopes to use. Now after making a couple I think this would be an easily portable craft project to work on while I’m traveling for work and stuck in hotel rooms!

The possibilities of how to use these are endless!  You can use them to decorate a cake, create a pretty package wrapping, I’ve seen them attached to fronts of greeting cards, craft show displays… and of course you could use any type of paper to make the flags. 
How will you use your bunting?

OK, let’s get started!  This is a super simple project, but I’ll admit it is a bit more time consuming than I thought.  To help speed up the process I’ll include several hints in the instructions below.

Supplies Needed:

  • Security envelopes (for this project I used 2 envelopes from my power bill)
  • Toilet Paper Roll
  • Baker’s Twine or Embroidery Thread (5 ft)
  • Double Sided Tape, Xyron, or Glue Stick

Tools Needed:

  • Ruler
  • Scissors
  • Bone Folder or Envelope Opener (optional)
  • Paper Cutter (optional)

Instructions (written directions follow pictorial):

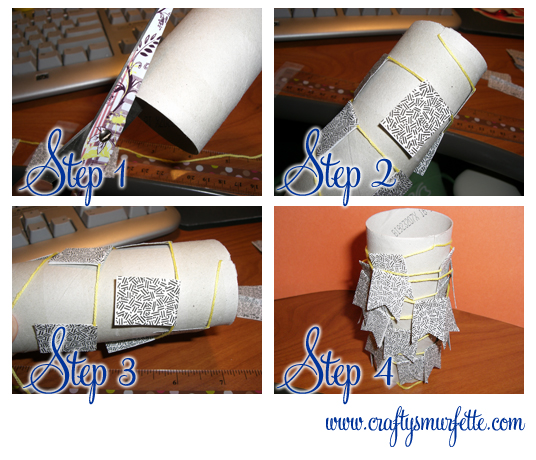
  1. Carefully take apart your envelopes exposing the inner security lining.  To do this I use my bone folder and carefully slide it between the seams to open them up.  You could also use an envelope opener or just pull them apart as well.
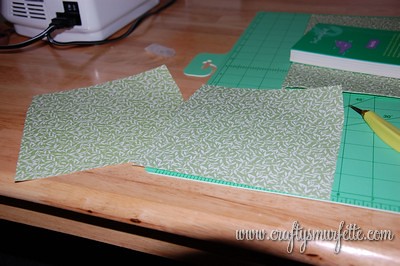
  2. Use your paper-cutter (or scissors) to square up the pieces, and remove the edges and window panes  (hint:  I’m putting those window panes off the side for another idea I have swimming around in my noggin).
  3. Now, using either your cutter (hint: it’s quicker and easier to get consistent sized pieces using a paper-cutter with built-in ruler) cut your envelope into 3/4 inch strips.
  4. Stack those strips up together and use your cutter to cut those into 2 inch pieces.
  5. Measure & cut a 5 foot piece of either embroidery thread or bakers twine  (hint: if you use embroidery thread use a piece of tape or glue to seal off both ends to keep it from separating as you add your flags).
  6. You will start assembling your bunting by placing the first flag 6 inches from one end of your twine and stop 6 inches from the other end to allow you room to tie up your bunting.
  7. Apply your choice of adhesive to your first flag and carefully fold it over the twine sealing the edges together.  For this example I used double-sided tape that ran half the length of the flag.  You could also use a glue stick but it will be a bit messier.  (hint:  if you have a Xyron machine you can run all your pieces through at once and then just peel them off and fold over the twine.  It made the process MUCH quicker).
  8. Continue this process by adding a new flag every 1.25 inches.  You can always tape a ruler to your desk to make it easier to decide where to place the next flag, but after the first few I went with the just eyeball it method.
  9. Once you have all your flags in place it’s time to snip the decorative edge.  For this process I just pulled up a podcast I wanted to listen to and used scissors to make a “V” snip on each edge.  (hint:  if you want consistent edges you could also use scrapbook scissors or even a triangle shaped paper punch)
  10. Hang it up and enjoy!

Wait…but how do I keep it from getting all tangled up until I’m ready to use it.
It’s simple:  a toilet paper roll

  1. Just take a toilet paper roll and cut a small slit in the top edge.
  2. Take one end of the bunting and slide it into the slit.
  3. Carefully roll your bunting around the tube and once at the other end tuck it inside the slit as well.
  4. There you go…all rolled up and ready to use!

So, let’s recap:  4 feet of cute bunting completely from my stash & trash!

Cost Breakdown:
– Paper for Flags – Free from recycling the envelopes from pesky utility bills
– Twine or Thread – Free from my stash (or $.99 new from JoAnn’s, will make 2)
– Glue/Tape – Free from stash (or $2.99 from Target, will make 25)
– Toilet Paper Rolls – Free from recycling
GRAND TOTAL: FREE from Stash or $0.60 per bunting

PS.  I’ve decided to list a few of my “crafty projects” in the etsy store over the next few weeks, it’s kinda sad how long it’s sat empty!
DIY: Easter Napkin Wraps – Religious Themed

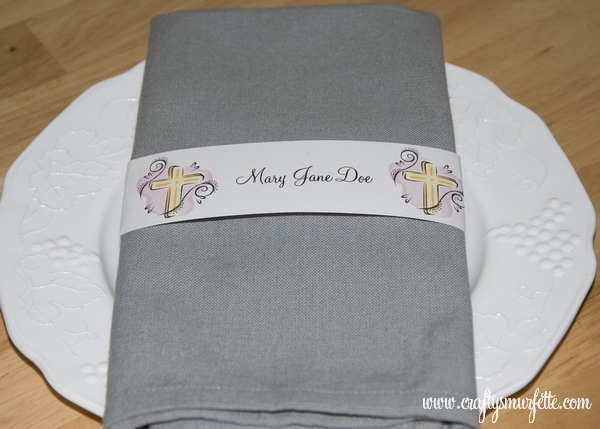
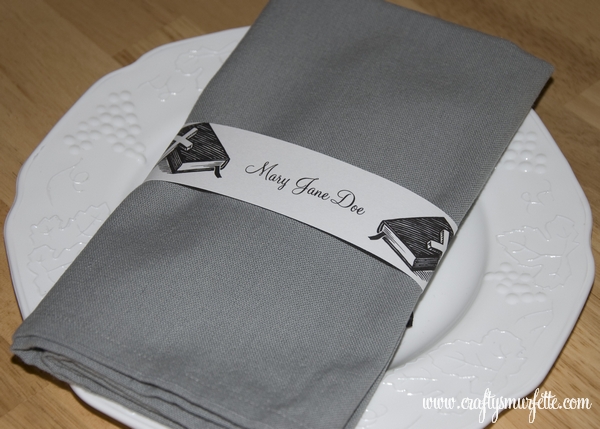
I have a friend putting together a ladies pre-Easter brunch at her church who asked me if I could put together a couple of reusable religious themed wraps.  So using MSClipArt (I’m being lazy since I’m so swamped at work) I whipped up several options that could be used not only at Easter but for other events later in the year.

Let’s start out with a pastel cross theme:


Download Template:  Pastel Cross Napkin Template

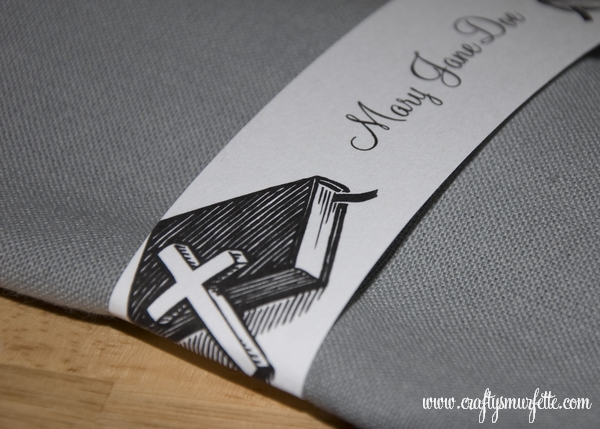
And then my friend requested a black & white option with a bible theme:

Download Religious theme template: Black & White Bible Napkin Template

All templates above use Monterey BT font which is free to download from SoFontes (see link on templates page).  New to Napkin Wraps?  No worries, visit this post for step-by-step instructions on how to use my napkin wrap templates!

ReUse – Powdered Drink Container Storage

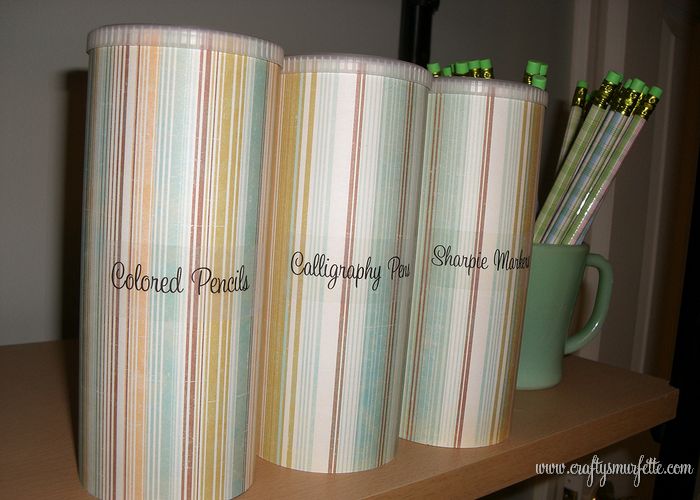
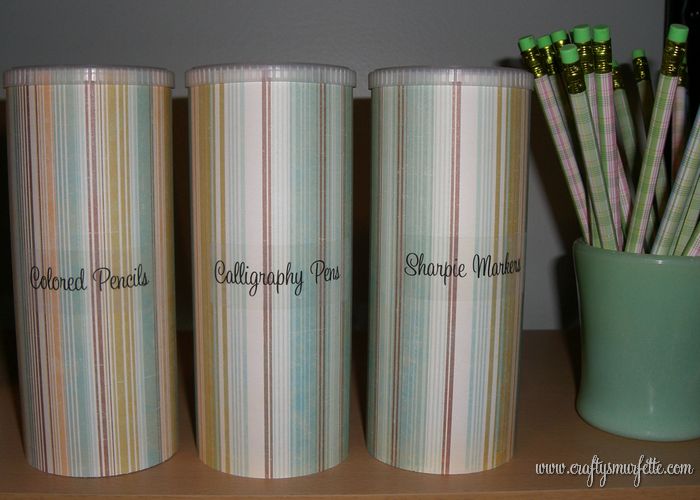
Earlier today I posted about using old Crystal Light plastic containers to make cheap and safe “big girl” candles for my friend’s little girl.  Afterwards I remembered I had never shown you how I use these containers in my craft room/office for storage.  Before I had all my pens/pencils in a large flower pot on my desk, but I was NEVER able to find the specific type of writing utensil I was looking for.  Now, I know right where they are…and they look stylish sitting on the shelf as well.  🙂

Supplies & Materials:

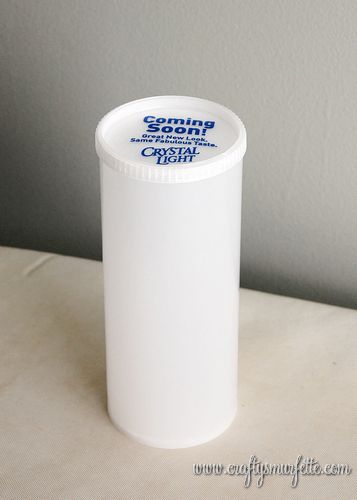
  • Plastic Powdered Drink tubes (ex. Crystal Light)
  • Clear Address Labels
  • Computer & Printer
  • Scrapbook Paper
  • Double-Sided tape or Xyron Machine
  • Scissors or Paper Cutter

Directions:

  1. Start out by cleaning the plastic container and removing all labels.  Dry throughly afterwards.
  2. Measure the height of your plastic container.
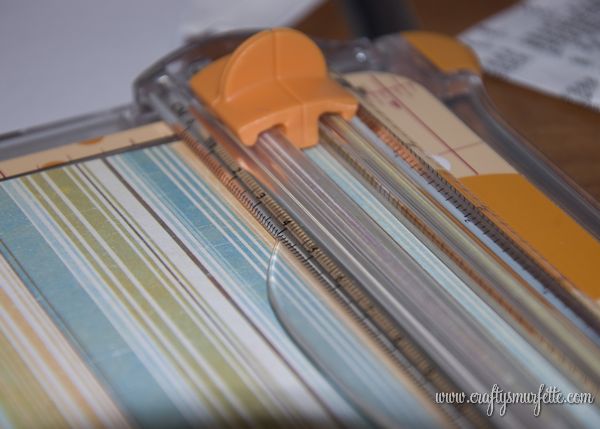
  3. Using your scissors or paper-cutter cut a piece of scrapbook paper to the correct height.
  4. Wrap paper around your container and make a small mark where the edges meet (adding .25 inch to allow for a better seal/overlap).
  5. Using your scissors or paper-cutter cut the piece of scrapbook paper to the correct width.  Use this piece as a template to cut other pieces for more containers.
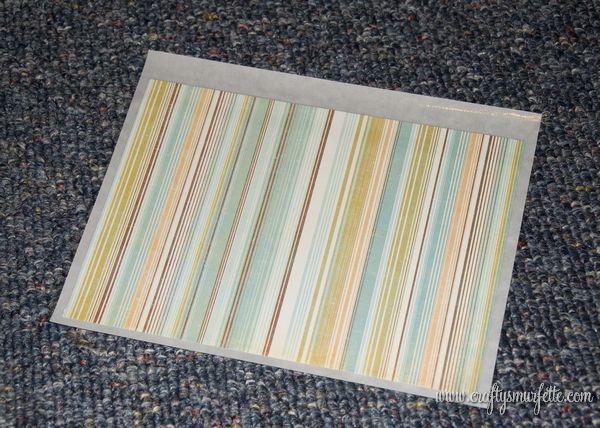
  6. If using an Xyron machine run your pieces of cut scrapbook paper through the machine.
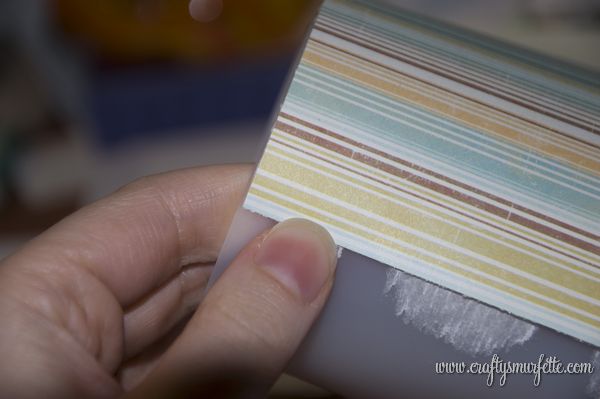
  7. Carefully remove the backing from the paper and carefully wrap it around the plastic container, taking care to smooth out to prevent any air bubbles. (If using double-sided tape run a piece down the height of the container and attach one end of the paper.  Then attach another piece of double-sided tape to the inside of the finishing edge and carefully smooth around so that the paper is smooth and the edges are sealed).
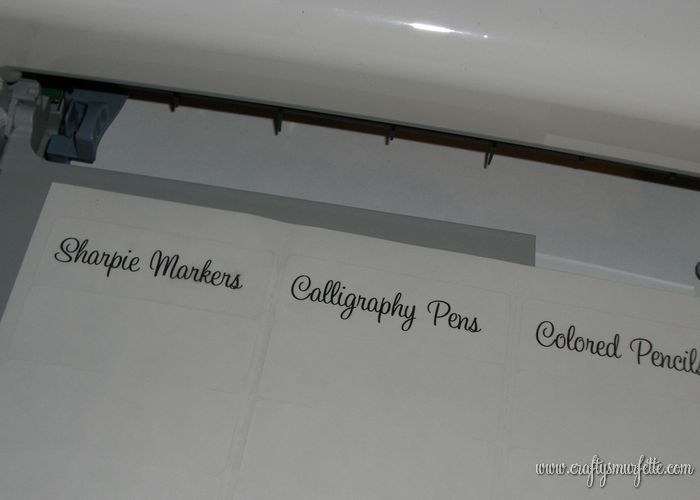
  8. Using your word processor of choice, print out your clear labels for each container
  9. Apply your labels and fill up your containers with their new contents. 

Cost Breakdown:

  • Plastic Powdered Beverage Containers – Free from recycle bin
  • Scrapbook Paper – Free, leftover from wedding
  • Clear Mailing Labels- Free, leftover from wedding

Total:  FREE

Bonus:  These are so easy to make they would make a fun crafty project for the kiddos as well!  You could also cut a small hole in the lid to make a stylish coin jar!

ReUse – Powdered Drink Container Candle

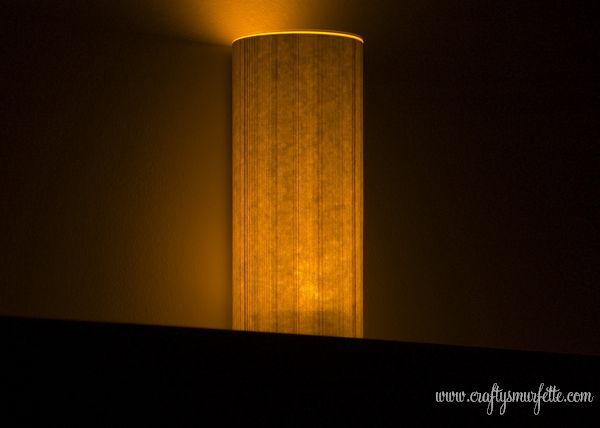
I have a friend with a growing 5-year-old…one who decided she wanted some big girl candles for her room.  Obviously candles aren’t the best solution for a 5 year old, and battery operated candles are quite pricey for something that might lose its appeal quite quickly.  So I had an idea:  use some leftover battery operated tea lights to whip her up some cheaper “big girl” candles 🙂

Materials:

  • Plastic Powdered Drink tubes (ex. Crystal Light)
  • Battery Operated Tea Light (1 per plastic tube)
  • Scrapbook Paper
  • Double-Sided tape or Xyron Machine
  • Scissors or Paper Cutter

Directions:

  1. Start out by cleaning the plastic container and removing all labels.  Dry throughly afterwards.
  2. Measure the height of your plastic container.
  3. Using your scissors or paper-cutter cut a piece of scrapbook paper to the correct height.
  4. Wrap paper around your container and make a small mark where the edges meet (adding .25 inch to allow for a better seal/overlap).
  5. Using your scissors or paper-cutter cut the piece of scrapbook paper to the correct width.  Use this piece as a template to cut other pieces for more containers.
  6. If using an Xyron machine run your pieces of cut scrapbook paper through the machine.
  7. Carefully remove the backing from the paper and carefully wrap it around the plastic container, taking care to smooth out to prevent any air bubbles. (If using double-sided tape run a piece down the height of the container and attach one end of the paper.  Then attach another piece of double-sided tape to the inside of the finishing edge and carefully smooth around so that the paper is smooth and the edges are sealed).
  8. Drop in 1 or 2 battery operated votives and display your “big girl candles”. 🙂

Cost Breakdown:

  • Plastic Powdered Beverage Containers – Free from recycle bin
  • Scrapbook Paper – Free (or $1 from Target Dollar section)
  • Battery Operated Tea Lights – Free, leftover from wedding (or $1 for 2 at Dollar Tree)

Total:  FREE (or $1.50)

Bonus:  These are so easy to make they would make a fun crafty project for the kiddos as well!

Reuse, Recycle: Leaf Seating & Food Labels

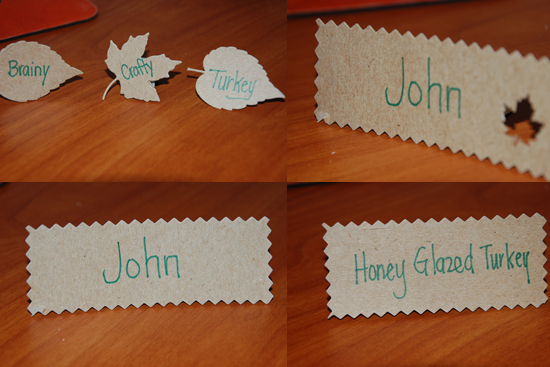
Yesterday I left you with a bit of a teaser for today’s project which also uses leftover food box cardboard.   Each year my office has a Thanksgiving lunch, and each year there is always a bit of question as to what each dish on the line is.  So, today we’ll use the scraps leftover from the banner project to make buffet labels or you could use them for seating cards as well.

Today we’ll turn those leftover cardboard box scraps into this:

Materials:
– card board scraps leftover from banner project
– marker (for lettering)
– scotch tape, school glue, or hot glue

Tools:
– Cuttlebug (or edge punch, or scrapbooking scissors)
– Cuttlebug Leaves Dies (or edge punch, or scrapbooking scissors)
– Scissors
– Shape punches (optional)

Instructions:

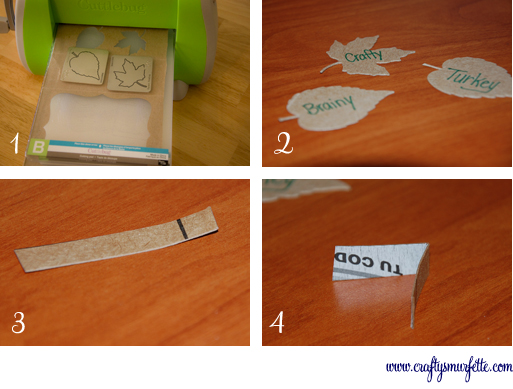
  1. Carefully stack the leaves dies and the card board and run through the die cutting machine (careful to use acrylic plates as indicated by each machine’s instructions).  Repeat as many times as necessary to cut enough leaves for each of your dishes or place settings.
    Note:  Don’t worry if you don’t have a Cuttlebug, or the leaves dies. You can get an equally fun look by marking off rectangular pieces and cutting out with scrapbook scissors OR also from cutting out with regular scissors and then using an edge punch.
  2. Using your black marker write on the dish names or person’s name for place cards.
  3. For leaf dies cut a small 1.5 x .25 inch piece of leftover cardboard for each leaf. 
  4. Fold each of these pieces in half vertically. 
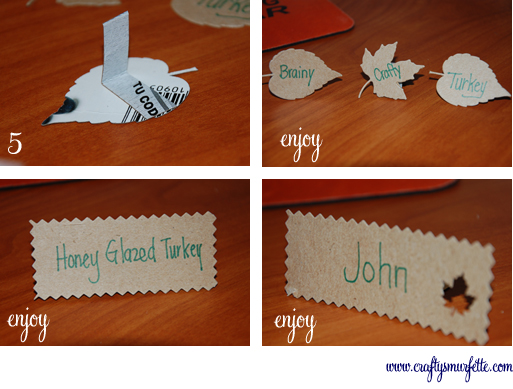
  5. Use your scotch tape (school glue & hot glue would work well also) to attach the folded piece to the back of each of the leaves.
  6. Place & Enjoy!!


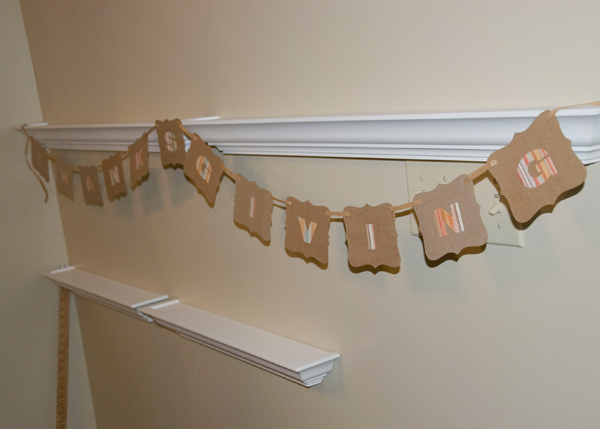
Reuse, Recycle – Thanksgiving Banner

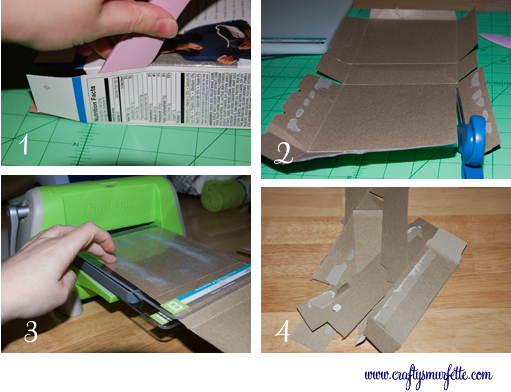
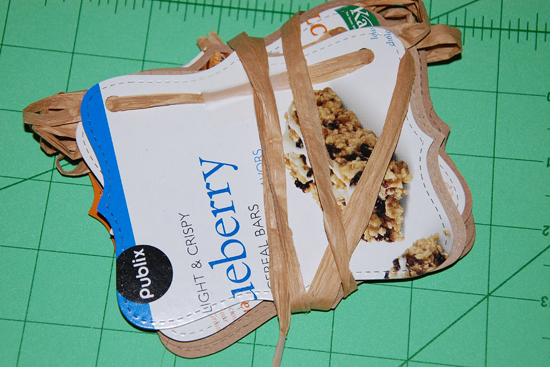
If you are anything like us, you throw away several “chip board” style boxes every week, between cereal, granola bars, and yogurt packs it adds up.  Now, if you are anything like ME, then you love using chip board & kraft paper for your crafting projects…do you see where I’m going with this? 

For projects that are one-sided, why not reuse something that you would just be throwing away (hopefully in the recycle bin)?  So stick around and I’ll show you how to turn these:

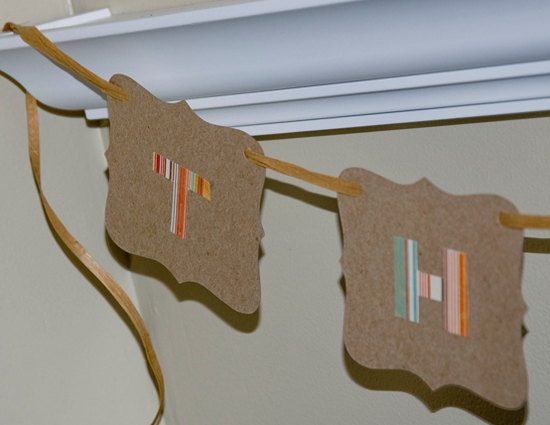
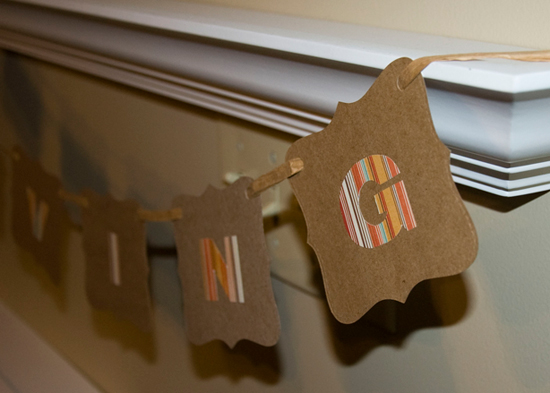
Into this:

Materials:
– card board boxes destined for the trash
– scrapbook paper to make letters
– 3 yards of raffia (twine, ribbon, or yarn… use what you have)
– tape

Tools:
– Cuttlebug (or edge punch, or scrapbooking scissors)
Top Note Die from Stampin Up
– Standard Hole Punch
– Glue Stick, School Glue, or Xyron (again use what you have)
– Scissors
– Bone Folder

Instructions:

  1. Carefully pull apart glued seams on each of the cardboard boxes.  I use a bone folder to help open up the more difficult areas.
  2. Using scissors cut off all side flaps from both sides of each box.  For larger (cereal sized) boxes you will also need to cut the larger areas into small pieces that will fit through your Cuttlebug or Bigz machine.
  3. Carefully stack the Top Note die and the card board and run through the die cutting machine (careful to use acrylic plates as indicated by each machine’s instructions).  Repeat as many times as necessary to cut 6, 12 or 18 (depending on your selected message). 
    Note:  Don’t worry if you don’t have a Cuttlebug, or the Top Note Die. You can get an equally fun look by marking off rectangular pieces and cutting out with scrapbook scissors OR also from cutting out with regular scissors and then using an edge punch.
  4. Put leftover cardboard aside for tomorrow’s project 🙂
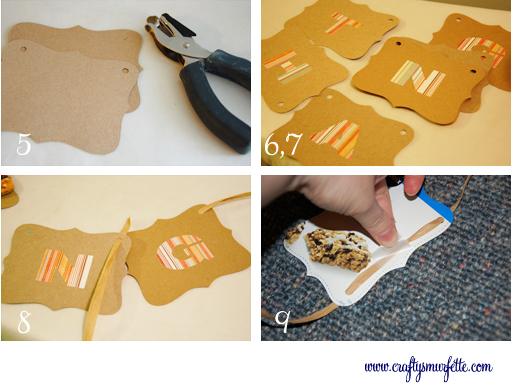
  5. Use hole punch to carefully punch the top area of each piece and set aside
  6. Using your scrapbook paper carefully cut out the letters for your desired message.  I like using 2 inch sized letters.  If you have letter dies you could use them to easily punch out your letters, you could also use stickers or pre-cut chip board letters.  OR you can always use old school stencils to trace letters in reverse on the back of your scrapbook paper and cut them out with scissors (that’s what I did) 🙂
  7. Use your glue product to attach letters to card board pieces.
  8. String your card board pieces with the raffia.  To be consistent I always start from the front of each piece of card board, so that the raffia piece is behind the shape. 
  9. To help keep my pieces in place I use a bit of tape on the back of each piece to keep them from sliding.
  10. Hang & Enjoy!!


Another really fun feature to this quick & cheap project is that it folds up to store really easily, so we can use it again next year! 

Price Breakdown:
Since I used boxes that were going to be thrown away, and other materials I already had literally lying around my craft table…it was FREE!!!! 

And did you notice a hint for tomorrow’s crafty post in the photos above?  Yep, check back tomorrow for another reuse project.

DIY – Lining Envelopes – Making Templates

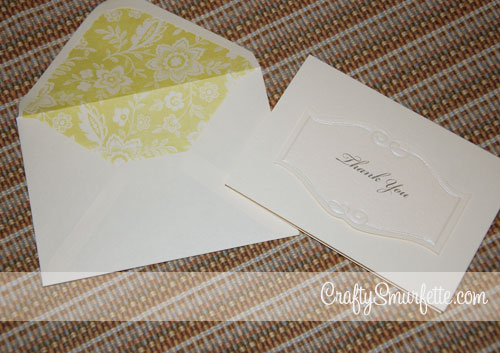
One of the simplest and most cost-effective ways to jazz up your DIY invitations, thank you notes, save the dates, etc. is with lined envelopes.  I used liners to take “just ok” but economical Michael’s Thank You notes to the next level (you can see them in this post) but since I’ve been asked several time how to line an envelope and where to find templates, I decided to just create a post on making your own template for lining envelopes and list out the best resources I’ve found.

There are quite a few DIY guides out there to how to make envelope liner templates, and I’ve used quite a few of them.

  • This one from Being Crafty has quite a few references to helpful templates
  • Paper-Source is of course the go-to for premade liner templates sized to match their envelope stock.  They sell the liner templates in a package that contains the 4-bar, A2, A6, A7, A9, 5 3/4″ square and 6 1/2″ square templates.  They are made from a sturdy plastic and if you plan to use either Paper Source or Waste Not Paper envelopes the $9.50 is worth it for a perfect match.
  • Paper-Source also sells precut envelope liners in quite a few prints and solids (for those who want the look with less work). These will also fit Waste Not Paper envelopes as well.
  • For the really custom look, You can also create your own envelopes with the Paper Source envelope template kit.  This $15.00 kit also contains sturdy plastic templates for 4-bar, A2, A6, A7 and 5 3/4″ square envelope sizes.  I’ve used these to make envelopes from old maps and lined them with a solid paper that turned out really cute.

But what happens when you don’t live near a Paper-Source, and don’t have time to have the templates shipped to you?  Or what do you do if you have envelopes with square flaps?  or pointy flaps?  Then you do what I’ve done several times through the wedding planning process, make your own template!  It’s really not hard at all….

Tools Needed to create Envelope Liner Template:

  • A piece of Stencil Plastic or other clear plastic to make liner template
  • Black Sharpie Marker
  • Scissors
  • Kraft Knife & cutting pad

Materials Needed for Lining Envelopes:

  • White School Glue Stick or Double Sided tape
  • Printed Paper for liners (a thinner paper works best, I used thin scrapbook paper or a thicker wrapping paper)
  • Envelopes to be lined
  • Kraft Knife & cutting pad
  • Bone folder
  • Optional heavy books to hold paper still

Instructions for Creating  your template:
The one thing I like to do when I’ll be using a particular sized liner over and over is to create the template in a bit more sturdy fashion to keep the wear and tear to a minimum.

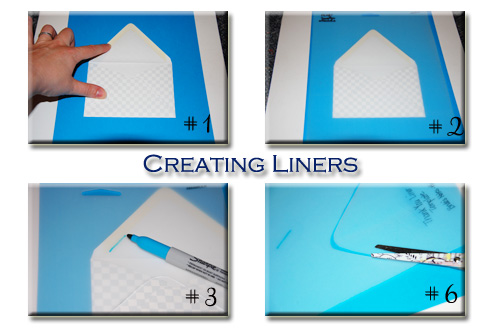
  1. Take one envelope and place it on a firm surface like a cutting mat.
  2. Place the sheet of stencil plastic over the envelope, tape it to your table to help hold it in place if needed.
  3. Using the Sharpie marker start tracing around the inside of the flap on the inside where the glue-line stops.  This will allow the liner to fit right below the sticky part that seals the envelope.  Follow the glue line to the outside edge of each envelope.
  4. Next trace just inside of the bottom edge of the envelope.
  5. Finally place a ruler to connect the top lines with the bottom line.  Move this line just inside the outside edge of the envelope to allow the liner to slide down inside the envelope.  Repeat on the other side.
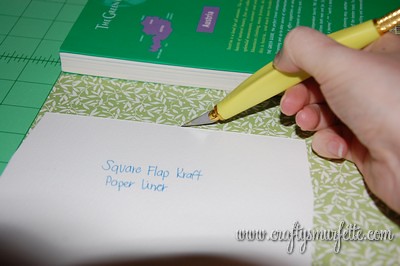
  6. Cut out the liner and label your template with a sharpie so you’ll have it handy next time you need to line a new envelope of this size

TY_002

Instructions for Using an Envelope Liner Template:
Paper Recommendations & Notes:

Now, you are ready to use your liner to cut out the liners from your selected paper.  I recommend a thinner stock of paper for envelope liners for several reasons.  1) it is easier to work with when it comes to folding down the flaps and 2) it doesn’t add as much extra weight to the envelope.  For those using liners for wedding invitations or the such you know how much drama extra postage costs can be.  So a thinner liner paper equals less added weight to worry about paying for later. For the most recent set of liners I used thin scrapbook paper from a bulk “My Minds Eye” book of papers.  I liked how it had a variety of “vintage” floral prints.  If you are making 4-Bar sized envelope liners, a piece of 12×12 paper you should be able to get 4 liners with a small piece left over that would be a perfect size to reuse as a belly band if you are also DIY’ing your invitations. You’ll also find for A7 & A9 liners you will have less wasted paper left-over if you use standard sized paper (8.5 x 11), with A9 liners using the standard paper will also equal less cuts!

Cutting Out Your Envelope Liners:
There are tons of how-to articles out there on how to cut out envelope liners, and they are all equally helpful.  Everyone has to find the way that works best for them.  Some cut out each liner individually after using the template to draw around the back.  That works wonderfully, however, I had over 100 of these to cut out and I found that a little too slow.  So I came up with a slightly different way to go faster with more uniform cuts.  Again there is no right or wrong way to do this…just find the method that words best for you!

  1. Place your cutting mat on a sturdy flat surface.
  2. Stack 2 or 3 sheets of your paper to be cut so that all the edges are perfectly in line.
  3. Place stack of paper onto the cutting mat, making sure that everything is still perfectly aligned.  I like to line up the paper using the grid on my mat to ensure I end up with straight lines.
  4. Optional:  Place a couple books or other heavy objects in the middle of the paper to help keep everything firmly in place.  Sewing or pattern weights would also work great for this. 
  5. Lay your liner template down in the bottom left corner of the stack of paper.  Take care to align it on both the bottom and left sides, which will give you fewer cuts to make.  And few cuts = saved time!!
  6. Using one hand to hold the template steady, use the other to run the Kraft knife firmly around the edge of the template.  Make sure to apply enough pressure to cut through all the layers of paper, and keep the knife blade firmly against the edge of the template for the smoothest cuts.
  7. Remove the liners you just cut and move the template to line up again in the lower left corner of the paper.  Repeat on the top section of  your paper after you have cut all the way across the bottom.  If you are using wrapping paper make sure to cut off a piece that is no longer than your cutting mat so it is easier to manage.  Once you have all your liners cut out…it’s time to put them in the envelopes.
  8. Slide the new liner inside the envelope and line it up so that the top of the liner is just below the glue line. 
  9. Turn the envelope over to the front side, and flip the flap backwards so you are looking at the back of the liner paper.
  10. Apply glue stick to the back side of the liner paper
  11. Press flap firmly down onto glued area.
  12. Flip the envelope back over and use the bone folder to carefully run along the inside edge of the fold while you close the envelope.
  13. Once closed use the bone folder to run along the fold to ensure the envelope will stay closed.  

(Optional Tip):  If you have a Scor-Pal (mine came in really handy during the wedding prep) you can set up a scoring template and easily score all your liners really quickly.  To do this line up the base of the envelope in the upper corner and mark the correct line on the tray with a post-it note to serve as your template to know where to score each liner.

Using this method I was able to cut 16 liners in 5 minutes, which is MUCH faster!  Hope this helps a few of you out, and if you have questions please don’t hesitate to email me.

**Note** I do not work for nor do I receive any support or benefit from my recommendation of any products or corporations.  These are purely my options based on my experiences with these products and corporations.

Decor Inspiration – Reduce – Reuse?

Has anyone else seen the new Pottery Barn catalog for Fall 2009?  I’m loving all the vintage looking inspiration (even through it doesn’t fit the “look” of our house).  Something that really caught my eye was this recycled wine bottle light fixture.  It reminds me of the cute wine bottle vases and candle holders some of those craftybees whipped up.  Wouldn’t this but fun hanging at a vineyard wedding?  or on my back deck…ok it’s a bit pricey so maybe not but it’s seriously fun.

pbarn001

(Photo Source