DIY: Large Peppermint Candy Decor – Part II

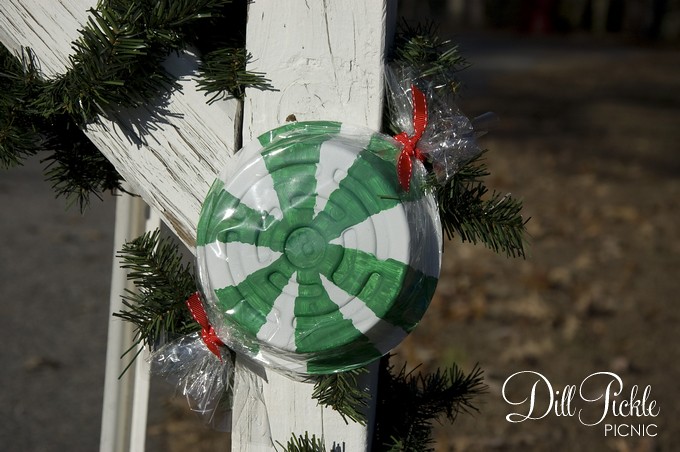
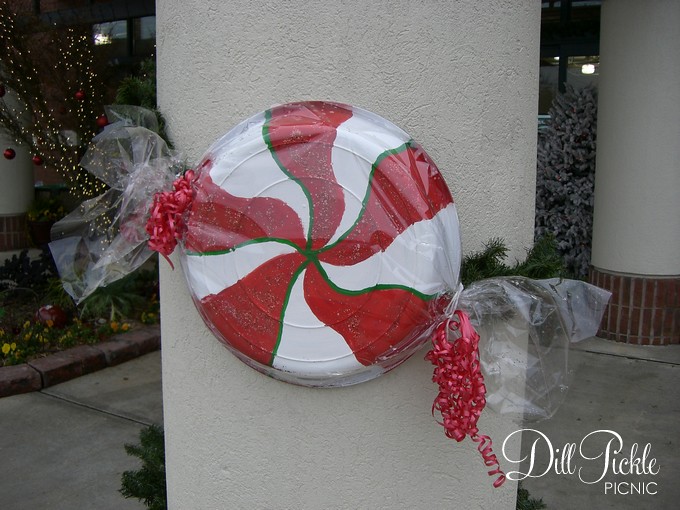
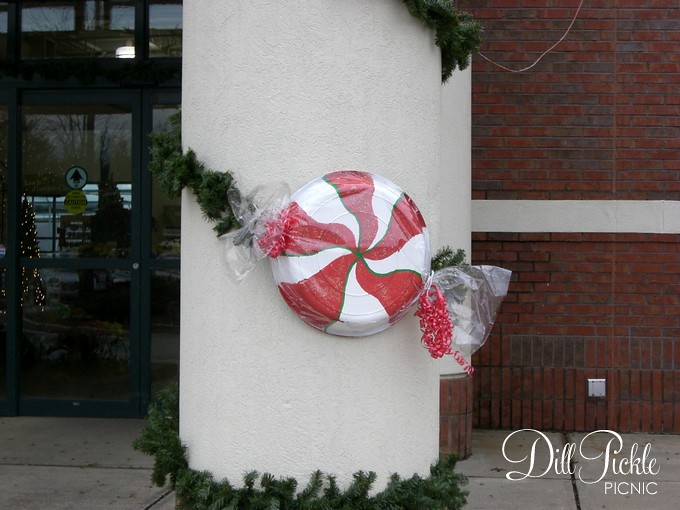
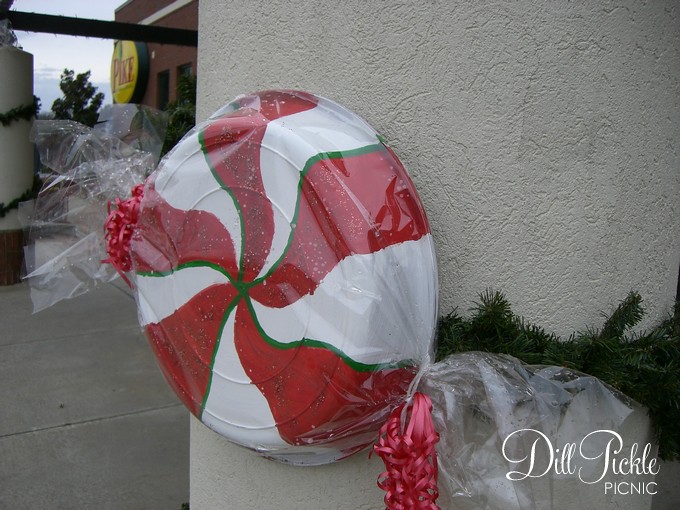
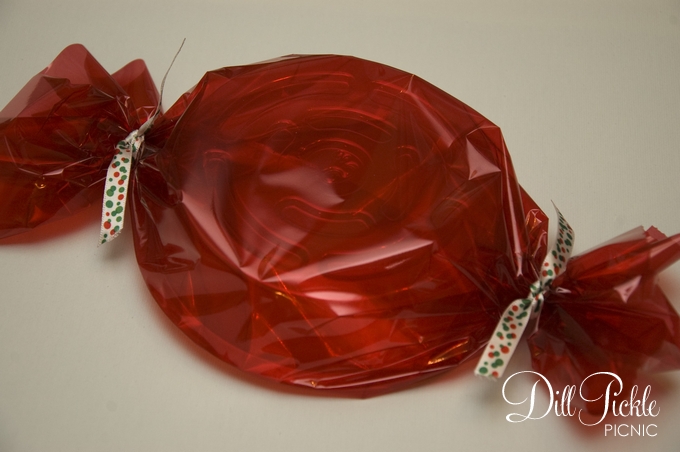
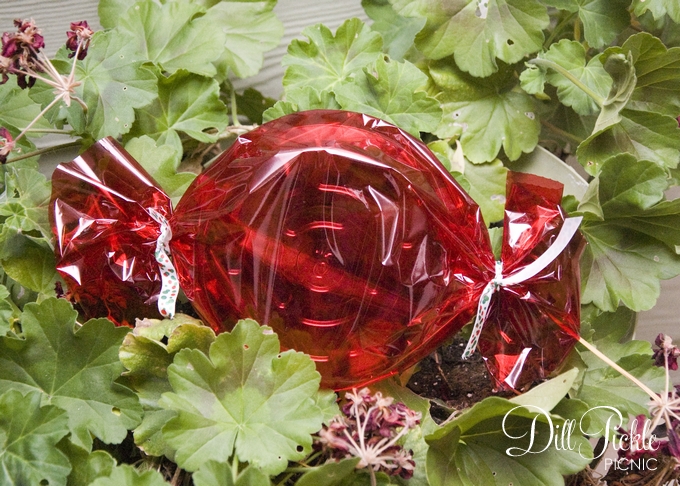
Earlier I posted some photos from my inspiration candy pieces…they were white, glittery, and peppermint-y.  The plant saucers I have are clear…so that meant I needed to try to make them work as well as buying new white ones.  These took a bit longer than those in the first post since they needed some drying time, but we used them to decorate our mailbox just a bit.
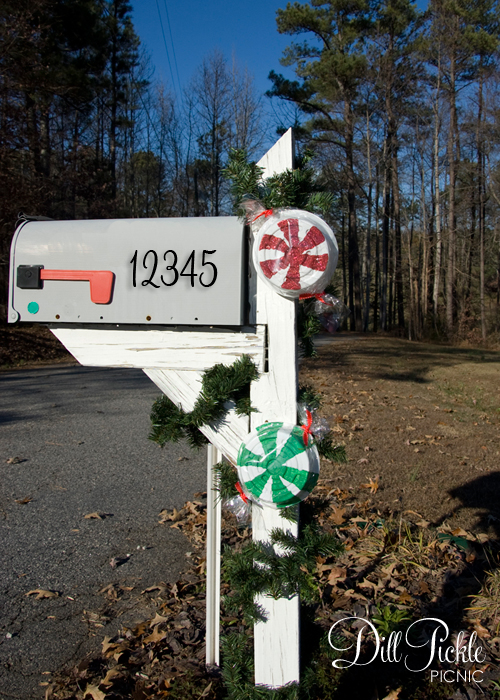
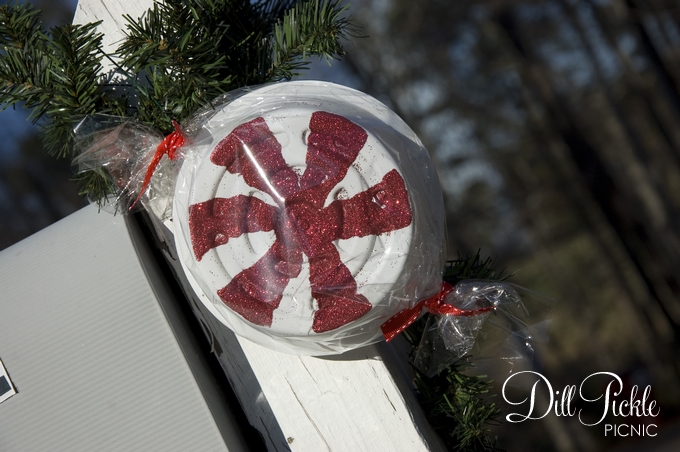
DPP-lgcandy-17

DPP-lgcandy-16

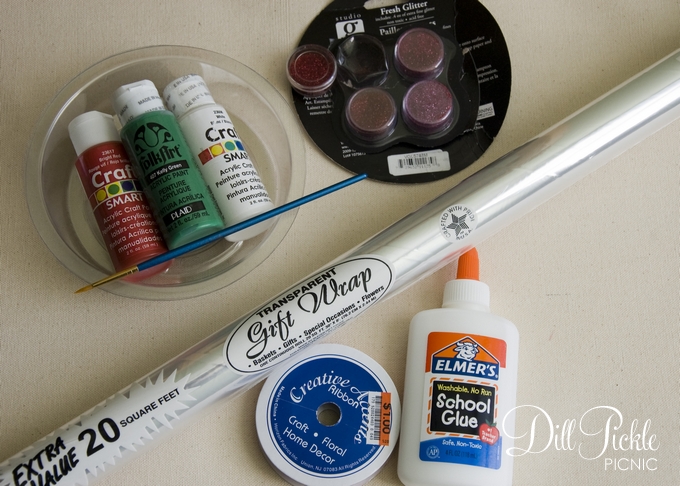
Supplies Needed:

Supply List

  • Transparent Cellophane  ($1 from dollar store)
  • Plant Saucers (mine were $1 from local dollar store and are 6 inches in diameter)
  • White Paint (I used some white spray paint from my stash)
  • Paints for peppermint colors
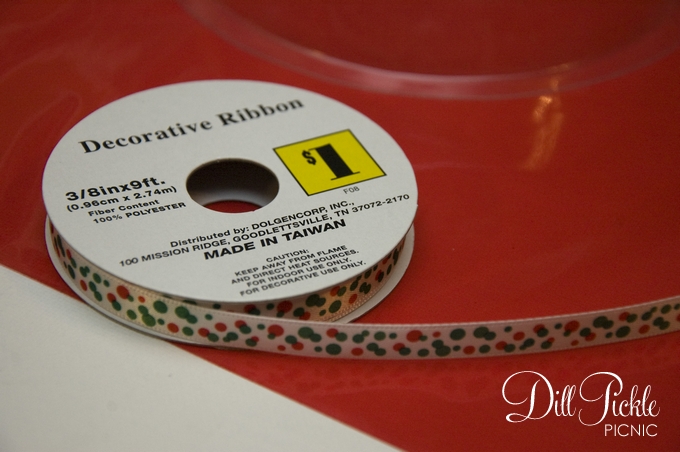
  • Ribbon ($1 from Big Lots)
  • School Glue ($1 from dollar store)
  • Glitter ($1 from Michael’s dollar bins)

Instructions:

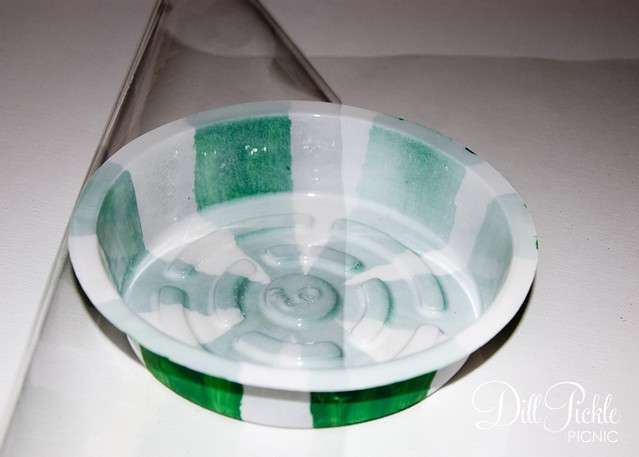
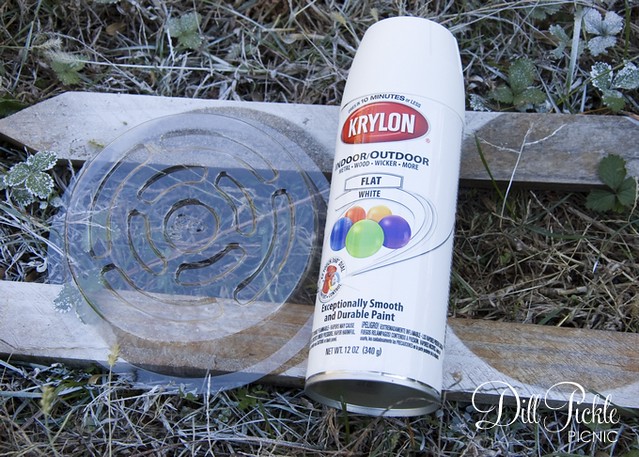
  1. If starting with clear saucers start by painting them white.  You could use acrylic paint and a brush, or spray paint works great for this project.  I used a can leftover from another project and gave the saucers a quick light spray, and then let them dry thoroughly.
    DPP-lgcandy-21
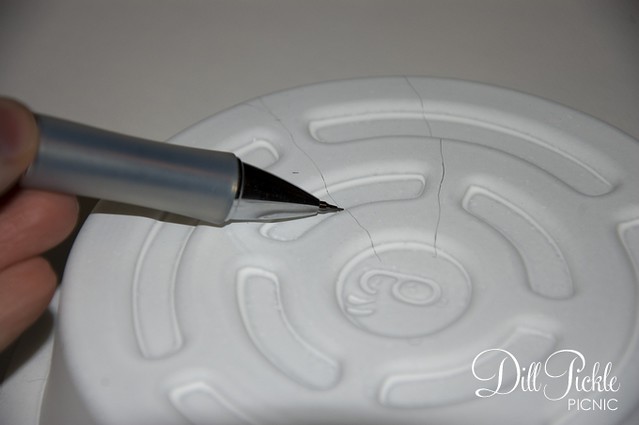
  2. Once dry, it’s time to decorate your candy pieces.  I start by lighting outlining the shapes of the areas to be painted on the top of each piece with a pencil.
    DPP-lgcandy-1
  3. For painted pieces use your acrylic paint & brush to fill in each of the candy sections.  Sit aside to let dry (I leave mine overnight).
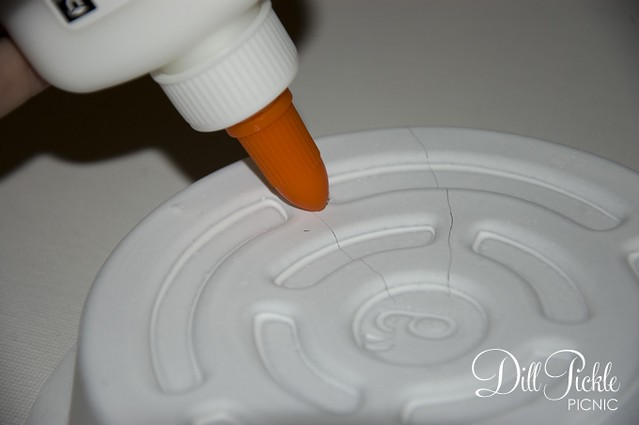
  4. For Glittery pieces fill in each of the candy sections with your school glue.  Use the paintbrush to fill in the spaces if necessary.  Then over a piece of paper apply your glitter.  Use the paper to reuse extra glitter until all glue is covered.  Sit aside and allow to dry (I leave mine overnight)
    DPP-lgcandy-2
  5. Cut your cellophane into pieces larger than your saucers.  I doubled the diameter of my saucer, so 12 inches square for each 6 inch saucer.  Don’t worry if you have too much on the sides you can trim that later.
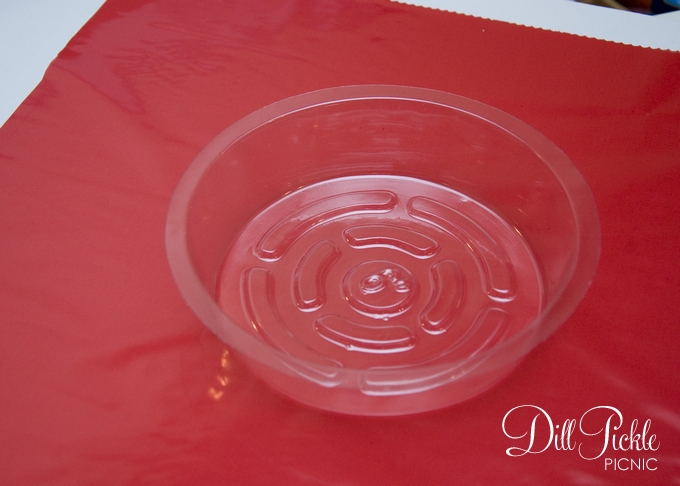
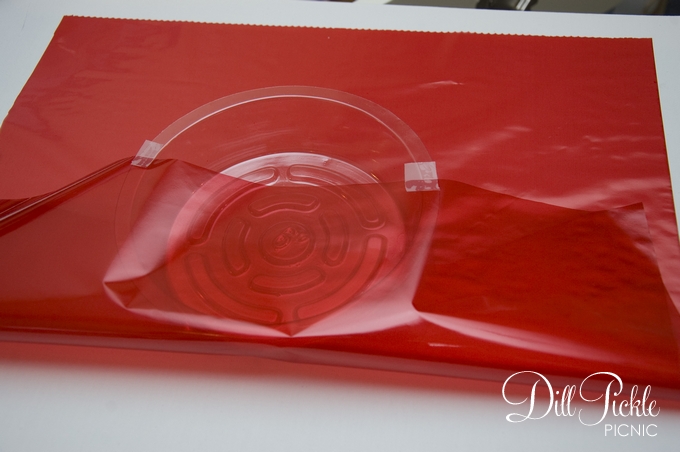
  6. Lay your first saucer in the middle of one of your pre-cut cellophane pieces, open side up.
  7. Pull the bottom half of the cellophane up and over the top of the open saucer.  Secure it with tape.DPP-lgcandy-7
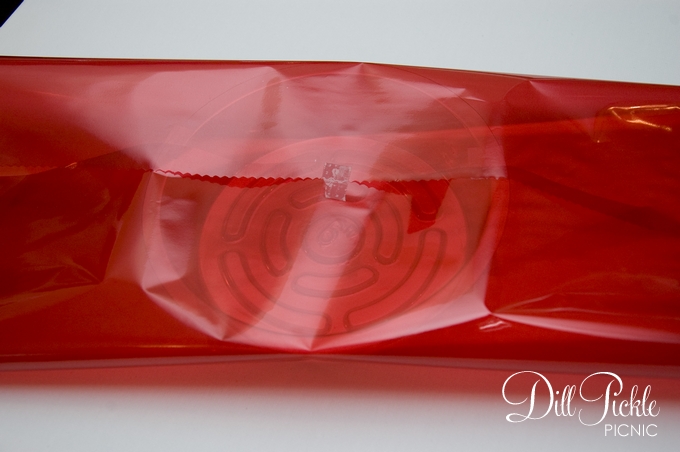
  8. Pull the top half of the cellophane down and hold closed with a tiny piece of tape.
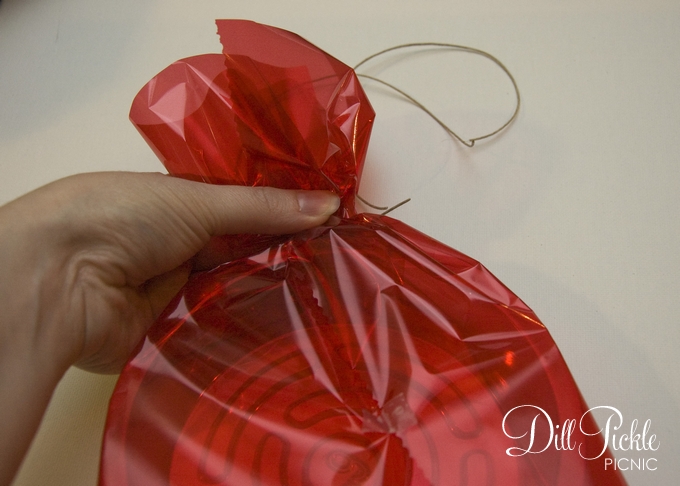
  9. Now carefully gather one of the ends and tie with a piece of ribbon.   Don’t worry if your ends are a bit long, you can always trim them when they are finished. DPP-lgcandy-10
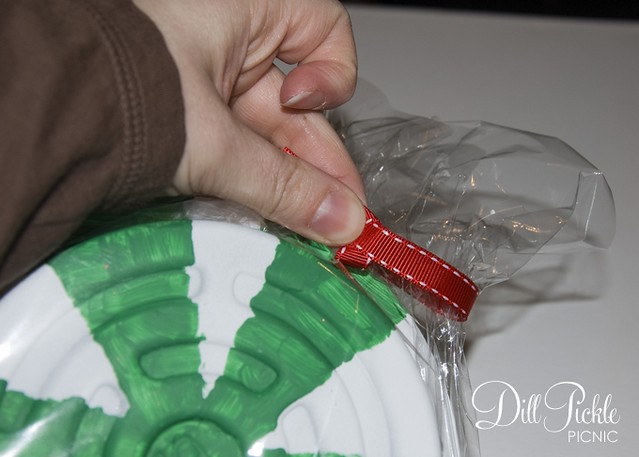
  10. Repeat the gathering and tying process on the remaining side.
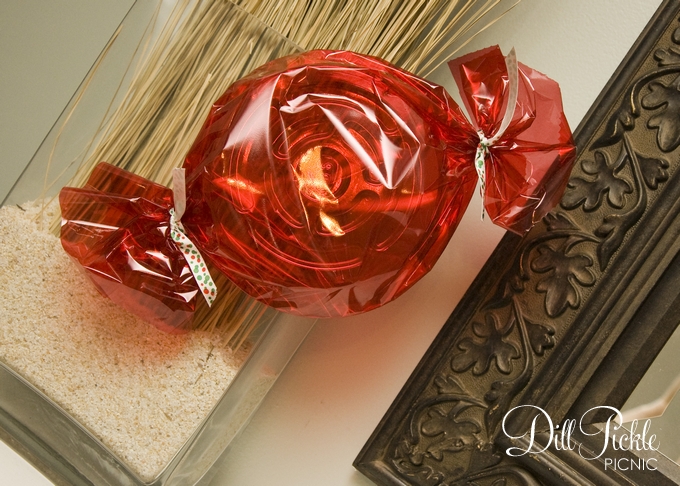
  11. Now,  you are all ready to display your candy! DPP-lgcandy-12
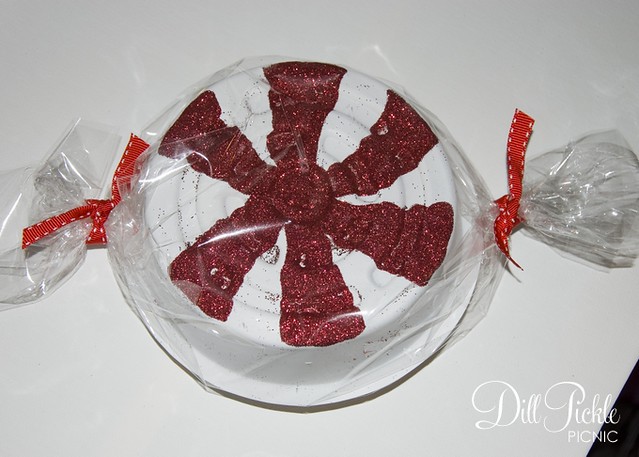
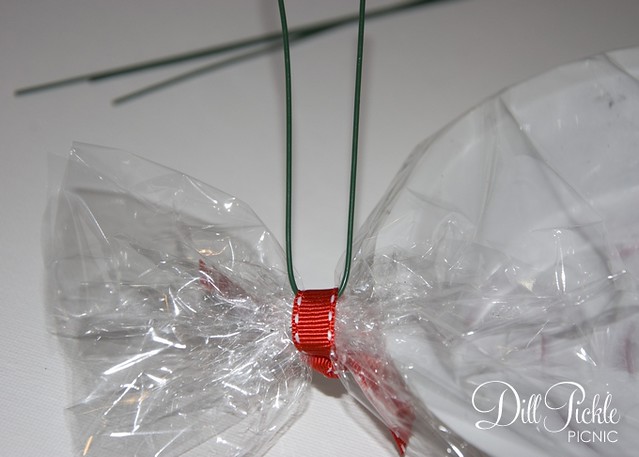
Want to add your candy pieces to garland?

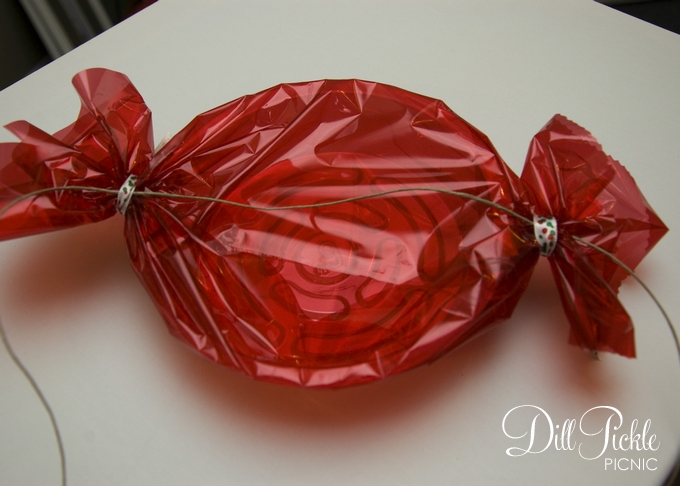
Easy, just slip pieces of floral wire behind your ribbon ties on each side and use to secure to your garland!
DPP-lgcandy-14

Like these candy decorations?

DPP-lgcandy-18

Then stick around…hopefully I’ll have a fun reuse candy bunting project to post later this week!
How do you decorate your mailbox?  Have any fun mailbox inspiration links to share?

Inspiration: Large Candy Decorations

I mentioned in my first post about the Large Candy decorations that was inspired by decorations I saw outside my local Pike Nursery last year.  It took me forever but I finally found those photos….see aren’t these huge candies fun?

DPP-lgcandy03
DPP-lgcandy02
DPP-lgcandy01

You can  see that they used large white saucers to make 24 inch pieces of candy to decorate the front of their store…who says businesses can’t be creative & crafty!  I’ll have the second large candy post up later tonight or first thing tomorrow and photos of how we used some of them.

How has a local businesses decorations inspired your own holiday creativity?

DIY Link: Yo-Yo Christmas Trees & Product Review

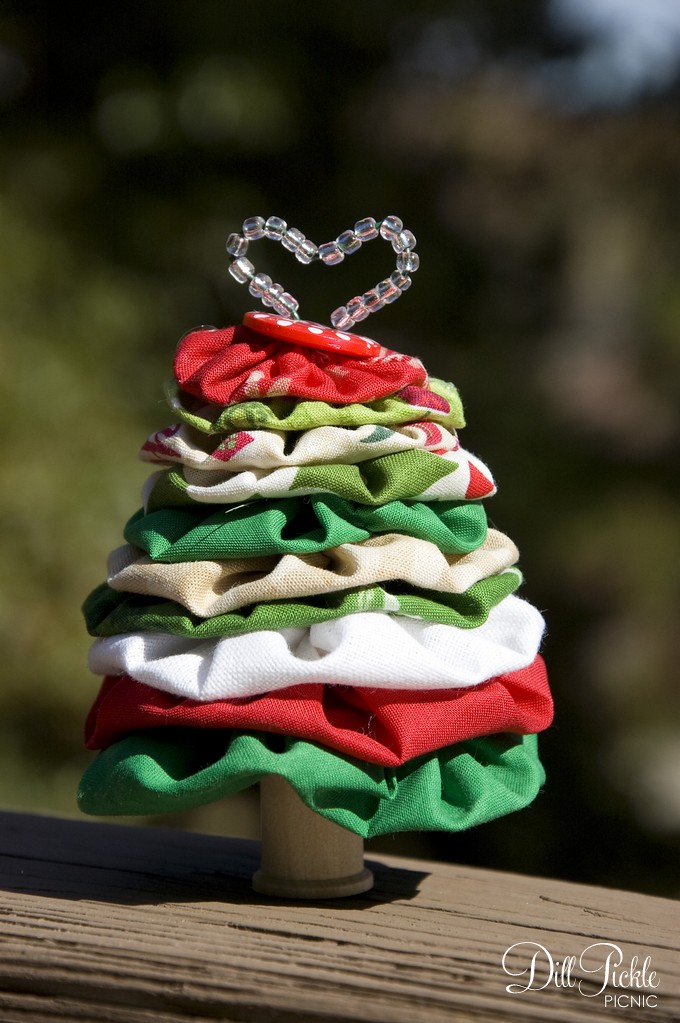
I’ve mentioned my love of Swap-Bot before, and today I’ll show off one of my latest projects that was shipped off several weeks ago to one of my swap partners.  The Yo-Yo Christmas Tree:

DPP-YoYoTree4

Isn’t it cute?  I love to make yo-yo’s, making them is quite soothing to me for some reason.   Typically I have a pile of them laying around with no clue how to use them and after seeing a yo-yo pumpkin this fall thought I should attempt to make a tree.  Then I saw this fun tutorial from Kiwi at Heart and she had made exactly what I was dreaming up in my head.  She does a great job explaining the process…I only did one thing differently.

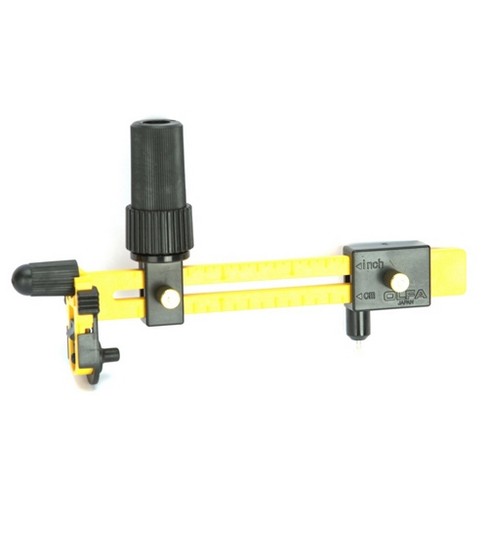
Where she uses templates to cut her circles, I decided to try out this fun little gadget I picked up 50% off at Joann’s a while back.

Olfa Circle CutterThe verdict?  I LOVE it!

PROS:
I was able to just adjust the setting to match her dimensions and cut the circles out with no templates.  It works much like using a string & pencil to draw a circle…only this bad boy has a sharp pin to hold it in place and a super shape rotary blade.  Such a time saver…especially when you love to make yo-yo’s as much as I do! I have a quilt I want to make this year that involves circles and I am thinking this little guy might be a life saver when I get to that point.  So if you cut out circles-o-plenty of like I do…it might be the best $15 you spend.

CONS:
It uses a really sharp rotary blade, so you absolutely must use a cutting mat underneath it.  It can also be a bit odd to hold and turn at first, but once you get the hang of it that isn’t really a problem.

Any other recommendations out there for yo-yo construction or quilting gadgets I might also find indispensable?  Please, share!!

DPP-YoYoTree1

Make sure you check out the yo-yo tree tutorial:  Yo-Yo Christmas Tree Tutorial from Kiwi at Heart

You might also check out Mummy Crafts to see her take on the same tutorial, which also includes a template for cutting the circles.

Fine Print:  I have not been compensated in any way by either Joann’s or Olfa for my review of this product.  It is simply my opinion based on usage of the product I purchased.

DIY: Large Candy Decorations – Part 1

Can you believe it’s December already?  Wasn’t it just June?  I remember thinking the saying “time flies” was just one of those things older adults said. Much like walking to school in the snow, up hill both ways.  Sadly now I completely understand what they meant…this year has flown by!

Last year on a last minute, right before Christmas trip to Pike Nursery I noticed  their fun outdoor decorations.  They had these large peppermint patties.  It took me a minute but then it hit me…they made them.  So I snapped a photo thinking I should give it a try this year.

DPP-lgcandy17

DPP-lgcandy19

Supplies Needed:

DPP-lgcandy26

  • Tape
  • Scissors
  • Red (or any color)  cellophane wrap
  • Ribbon or twine
  • Clear Plastic Flower Pot Saucers (mine are 6 inch)

Instructions:

    1. Cut your cellophane into pieces larger than your saucers.  I doubled the diameter of my saucer, so 12 inches square for each 6 inch saucer.  Don’t worry if you have too much on the sides you can trim that later.
    2. Lay your first saucer in the middle of one of your pre-cut cellophane pieces, open side up.DPP-lgcandy7
    3. Pull the bottom half of the cellophane up and over the top of the open saucer.  Secure it with tape.DPP-lgcandy8

  1. Pull the top half of the cellophane down and hold closed with a tiny piece of tape.DPP-lgcandy9
  2. Now carefully gather one of the ends and tie with a small piece of twine.  You could also just use your decorative ribbon but since they will be outside I wanted to tie them with something a bit stronger.  Don’t worry if your ends are a bit long, you can always trim them when they are finished.
    DPP-lgcandy10
  3. Repeat the gathering and tying process on the remaining side.
  4. Now, cut pieces of your decorative ribbon, and tie over the twine to decorate your candy.DPP-lgcandy14

Want to make your candy into an extra large bunting to hang along your front porch?

Easy, just add your bunting twine or robe in behind your ribbon ties, hang, and enjoy!

DPP-lgcandy25

DPP-lgcandy22

Total Cost:

All of the supplies listed above were found at my local dollar store!  I spent a total of $3.00 which would make over 6 of these large candy pieces which supplies left over for a couple other projects you’ll see very soon
$1 and up

Like these candy decorations?
Then stick around…I’ll have additional ones later this week & next!

_______________________________________________________

DIY: Halloween Lightpost Decor

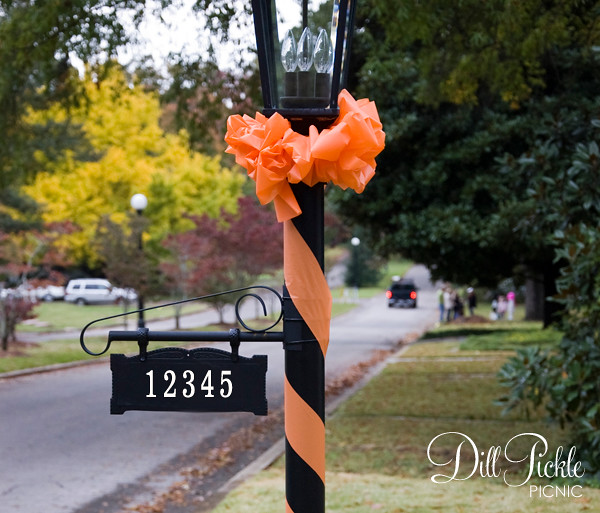
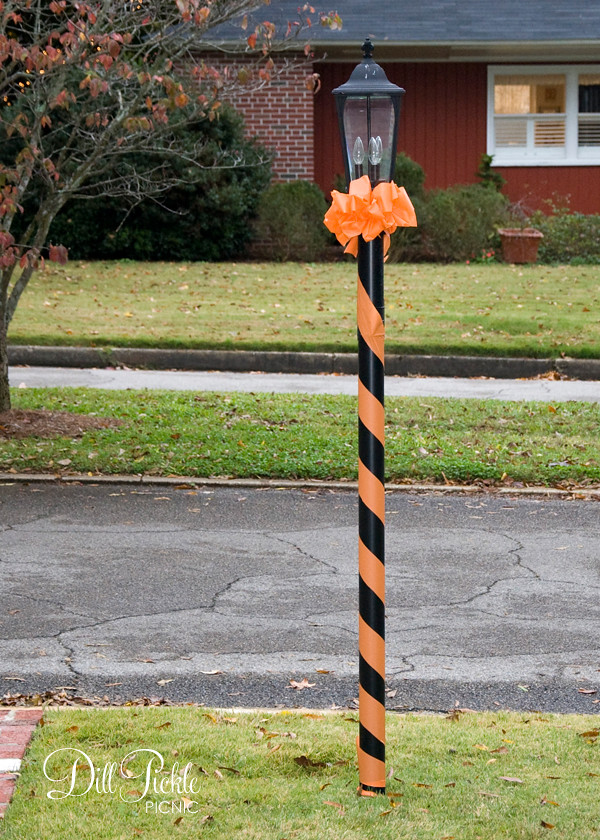
I had almost forgotten about posting this little quick project. Last Halloween my FIL hosted a bit of a Halloween party in his “under renovation” home. The “under renovation” part meant we didn’t even start decorating until a few hours before everything was to start. I learned it’s amazing what you can throw together really quickly…including this fun addition to his street number light post that cost less than $1 to make.

DPP-hallowpost1

Supplies Needed:

DPP-hallowpost3

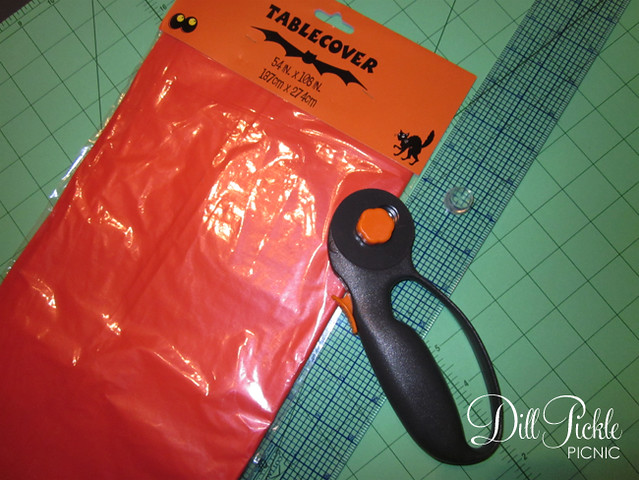
  • Plastic Table Covering (from your local dollar store)
  • Scissors or Rotary Cutter & Mat
  • Tape (I used painters tape, but scotch would work as well)

Instructions:

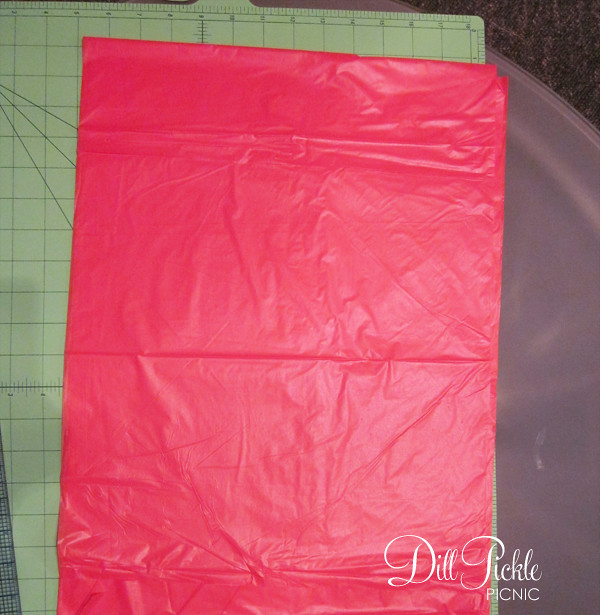
  1. Carefully unfold the initial vertical folds of your plastic table covering so that it is still folded vertically. (This will allow you to cut longer strips quicker and more precise).
  2. DPP-hallowpost4

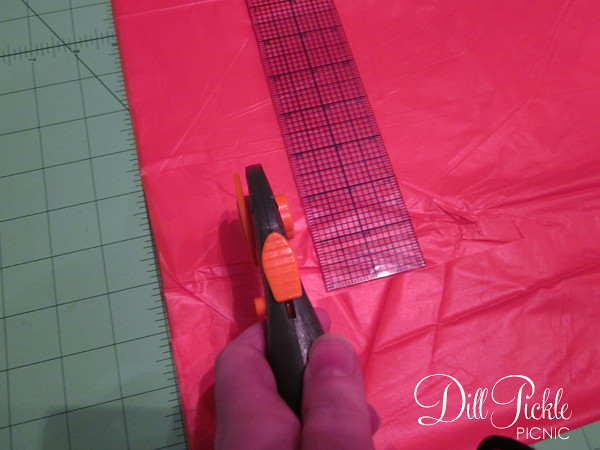
  3. Using your scissors or cutting tool measure over approximately 2 inches and cut up the length of the outside vertical edge of the table covering.
  4. DPP-hallowpost6

  5. Repeat 3 more times so that you have 4 strips.
  6. Carefully open up your strips so that you have one long piece. Hint I keep mine doubled so the color is a bit more pronounced.

Wrapping the Post:

  1. Using your tape attach the bottom of the first strip to the bottom of your post at the angle you wish your strips to run.
  2. Carefully wrap the plastic strips around over the tape and then start carefully wrapping the plastic strip up the length of the post. Make sure to keep the strips pulled just tightly enough to keep it in place.
  3. When you reach the top, use an additional piece of tape to hold it in place. Don’t worry about the tape showing since the bow will cover it up.

Creating & Attaching the Bows:

    DPP-hallowpost10

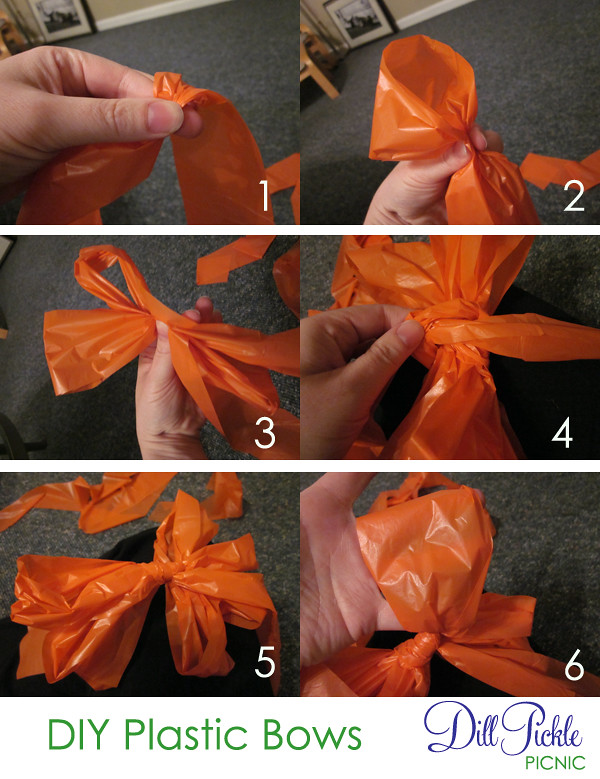
  1. Take the second strip (again I always use a double layer of the table cover) and hold it in your hand about 6 inches from the end.
  2. Make a loop folding it to meet your fingers in the center.
  3. Repeat on the opposite side. Repeat steps 2 & 3 until you have approximately 7 inches of the strip leftover.
  4. Loop the leftover strip around the center and tie the two ends together.
  5. Pull your loops to make them all uniform in length (it’s ok if it looks a bit flat at this point)
  6. Carefully open up the loops of the bow, pulling apart the two sections to “fluff” up the bow.
  7. Repeat using remaining 2 sets of table covering strips.
  8. Using the 6 inch trailers tie the bows around the top of the light post. By tying them all side by side it the bow will go completely around the top of the post and give a much fuller look.
  9. Either trim the trailers to have pointed ends, or tuck them inside the bows so that they don’t show.

The great thing about this project is I still had about 1/2 of my table covering left…which was a perfect size to either cover the long island in his kitchen (or make a Halloween wreath?). Also, since it’s made from plastic it wasn’t an issue when it started raining a few moments later!

DPP-hallowpost2

Total Cost: $1

You could also use this same approach using any of the plastic table covers found at your local dollar store…I’m thinking a red and white candy-cane look could be fun for Christmas!

Looking for more Fall or Halloween projects? Check out the side bar to the left for a quick listing!

Semi-DIY: Creating Coasters – Part 2

So yesterday you saw our first re-purposed item coaster attempt, today I”ll show you the latest additions and how they came about.

Back in June, the boy and I celebrated one glorious year of marriage with a fun little trip to Asheville, NC.  We took a couple days off from work, and the hubs planned out the where/when/how and kept it as a surprise destination until the morning we left.  He chose Asheville because 1)I had never been 2) it offered plenty of outdoor activities (which we both enjoy) 3) it offered nice lodging & dining options and 4) being at a high elevation that Atlanta it would be a nice relief from the oppressive heat that has plagued the Atlanta area this summer.

All I can say about reason #4 is HA!   Mother Nature definitely didn’t get that memo, and instead it was a sweltering mess of high temperatures mixed with humidity from the depths of places known for fiery torture.  Any of your familiar with Weddingbee might remember that Mrs. Snow was getting married in Asheville in June…yes, it was the same weekend and she blogged about the crazy weather swing as well.  So, we rearranged several of the things the boy had in his plans so we didn’t melt away in the oppressive heat…and in the midst of wandering around we realized that weekend was also the River District Artists Studio Stroll.

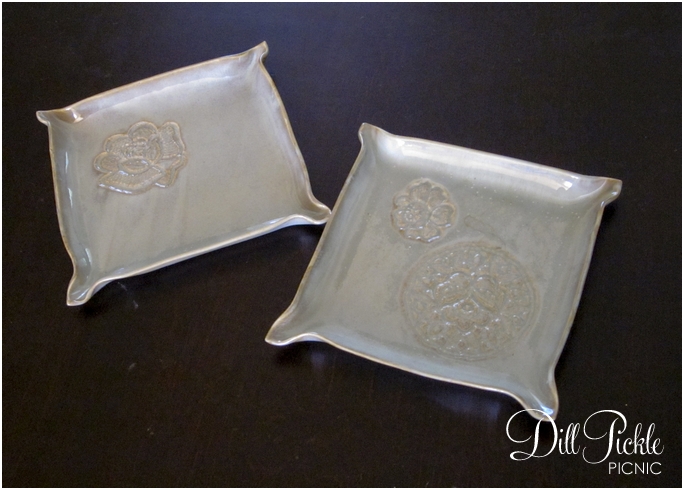
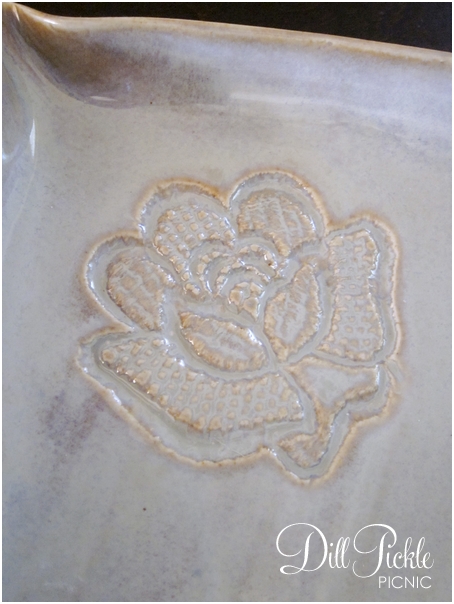
So we drove over and wandered around through several of the studio’s, not really looking for anything in particular.  Then right before turning around to make our way back to the car (and out of the heat) we walked into Michael Hofman’s Studio.  Michael makes beautiful pieces of porcelain pottery using antique lace to make impressions into his pieces.  Some of the lace he uses is centuries old, from things like christening gowns & wedding dresses.  It was quite interesting to meet him, and see part of his process in action.  He was even telling us about someone who brought in their grandmothers wedding dress to use to create their wedding china (incidentally the dress was not harmed in the process).  So we looked around thinking we might pick up a serving platter, but then the boy picked up these small square plates and said “hum? think they could be coasters?”

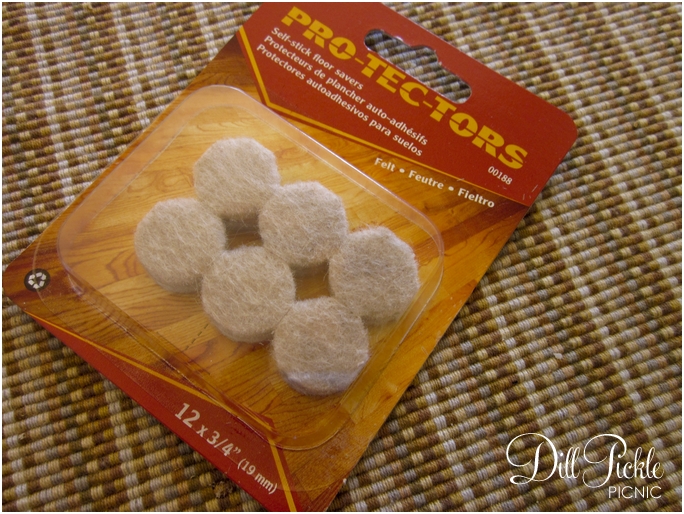
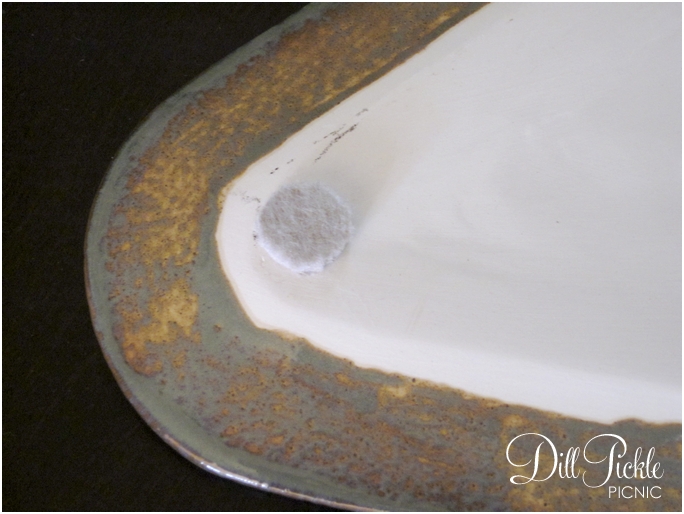
So, we picked up two of the square tapas plates.  Once home, we again brought out some felt pads from the local dollar store (the thinner of the selection this time) and added one to each corner of the plate.

Instant coasters, that once again provide a useful reminder of our anniversary trip!  Look at the lace details up close…aren’t they stunning?  Those lace details also provide a place for beverage sweat to pool, gotta love it when something is both beautiful and useful. 🙂

Can you tell we tend to purchase only mementos that have an actual use around our house?  We tend to buy art or handmade pieces to commemorate special trips or events…that and I buy magnets (which I still need to figure out what to do with since I’ve picked up magnets from my travels my entire life).  What do you pick up as mementos of special occasions or trips?

Semi-DIY: Creating Coasters – Part 1

We don’t like coasters.   There…I’ve said it out loud.  That’s not to say that we prefer to place our sweating beverage glasses or bottles directly onto surfaces, I’m just saying  we haven’t found any that we BOTH found aesthetically pleasing.  Then something happened…we stopped shopping for them and instead focused on things we could make into them.  This is the story about how we used these little guys from the local dollar store to solve our coaster dilemmas.

dollar store felt floor protectors

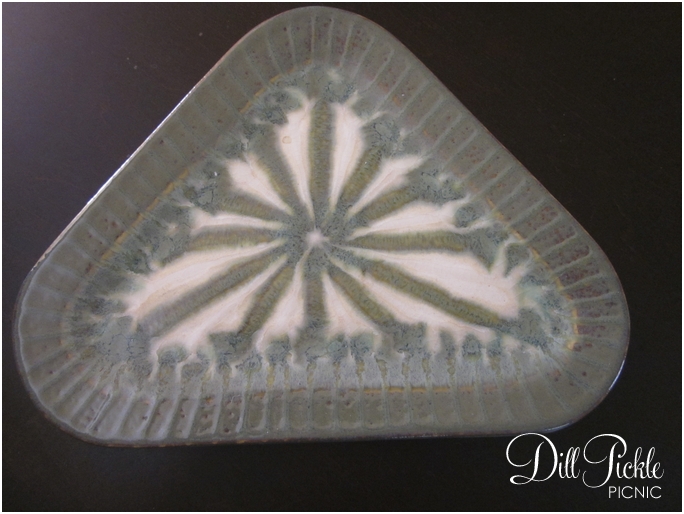
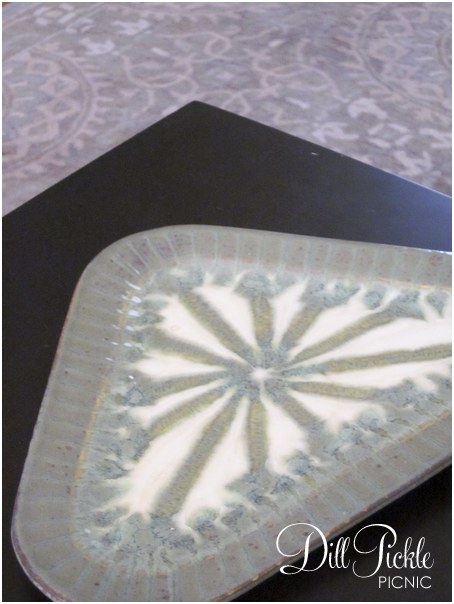
Last year while on a bit of a family vacation with the boy’s family we noticed this fun piece of flattened pottery on a deck side table in the house we were staying in.  It was the perfect size for a couple of glasses and still appealed to both our senses of design.  Interestingly enough we already owned a bowl in a similar pattern from the same pottery studio that the boy uses on his bedside table to store the contents of his pockets each night.  Do you see where I’m going with this?  Yep, we looked around the shops that weekend in search of a plate to use as a coaster on our living room end table. We ended up choosing the small triangular plate from The Good Earth Pottery, their stuff is great in not only is it appealing to the eye, it is also dishwasher and oven safe as well.

Then to keep our fun new find from scratching up our tables we just added one of the little felt pads to each corner.


Instant extra large coaster!  What’s really nice is when I am lazy and fill up a Nalgene bottle with water…it fits on the coaster with no worries as well.  As do ice cream bowls, large coffee mugs…you get the picture. You can see in the next photo how the colors in the plate match our rug, but sadly what you can’t tell is how nice it looks on our end table.

Overall, I’m really pleased with how our initial attempts to use something not originally intended as a coaster worked out.  The benefit we never considered when we initially picked this piece was how any sweat from glasses placed on top would pool in the small groves of the pattern , this means the bottom of the glass stays drier than if the piece were a completely flat surface.  Plus, the coaster also serves as a very useful reminder of our trip to Highlands, NC. 

Come back tomorrow and I’ll show you round 2 of our coaster experiment! 🙂

How have you re-purposed items to create the “thing” that seemed to elude you otherwise?  Was it a success?

Life: Halloween & Etsy

Well hello there!  I’ve missed you the past week or so…but things have been busy in the Pickled household.  In the midst of everything I finally managed to get the Dill Pickle Picnic Etsy shop open!  Yay!  Right now it’s looking a bit sparse but I’m hoping to fill it up a bit more over the weekend.  So when you have a minute check it and let me know what you think!

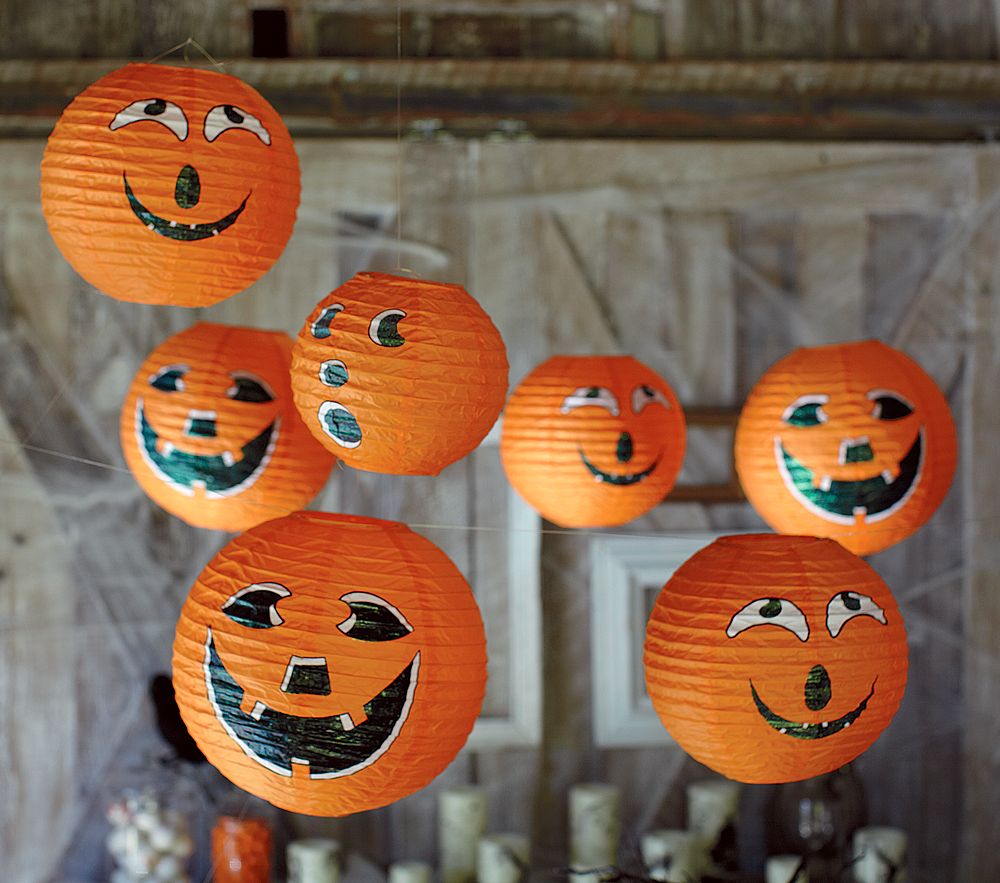
It’s finally starting to feel like Fall in Georgia, and it makes me so happy!  I love fall, it means pumpkins, college football, Halloween, and deep colored clothing.  We will once again attend a Halloween party hosted by a family member and since he has me lead the decorating charge I’ve been checking out all the latest Halloween decorations.  And I found these fun little guys…

{image source: PB}

Which reminded me quite a bit of these little guys I whipped up for his party last year:

Check out this post from last year to learn how to whip up your own pumpkin lanterns using a few dollar bin items!

What about you guys?  What are you decorating plans for Halloween?  Any fun, yet cheap suggestions to share?

DIY: Fishy Thumbtacks

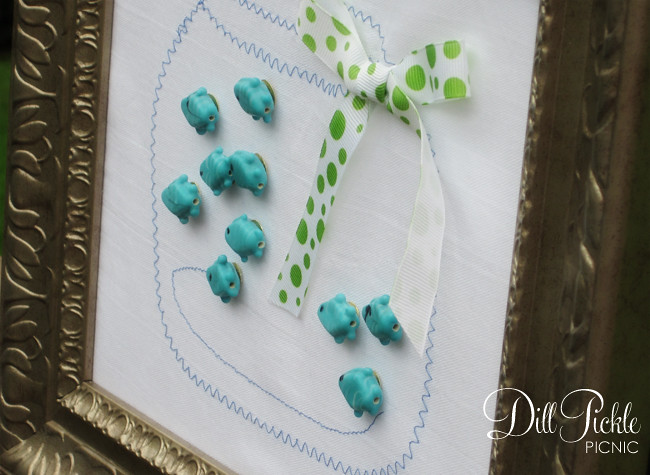
You’ve already seen the fishbowl message board I made as a gift to a friend.  Now, let’s bring on the fish…the fish thumbtacks that is. I mentioned the Envelope of Doom in a previous post, this is second of the 3 (or more) projects I created using several components from the “envelope of doom“. Don’t have an envelope full of supplies…don’t worry. You could create this project using items from your local dollar store & craft store as well! This is one of the quickest projects I’ve taken on in ages.

.

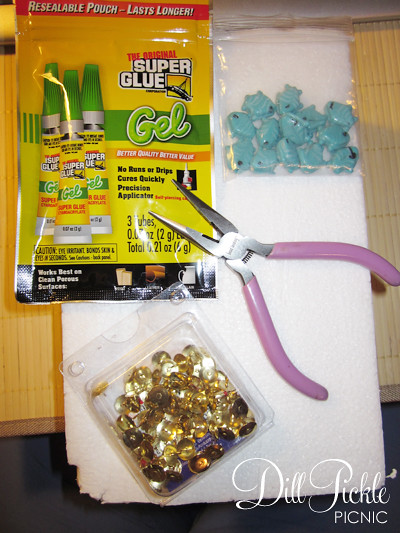
.Supplies & Materials Needed:

  • Fish beads
    Fresh from the envelope of doom, these happen to be glass
  • Thumbtacks
    The old school, plain kind with flat tops
  • Glue
    Any glue that will attach your bead material to metal will work here.  I used super glue which held “ok”.  One commenter suggested E6000 as a better option.
  • Foam block
    Optional but extremely helpful
  • Pliers
    Also optional for most people, but I’m not allowed to use super glue without the supervision of an adult and these help me not glue myself to things.  One day I’ll tell you about the time I glued both hands to separate tools and needed my then boyfriend to rescue me.  So many things will make more sense after that I’m sure! 😉

.

Instructions:
This is potentially the easiest tutorial I’ve ever written, and I think the photos tell the whole story.


  1. Count out the number of thumbtacks you need, and spread them out onto your Styrofoam block.  By placing the sharp end into the foam it will hold them in place while you glue down the fish.
  2. Squeeze a medium-sized amount of super glue onto the first tack.  I’m using the gel type of super glue from my local dollar store, this is because it is thicker and easier for me to work with.  It also means fewer drips which makes it MUCH safer for me to use.
  3. Place a fish bead onto the drop of glue and press down.  Let dry completely.
  4. I use the pliers to help center the beads really quickly before the glue sets.  It is also helpful when removing them just in case they aren’t completely dry.
  5. Repeat for each tack

I had all the supplies in my stash to make these fun tacks, so my grand total was FREE!  Gotta love that

Total Cost: $1.00 and up

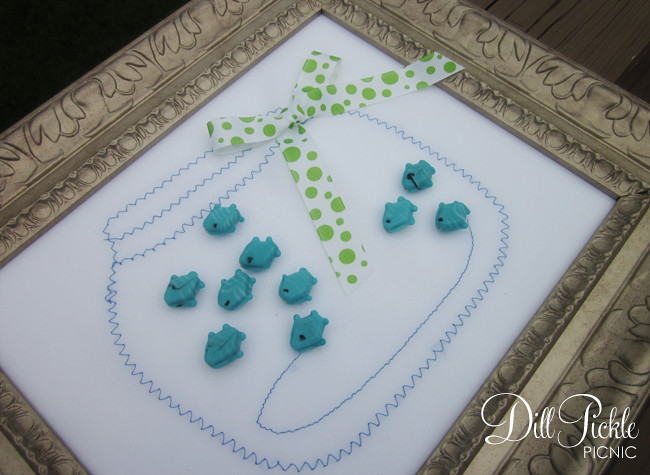
And after they dry, you end up with these cute little guys:

I think they really make the note board look more like wall art… even though now I wish I had painted the frame a fun green to match the ribbon.

I think this process could be fun to make all sorts of cute thumbtacks, so I see more of these in my future.  How about you?  Do you use cute things to attach things to your memo boards and if so where did you find your favorites?

DIY: Sewn Fishbowl Note Board

This is a project I have wanted to attempt for quite a while.  I’ve read several tutorials utilizing freezer paper for applique methods wondered if it was as easy as it seems.  All in all I’m happy with how it turned out, but I did have several problems along the way.

Materials Needed:

  • Freezer Paper (not pictured)
    large enough for pattern and an inch margin on all sides
  • Fabric to applique
    I choose to use a Flour Sack from my local dollar store
  • Thread in corresponding color
  • Photo Frame with the glass removed
    I used an 8×10 frame we had in the basement
  • cork or Styrofoam – should be large enough for frame opening
    I used Styrofoam since it is readily available in the trash heap at my office.

Tools Needed:

  • Marker to trace pattern (or print directly on freezer paper)
  • Scissors
  • Iron & Ironing Board
  • Sewing Machine
  • Xacto knife or cutting tool

Instructions:

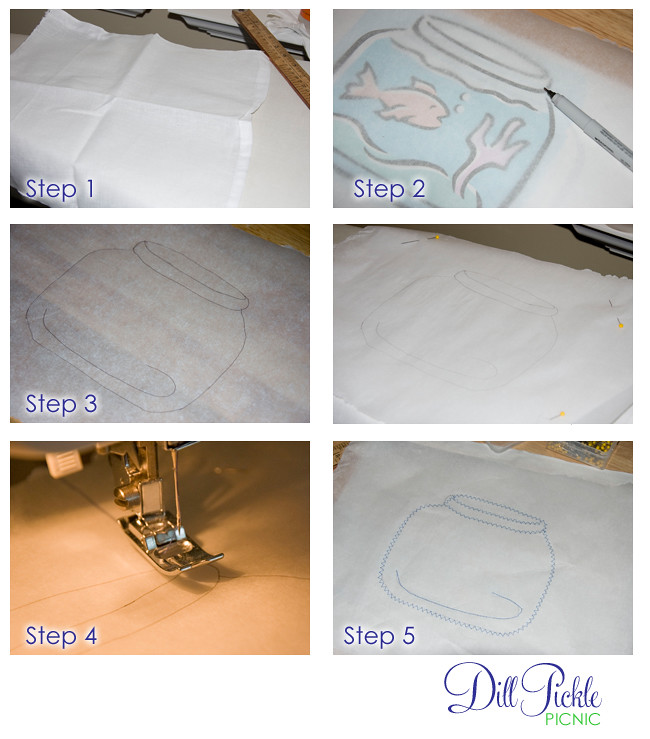
  1. Cut your material down to the correct size.  Measure the opening to your photo frame and add 1.5 inches to both the horizontal & vertical measurements.  You will use this later when attaching to the frame.
  2. Transfer your pattern to the freezer paper.  This can be accomplished in one of two ways.  I chose to simply print out my template and use a marker to trace it onto the freezer paper.  However, you could also run the freezer paper through an ink jet printer on the paper side.
  3. Remove your pattern and center your pattern in the middle of your piece of fabric, paper side up.  Using the iron with no steam, press your freezer paper to the fabric.  I was a bit unsure how it would hodl so I also pinned the corners for added “holding power”.
  4. Now using your sewing machine, simply sew over your template lines using your favorite stitch setting.  For my message board I chose to use a fun zigzag stitch.   You can see I got off my pattern a bit, but don’t worry…you can fix this later.
  5. Remove the fabric from your machine and carefully tear the freezer paper away.  This is where I had issues…major issues.   I ended up having to use the craft knife to carefully cut the paper away.  I don’t recommend this since it’s also easy to cut your stitching this way.

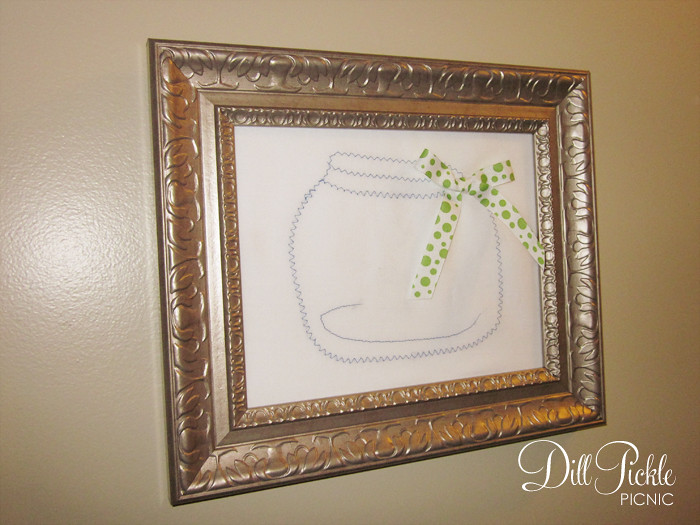
  1. Now is the perfect time to embellish your fishbowl a bit.  Remember by mistake, I decided to use some leftover wedding project ribbon to add a colorful bow to this fishbowl.  I just tied the bow, trimmed and singed the edges of the ribbon, and then stitched it to the fabric.  Press the fabric when you are finished to create a smooth surface for your message board.
  2. Now it’s time to cut your cork or Styrofoam.  The easiest method I found was to place your material on a cutting mat.   Take the glass you removed from the frame and place onto your foam.  Line up the outside edges so you have fewer cuts to make.
  3. Using an Xacto knife (and being careful not to cut yourself on the glass edge) cut around the edge of the glass pane.  Make sure your cuts are over your cutting mat.
  4. Time to put it all together.  Carefully center your fishbowl fabric over the cut piece of foam/cork.  You could easily use spray adhesive on the back of the fabric to help hold it in place while you complete the assembly.
  5. Take your foam/cork sandwich and insert into the opening of your frame, and fold edges to the center of the foam/cork.  I used clear packing tape to hold the edges down.
  6. Replace the back of the frame.  If it doesn’t sit completely flush, you could also use clear packing tape to hold the back securly to the frame.  This is necessary to keep everything all nice and wrinkle free.
  7. Hang and Enjoy

Everything used came from my stash, except the Flour Sack towel from the dollar store.

Total Cost:  $1.00 and up

Cute huh?  Oh…wait….where are the fish?  Don’t worry!  I have a post about fish coming up later!

So, overall I wasn’t impressed with my first experience using freezer paper.  Have any of you out there given it a try with better luck?  If so, please help me out…what did I miss?