Bring on the Doom!

The Crazy Crafty Wicked Cool Envelope of Doom that it!

Long ago (ok a few months ago), and in a land far away (hey, California is pretty far away from Georgia) the lovely Michelle L. won a Stash Busting give-a-way and created a blog.  There she created treasures from her winnings and posted them for all to see.  One day Michelle hatched a devious plan and decided to share with the world her “stash”. Using her leftover winnings and her own personal “stash”, the “Crazy Crafty Wicked Cool Envelope of Doom” give-a-way was born.  In her words, “I’m calling them ‘envelopes of doom’ because the items are going to be pretty eclectic. Okay, insanely diverse. And a few, possibly mind-bogglingly awful. It’s up to YOU to re-imagine and transform them into wicked coolness.”  The winners were to, “promise to make at least three interesting things from the contents, and post them online for us all to see.  Also, since this is kind of a “craft-it-forward” deal, I think your assignment should be to make things for other people – in other words, come up with three gift ideas, and tell us how you gave your creations away.”

Now, that sounds like a challenge I’m up for…and as luck would have it.  I was one of the winners!

After a bit of a technical glitch that put my envelope a bit late arriving, I opened my mailbox and was off to an immediate start, chanting “must catch up, must catch up”.  I ripped it open and spread out the contents quickly take stock of the monumental task ahead of me.  Honestly, I’m not sure what to think of some of this stuff.  There is some odd yarn-like stuff, a panel of hologram valentines, and an expired Starbucks card.
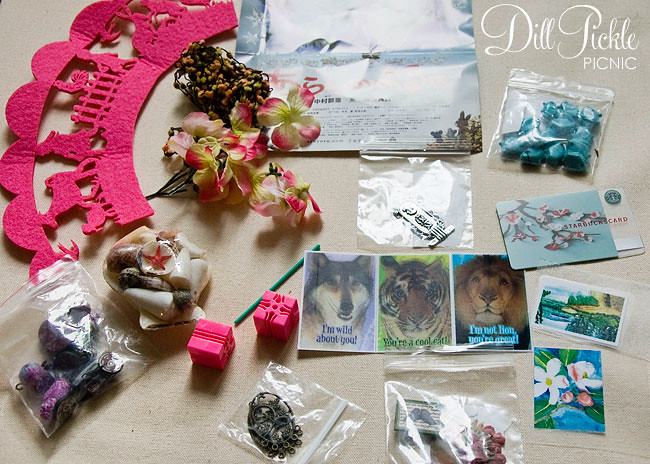
I put all that aside for a moment and focused on these odd-looking pink squares.   Interestingly enough they matched up exactly with the green pixie stick deal which makes me think they might be some sort of construction toys…. Wanna see?
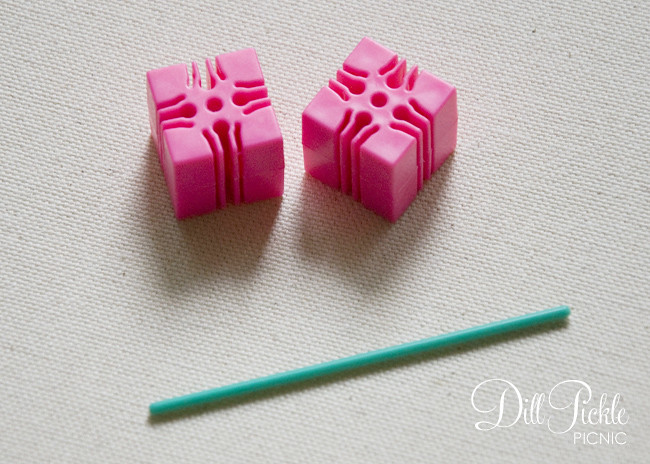
Oh, TOYS!  That’s it… I have a friend who collects Barbie & her assorted stuff…so I quickly assembled the 3 pieces together.  Do you see where I’m going with this?
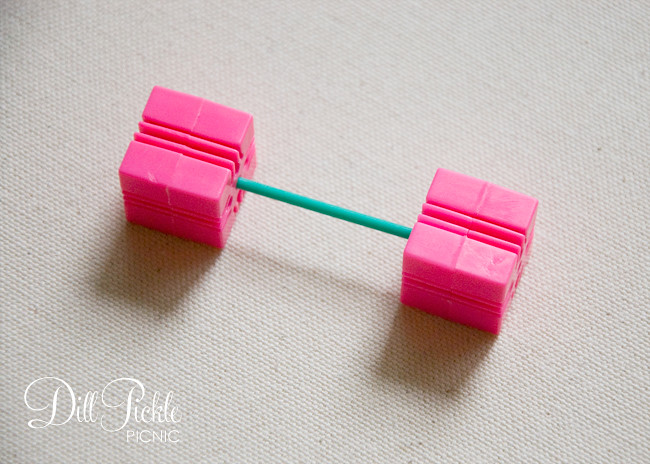
Yes, my first project was to create an action figure doll size set of weights.  I even gave it a try myself…
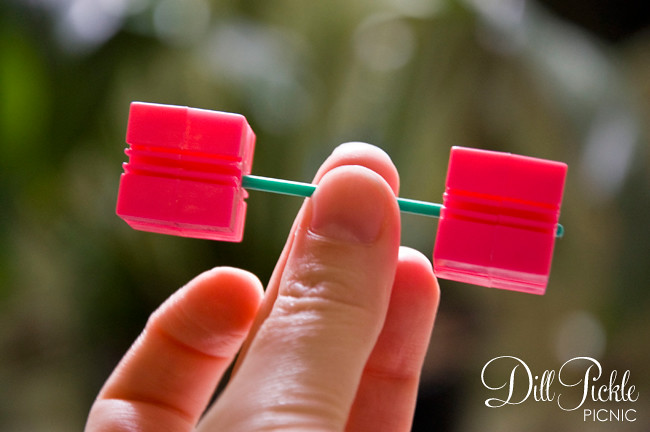

Now that’s my kind of workout!

Just kidding Michelle…I’ll be posting at least 2 of my projects from doom in the upcoming week.  Couldn’t resist kicking off this challenge with a bit of crafty humor!

If you want to see the other goodies these lovely crafters are coming up with, check out Michelle’s blog:  Mich L. in L.A.
Happy July

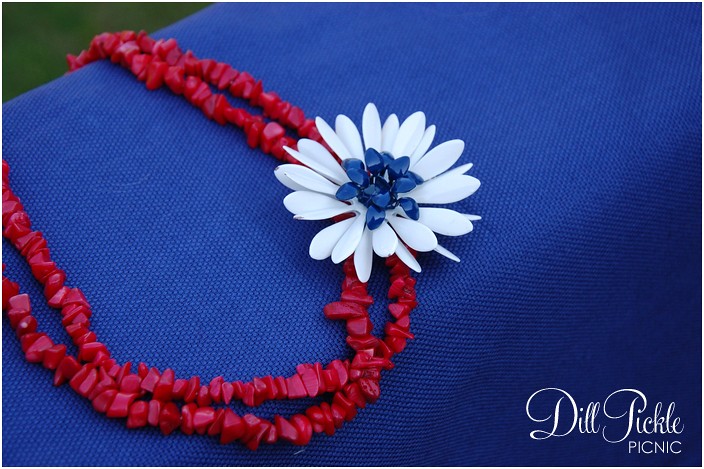
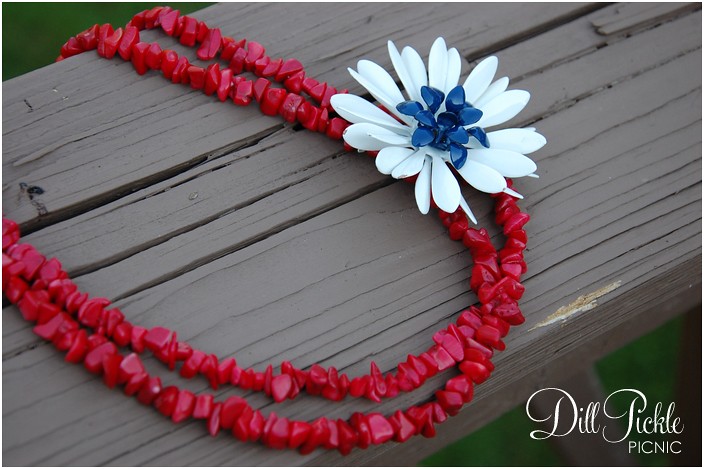
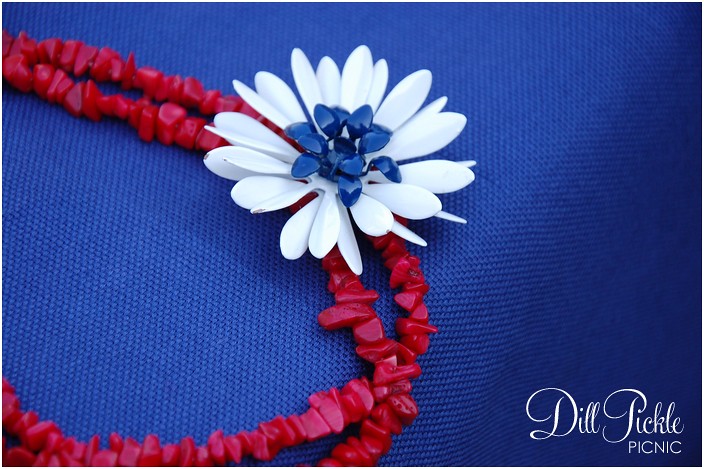
I missed getting this posted by the 4th, but I still wanted to show of the cute little trinket I whipped up to wear out for the 4th of July festivities.  Using some beads from my stash, and a fun thrift store find I was able to show my “colors” while snacking & watching fireworks with my hubby.  We’ve decided next year we might even throw a bash of our own 🙂


What about you guys?  What did you do over the holiday weekend?

Update: Craft it Forward

A while back I mentioned winning a unique sort of contest from Amy over at The Nifty Foodie’s Life.  Last week right before we left for a little anniversary trip, I found a fun surprise in my PO Box.  It was my Craft-it-Forward treat from Amy.  Check it out…

Aren’t these dishtowels just the snazziest ever?  I love the colors!
And, if the dishtowels weren’t enough…check out this adorable little baggie!

And while I had originally thought I’d have my own packages to my winners in the mail by our 1st Anniversary…it just didn’t happen.  Life happens, but here is a little sneak peek of some thrift store goodness that *might* be finding its way into a few of the Craft-It-Forward packages I’m putting together for you lucky ladies that are patiently waiting for me to get with the program.

I love finding entire bolts of fabric at the thrift store, especially when they are 50% off $4.64!

Sadly, it also seems that 2 of my winners never responded to emails… so if anyone else out there feels left out of the Craft-it-Forward movement shoot me a message.  I bet we can work something out 😉

Anyone else out there feeling a bit behind with all there summer projects this year?

DIY: Cute as Button Shirt

So, let the April Stash Bust posts resume (Yes, I realize it’s now May).  Mid-April I had the perfect weekend to get a few stash busting projects finished up since the hubby was at his dad’s to attend the first Indy Car Race in Alabama.  Racing just isn’t my thing so I opted to stay home and tackle our weed filled flower beds instead.  So, Saturday after spending the majority of the day working in the yard and finding out my credit card number had been stolen, I retired to my little craft room to see what I could whip up.

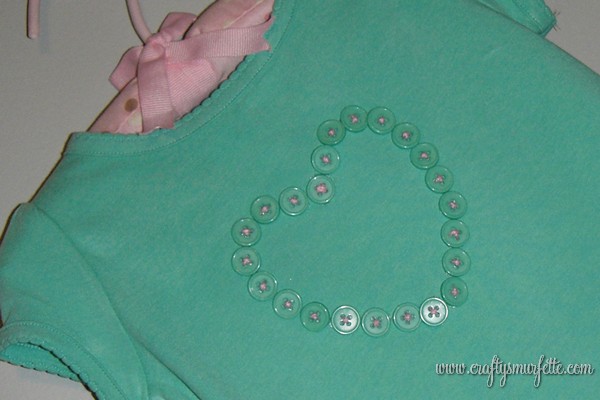
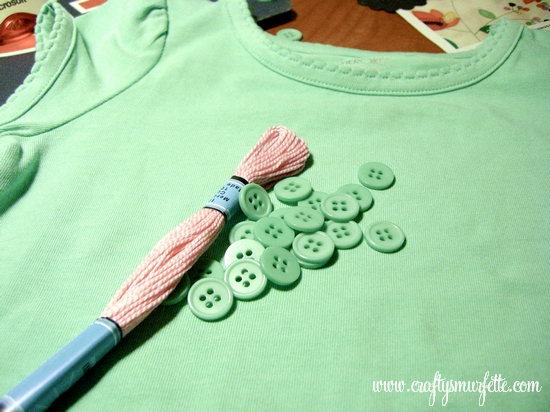
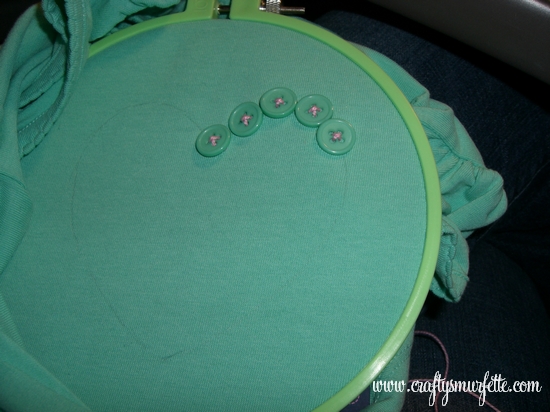
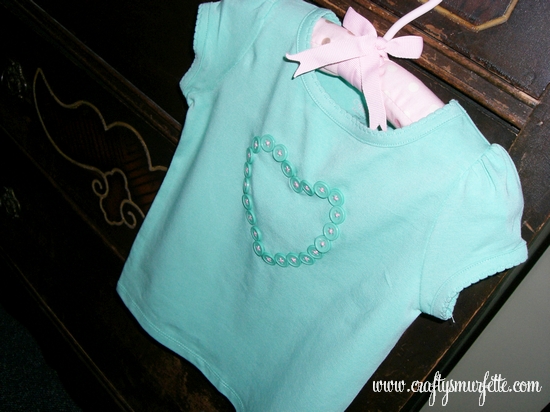
I had originally purchased this aqua t-shirt with the intentions of making my niece a bunny shirt for Easter.  Since that didn’t happen, I decided I needed to do something quick with the shirt so I could include it in a package I was planning to mail my sister that day.  So I started digging around in a couple of the plastic bins of craft supplies I have stashed in a closet and came up with some leftover buttons from a wedding project and a massive stack of embroidery floss.  Put all that together…and you get this Cute as a Button Heart Shirt.

It was super fast to make and turned out much better than I’d imagined.  I like that it looks like a more expensive boutique shirt, yet cost me right around $5.99 to make.

To make your own version you’ll need the following:

  • T-Shirt
  • Buttons (I used (25) 1 cm buttons for this project)
  • embroidery floss
  • needle
  • pencil to draw outline
  • heart shaped template (optional)
  • embroidery hoop (optional)
  • hot glue/fabric glue (optional)

Instructions:

  1. Press the shirt flat
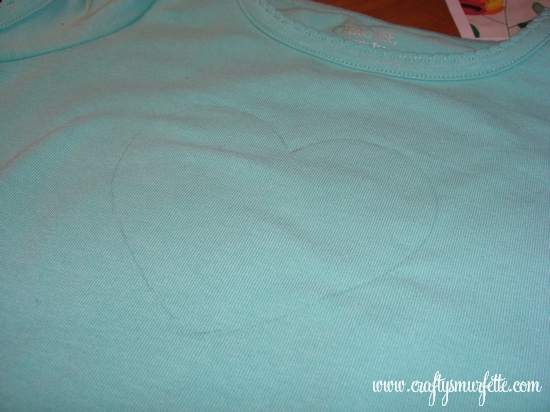
  2. Create Heart template and copy outline to shirt.  I used a regular pencil but a tracing pencil that washes away would have worked better if I’d had one.
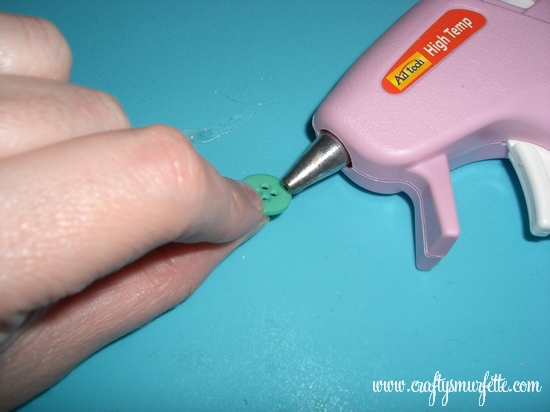
  3. If you want to add a little bit of extra attachment of the buttons to the shirt, take a moment to glue the edges of the buttons to the shirt.  Take care not to glue the centers so you can stitch them down in the next step.
  4. Thread your needle with embroidery thread and tie off with a sturdy knot.
  5. Start in the center of the heart and stitch your buttons to the shirt with moving around the heart.  This is where an embroidery hoop might make the process much easier.
  6. And after about an hour….1 cute as a button heart shirt :

Oh…so about those cute pink shorts.  I have to admit I bought those Saturday on a trip to Target during April.  I know…I wasn’t supposed to be adding to the stash before I finish busting through it but if it was less than $1 does it count?  My local store had all their Easter goodies marked 75% off, but a nice lady watching me pick up a bag of Dove eggs told me it was actually ringing up 90% off.  Which included all their children’s Easter themed clothing.  So the shorts cost me a whopping $0.43 (including tax) and then I sewed a matching button in the middle of each of those cute little bows on the sides just to tie it all together.

Project Costs:
– TShirt –  from stash – otherwise Target – $5.00
– Buttons – free from stash – otherwise $1.99 for package, using 1/4 of package
– Embroidery Floss – free from stash – otherwise $0.99
GRAND TOTAL:  $7.98 if you needed to buy everything at once.
My Grand Total:  FREE from STASH (ok…$0.43 for the Easter Clearance shorts)

_________________________________________________________________________

Safety Note:   Make sure all buttons are glued and then sewn on securely.  Due to buttons, do not leave your baby unattended while wearing this garment.
_________________________________________________________________________

DIY: Flower Arranging Simplified

I learned this trick from one of my high school friend’s mom years ago.  She is the quintessential southern mom and entertainer, so each time I have the opportunity to attend a shower,tea, or coffee that she is coordinating I make sure to take notes.  Want to see why….

This was from the Wedding Coffee they threw in my honor last Spring.  She just whips this up in a matter of moments.  It’s pretty amazing to watch!

I’m horrible at arranging live flowers.  It’s like I try to cram everything in the same place and end up with one side really over-weighing the other one…but using this little trick it’s a breeze to make sure you have things evenly placed.  It makes me *almost* look like I know what I’m doing….

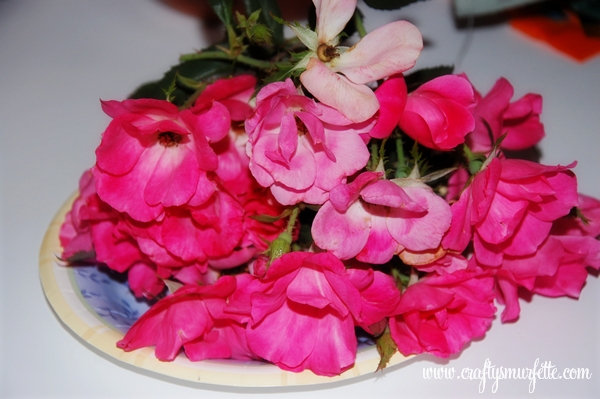
Ignore the flowers in these photos, I used some leftover flowers my hubby gave me to get a bit more life out of them before they went into the trash and mixed in some of the knock-out roses & greenery from right outside our front door.

Supplies Needed:

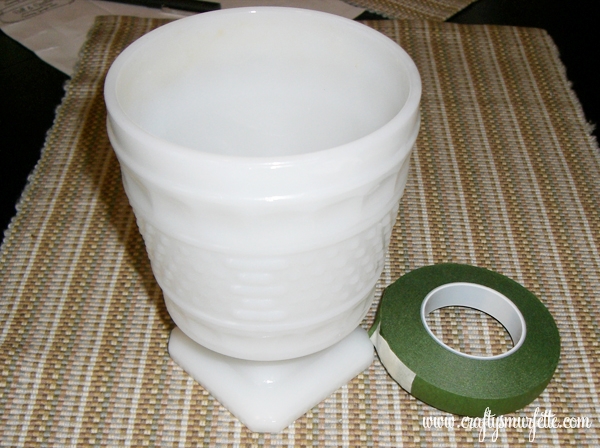
  • Container to use for arrangement.
  • Floral Tape (or other waterproof tape)
  • Flowers & Greenery for arrangement
  • Snips or Scissors

Instructions:

  1. Take out your container and place it on a solid surface.  I like to use our milk glass leftover from the wedding, but a simple glass square from Dollar Tree would also work great.  Try to choose something with a wider opening so you can build your arrangement out with a bit more space.
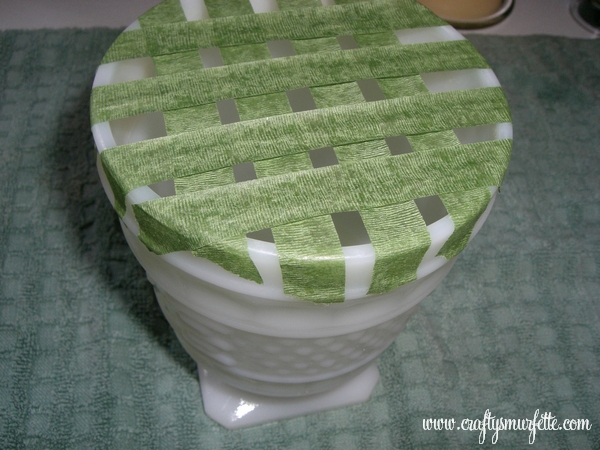
  2. Use scissors to cut strips of your floral tape that stretch the width of your container opening.  If floral tape is wider you might need to snip it in half width wise for ease of arrangement.
  3. Starting at one edge of the opening carefully place tape strips across the mouth of the container making sure to evenly space them apart all the way to the other side of the container.
  4. Turn the container and repeat this process going the other direction to create yourself a grid of sorts.
  5. Trim the stems of your flowers to be the depth of your container.  Make sure to leave a couple that are a bit longer to use in the middle.
  6. Starting in the center, using slightly longer stemmed flowers, carefully insert one flower stem into one open square of your tape grid.
  7. Carefully add flowers to the grid working from the center to each edge to help create a rounded type of arrangement.
  8. Once finished with your flowers, feel free to go back and insert bits of greenery into the arrangement to fill it out a bit more.
  9. Display!

What about you, have you picked up any entertaining tips from your friend’s parents in your younger years that stuck with you?  If so, by all means share…

PS.  I just realized this was my 100th post!!  🙂

DIY: Mother’s Day Napkin Wraps II

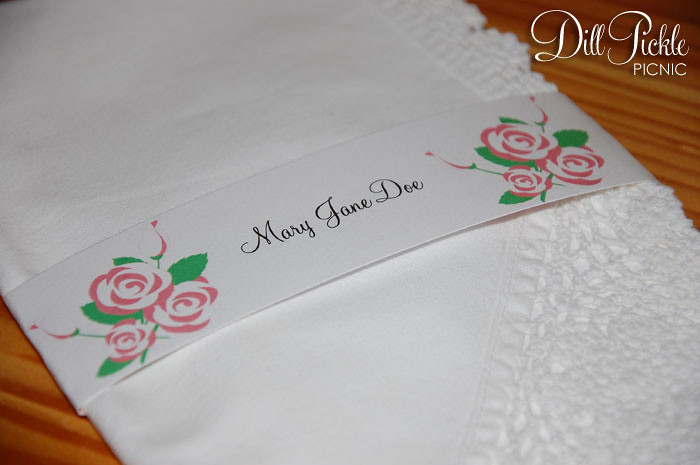
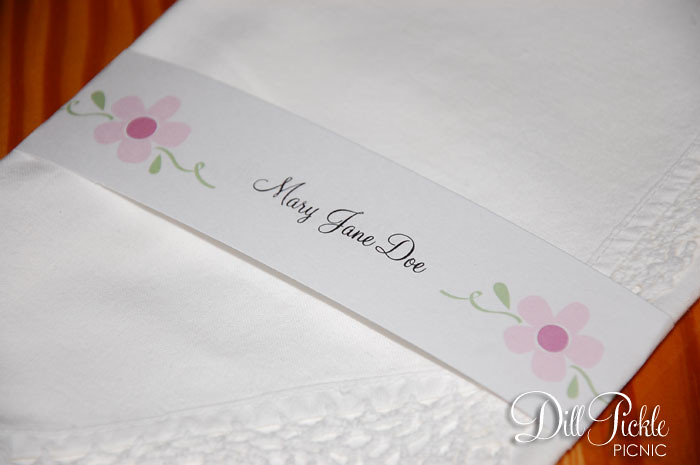
I can’t believe in my haste to finish up all my April Stash Busting projects (which I will begin to post this weekend) I almost forgot to post the second round of Mother’s Day Napkin Wraps!  Hope you enjoy Part II which we’ll call the “Mother’s Day Floral Set”


Click to Download: Pink Roses Napkin Wrap


Click to Download: Pink Daisy Napkin Wrap

All templates use the Monterey BT font which is free to download from Sofontes.  New to Napkin Wraps?  No worries, visit this post for step-by-step instructions on how to use my napkin wrap templates!What do you have planned for the mothers in your life to celebrate Mother’s Day this year?

ReUse: TP Roll Candy Bunting

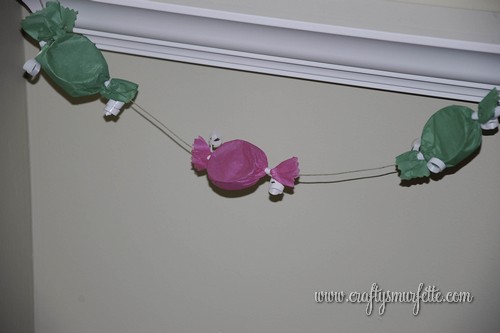
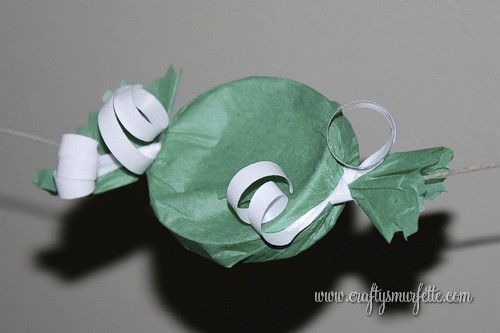
In honor of Earth Day & my April Stash Bust endeavors I decided to try my luck at reusing several TP(toilet paper) rolls because I’m not sure about your household but we seem to have an abundance of empty cardboard rolls.  I’m really loving bunting right now, so I set out to make some sweet candy bunting from my trash & stash…and this is what I ended up with:


What do you think?  I’m thinking it’s quite cute…and so easy to make that you could even have you kids help you with this project.  It could be fun for a child’s birthday party or even dressed up a bit more to hang behind a candy buffet.

Supplies Needed:

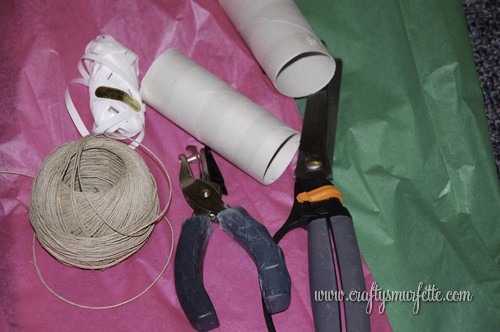
  • Toilet or Paper Towel cardboard rolls (1 TP roll averages 9 pieces of candy, or 4 feet)
  • Tissue Paper (you could also use fabric)
  • Curling Ribbon
  • Twine (Ribbon or Yarn would also work)
  • Hole Punch
  • Rickrack Scissors
  • Craft Knife or Scissors
  • Double-Sided Tape (optional)

Instructions:

  1. Using your craft knife or scissors carefully cut your cardboard rolls into 1/2 inch pieces.  (If you are doing this project with small children this is a step an adult should complete ahead of time.)
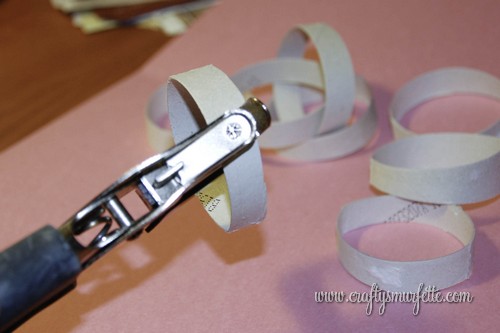
  2. Using a standard hand-held hole punch punch two holes across the tube from each other.  Repeat this process for each of your 1/2 inch pieces.
  3. Cut bunting twine to your desired finished length.
  4. Cut your tissue paper (or fabric) into 5 inch square pieces using pinking sheers. (If doing this project with children this is another step that could be completed by an adult ahead of time.)
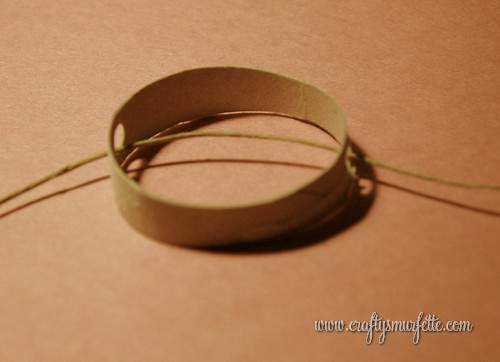
  5. Carefully thread one piece of cardboard onto the twine. (hint: To make this easier I actually taped one end of the twine to my table.  This helped keep one end stationary while I was threading from the opposite end.)
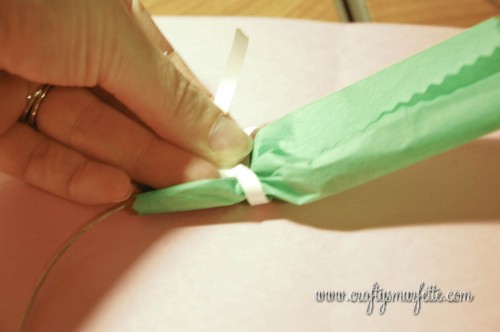
  6. Take a piece of tissue paper and place it under your threaded circle and fold it over to overlap in the front.  (hint:  You might find using a small piece of double-sided tape helpful to hold everything in place, but it isn’t necessary.)
  7. Using 4 inch pieces of curling ribbon, tie off each side of your “candy” with a hard knot.
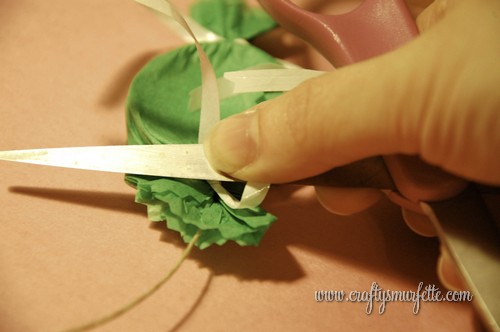
  8. Using scissors curl the ribbons to make a decorative tie.  (If you are doing this project with small children this is a step an adult should complete once the stringing process is completed.)
  9. Repeat the length of your twine.
  10. You can move the pieces slightly along the finished product to help evenly space them.
  11. Hang and Enjoy!


See…quick, easy, and a fun way to turn a common household trash item into something fun & decorative!

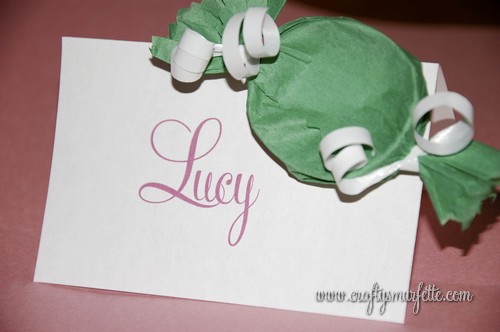
And if you have extra “pieces of candy” left over you could always glue them to place cards or signage for a sweet look.

Price Breakdown: Free from my trash & craft stash!
However, if you wanted to create these with no supplies on hand you could do so entirely from your local dollar store!

What crafty fun will you reuse trash & stash items for this week?


DIY: Folding Napkins into a Pocket

This post should kick off the beginning of our wedding DIY recaps. One of the projects I took on for our wedding was dressing up the table just a bit.  It seems that all too often with buffet dinners the tables can get “left out” of the decorating grand plan since it’s not really “necessary”.  I didn’t want to just go with rolled silverware/napkins to be picked up from the food line. Instead I wanted something a bit more formal, yet still in line with our not-so-shabby chic surroundings.  By setting each place setting with the silverware and folded napkin with menu, I think it gave our tables a bit more color and pop…even if my husband did call me crazy for obsessing over it! 😉


Since I’ve already posted our menu template that was created to fit inside a folded napkin, and the paper napkin wraps we used for seating cards, today we’ll go over how to easily fold your napkins into the pocket shape.  I know there are quite a few different methods out there, so I used bits and pieces and ended up with this one working best for me.

Items Needed:

  • Napkins (the ones we used for our wedding were purchased from Ikea)
  • Iron & Ironing Board
  • Something fun to put in the pocket 🙂

Instructions:

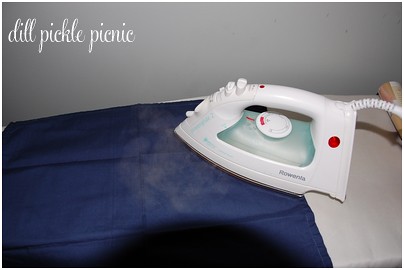
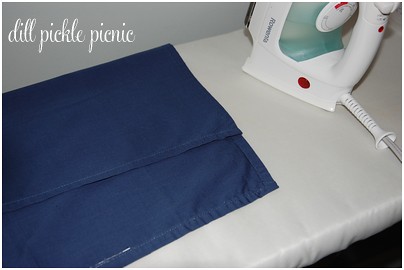
  1. For best display iron napkins flat before starting folding process.
  2. Place napkin front (or finished) side down
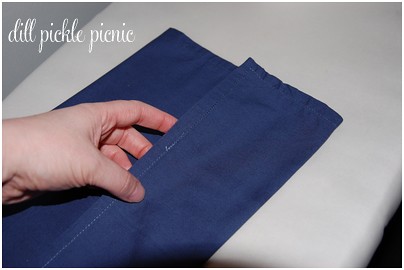
  3. Carefully fold the top horizontal edge (the one farthest away from you) down about 3/4 the length of the napkin.  Iron top portion of napkin for crisp edge.
  4. Fold the bottom horizontal edge up and over the previous fold.  This will create your pocket and again iron to create crisp fold.  (Hint:  This set controls the depth of the pocket, so simply adjust your fold size for larger/smaller pocket).
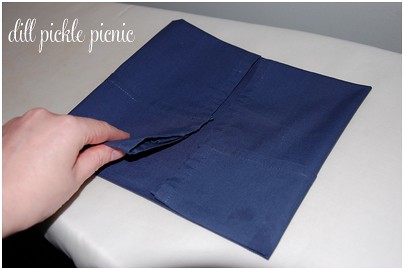
  5. Now, flip the whole napkin over so that the pocket it now face down on your ironing board.
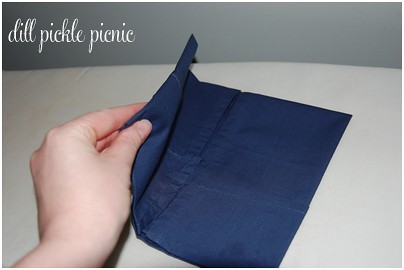
  6. Fold each vertical side of the napkin into the middle so that they meet flush and form a square.  Once again press for crisper look.
  7. Finally fold the left side over on-top of the right side and press one final time.
  8. Add menu, favor, or other fun item into the pocket and set your table.

Afterthoughts:

This is where I’ll be honest and forewarn you that ironing and folding 100’s of napkins will take a WHILE.  I did the first 50 by myself over several nights and it seemed to be taking forever to fold, add the menus, & the name card wraps.  Then with the help of two wonderful friends was able to finish the second 50 in a few hours in an assembly line fashion.  If you are doing this for a larger event I HIGHLY recommend the assembly line approach skipping the middle ironing steps and only iron at the beginning to make sure the napkin is flat to start with.  All in all…I’m still really happy with how everything turned out.

If you are following along with our DIY wedding table scape so far we’ve (click for details):

DIY: Mother’s Day Napkin Wraps

I am trying to get a slight bit ahead with posting holiday napkin wraps…my mom would be so please! Speaking of Moms here are a few napkin wraps inspired by the mom’s in my life.  Hope you enjoy Part I which we’ll call the “Mother’s Day Tea Set”

Let’s kick this off with a simple pink background.  This would be great for a Mother’s Day Brunch, Tea Party with the girls, or even a pink wedding.


Click to Download: Pink Background Napkin Wrap Template

And a simple tea kettle that looks fun printed on colored cardstock:


Click to Download: Tea Kettle Napkin Wrap Template

A finally, a pretty china tea-cup!

Click to Download: China Tea Cup Napkin Wrap Template

All templates use the Monterey BT font which is free to download from Sofontes (see link on templates page).  New to Napkin Wraps?  No worries, visit this post for step-by-step instructions on how to use my napkin wrap templates!

What do you have planned for the mothers in your life to celebrate Mother’s Day this year?

ReUse: Security Envelope Bunting

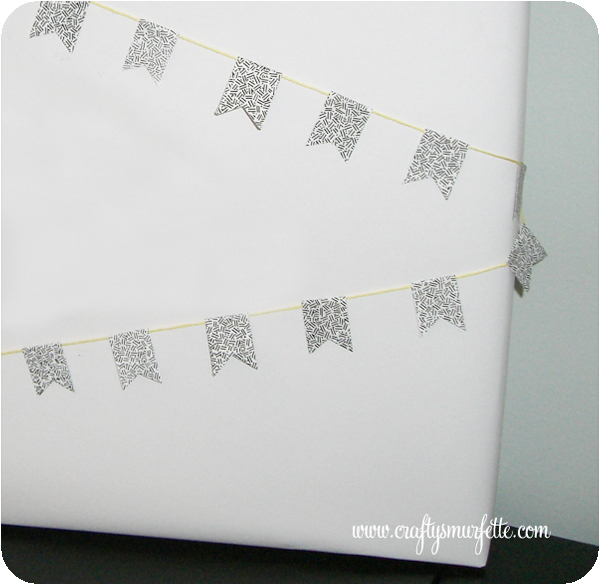
I’ve been saving envelopes with cool security patterns since I saw a cute cake bunting from the ever wonderful Martha made from her papers that mimic the same patterns.  So, what better time than during April’s Stash Bust to finally put those envelopes to use. Now after making a couple I think this would be an easily portable craft project to work on while I’m traveling for work and stuck in hotel rooms!

The possibilities of how to use these are endless!  You can use them to decorate a cake, create a pretty package wrapping, I’ve seen them attached to fronts of greeting cards, craft show displays… and of course you could use any type of paper to make the flags. 
How will you use your bunting?

OK, let’s get started!  This is a super simple project, but I’ll admit it is a bit more time consuming than I thought.  To help speed up the process I’ll include several hints in the instructions below.

Supplies Needed:

  • Security envelopes (for this project I used 2 envelopes from my power bill)
  • Toilet Paper Roll
  • Baker’s Twine or Embroidery Thread (5 ft)
  • Double Sided Tape, Xyron, or Glue Stick

Tools Needed:

  • Ruler
  • Scissors
  • Bone Folder or Envelope Opener (optional)
  • Paper Cutter (optional)

Instructions (written directions follow pictorial):

  1. Carefully take apart your envelopes exposing the inner security lining.  To do this I use my bone folder and carefully slide it between the seams to open them up.  You could also use an envelope opener or just pull them apart as well.
  2. Use your paper-cutter (or scissors) to square up the pieces, and remove the edges and window panes  (hint:  I’m putting those window panes off the side for another idea I have swimming around in my noggin).
  3. Now, using either your cutter (hint: it’s quicker and easier to get consistent sized pieces using a paper-cutter with built-in ruler) cut your envelope into 3/4 inch strips.
  4. Stack those strips up together and use your cutter to cut those into 2 inch pieces.
  5. Measure & cut a 5 foot piece of either embroidery thread or bakers twine  (hint: if you use embroidery thread use a piece of tape or glue to seal off both ends to keep it from separating as you add your flags).
  6. You will start assembling your bunting by placing the first flag 6 inches from one end of your twine and stop 6 inches from the other end to allow you room to tie up your bunting.
  7. Apply your choice of adhesive to your first flag and carefully fold it over the twine sealing the edges together.  For this example I used double-sided tape that ran half the length of the flag.  You could also use a glue stick but it will be a bit messier.  (hint:  if you have a Xyron machine you can run all your pieces through at once and then just peel them off and fold over the twine.  It made the process MUCH quicker).
  8. Continue this process by adding a new flag every 1.25 inches.  You can always tape a ruler to your desk to make it easier to decide where to place the next flag, but after the first few I went with the just eyeball it method.
  9. Once you have all your flags in place it’s time to snip the decorative edge.  For this process I just pulled up a podcast I wanted to listen to and used scissors to make a “V” snip on each edge.  (hint:  if you want consistent edges you could also use scrapbook scissors or even a triangle shaped paper punch)
  10. Hang it up and enjoy!

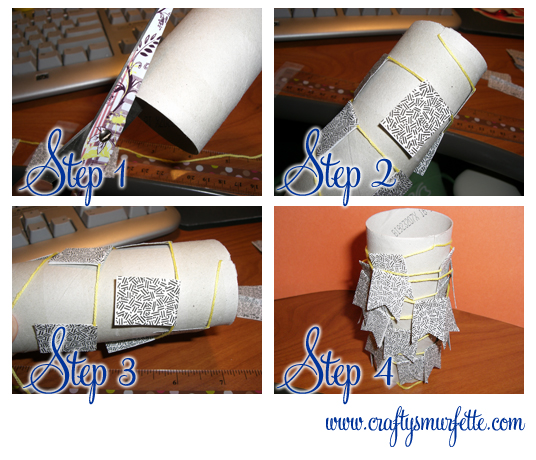
Wait…but how do I keep it from getting all tangled up until I’m ready to use it.
It’s simple:  a toilet paper roll

  1. Just take a toilet paper roll and cut a small slit in the top edge.
  2. Take one end of the bunting and slide it into the slit.
  3. Carefully roll your bunting around the tube and once at the other end tuck it inside the slit as well.
  4. There you go…all rolled up and ready to use!

So, let’s recap:  4 feet of cute bunting completely from my stash & trash!

Cost Breakdown:
– Paper for Flags – Free from recycling the envelopes from pesky utility bills
– Twine or Thread – Free from my stash (or $.99 new from JoAnn’s, will make 2)
– Glue/Tape – Free from stash (or $2.99 from Target, will make 25)
– Toilet Paper Rolls – Free from recycling
GRAND TOTAL: FREE from Stash or $0.60 per bunting

PS.  I’ve decided to list a few of my “crafty projects” in the etsy store over the next few weeks, it’s kinda sad how long it’s sat empty!